How AI is Shaping Backgrounds in Fashion Photography
Learn how to add a background in Photoshop with our guide for fashion brands. Discover modern techniques to create stunning, professional product photos.
When fashion brand Reformation tests a new summer dress, they no longer need a week-long photoshoot in Italy. Instead, they can drop a studio photo into multiple AI-generated backdrops — from a bustling market to a serene beach — to see which performs best in social media ads, cutting content production costs by up to 40%, according to a McKinsey report.
This shift from manual editing to instant creation is reshaping fashion e-commerce. Knowing how to add a background in Photoshop is still a valuable skill, but the real advantage now comes from speed and scalability.
Platforms like Picjam automate this entire workflow, allowing brands to generate entire virtual photoshoots, complete with models and custom scenes, in minutes.
This guide breaks down the essential Photoshop techniques while highlighting how AI is elevating the process for forward-thinking brands.
Why Quality Backgrounds Drive More Sales for Fashion Brands
A high-quality background does more than fill empty space. It builds a narrative, communicates brand identity, and creates an emotional connection that drives conversions.
Take a brand like Allbirds. Placing their sustainable wool runners against a clean, minimalist backdrop reinforces their eco-conscious, modern vibe.
Swap that for a rugged, natural landscape, and you tell a different story — one about adventure and durability. This flexibility is a massive advantage.
How AI-Driven Backgrounds Cut Content Costs
The ability to test dozens of visual concepts for a new collection without a single reshoot is a financial game-changer for brands.
That one product photo can be repurposed for different seasons, holidays, or marketing channels just by switching up the background.
This drastically cuts down the need for expensive, complicated photoshoots and empowers creative teams to be more agile.
For platforms like Amazon, where your product sits next to hundreds of competitors, a lifestyle image with a compelling background can significantly improve click-through rates.
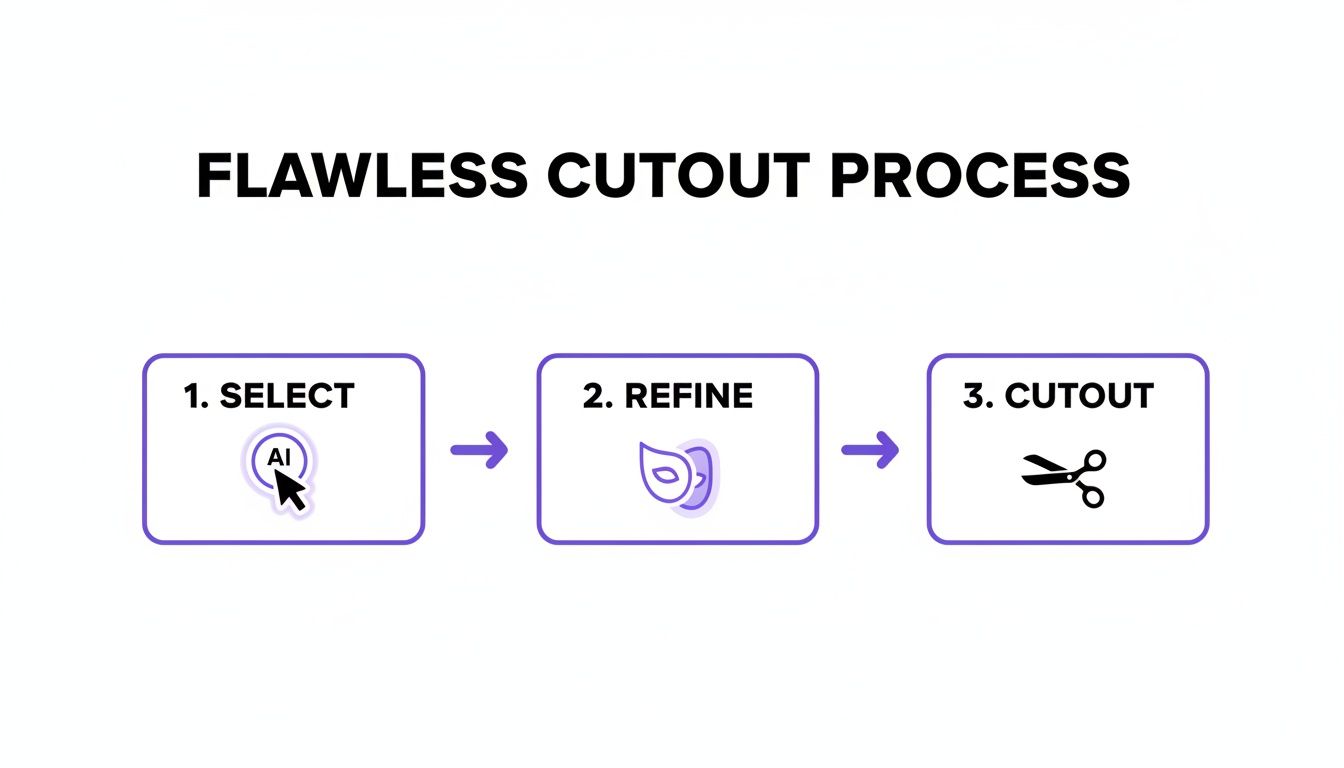
How to Master Selections for a Flawless Cutout
The foundation of any great background swap is a perfect selection. Getting this right is the difference between a professional image and an amateur one.
Thankfully, what once required painstaking manual work with the Pen Tool has been dramatically simplified by Photoshop's intelligent features.
For fashion brands, isolating a product or model with absolute precision is crucial. Fine details like stray hairs or sheer fabrics can make or break an image's credibility.
How AI Selection Tools Save Hours for Brands like Allbirds
Adobe Photoshop’s AI-powered tools, like Select Subject and the Object Selection Tool, do the heavy lifting. With a single click, these features analyze your image and identify the main subject in seconds.
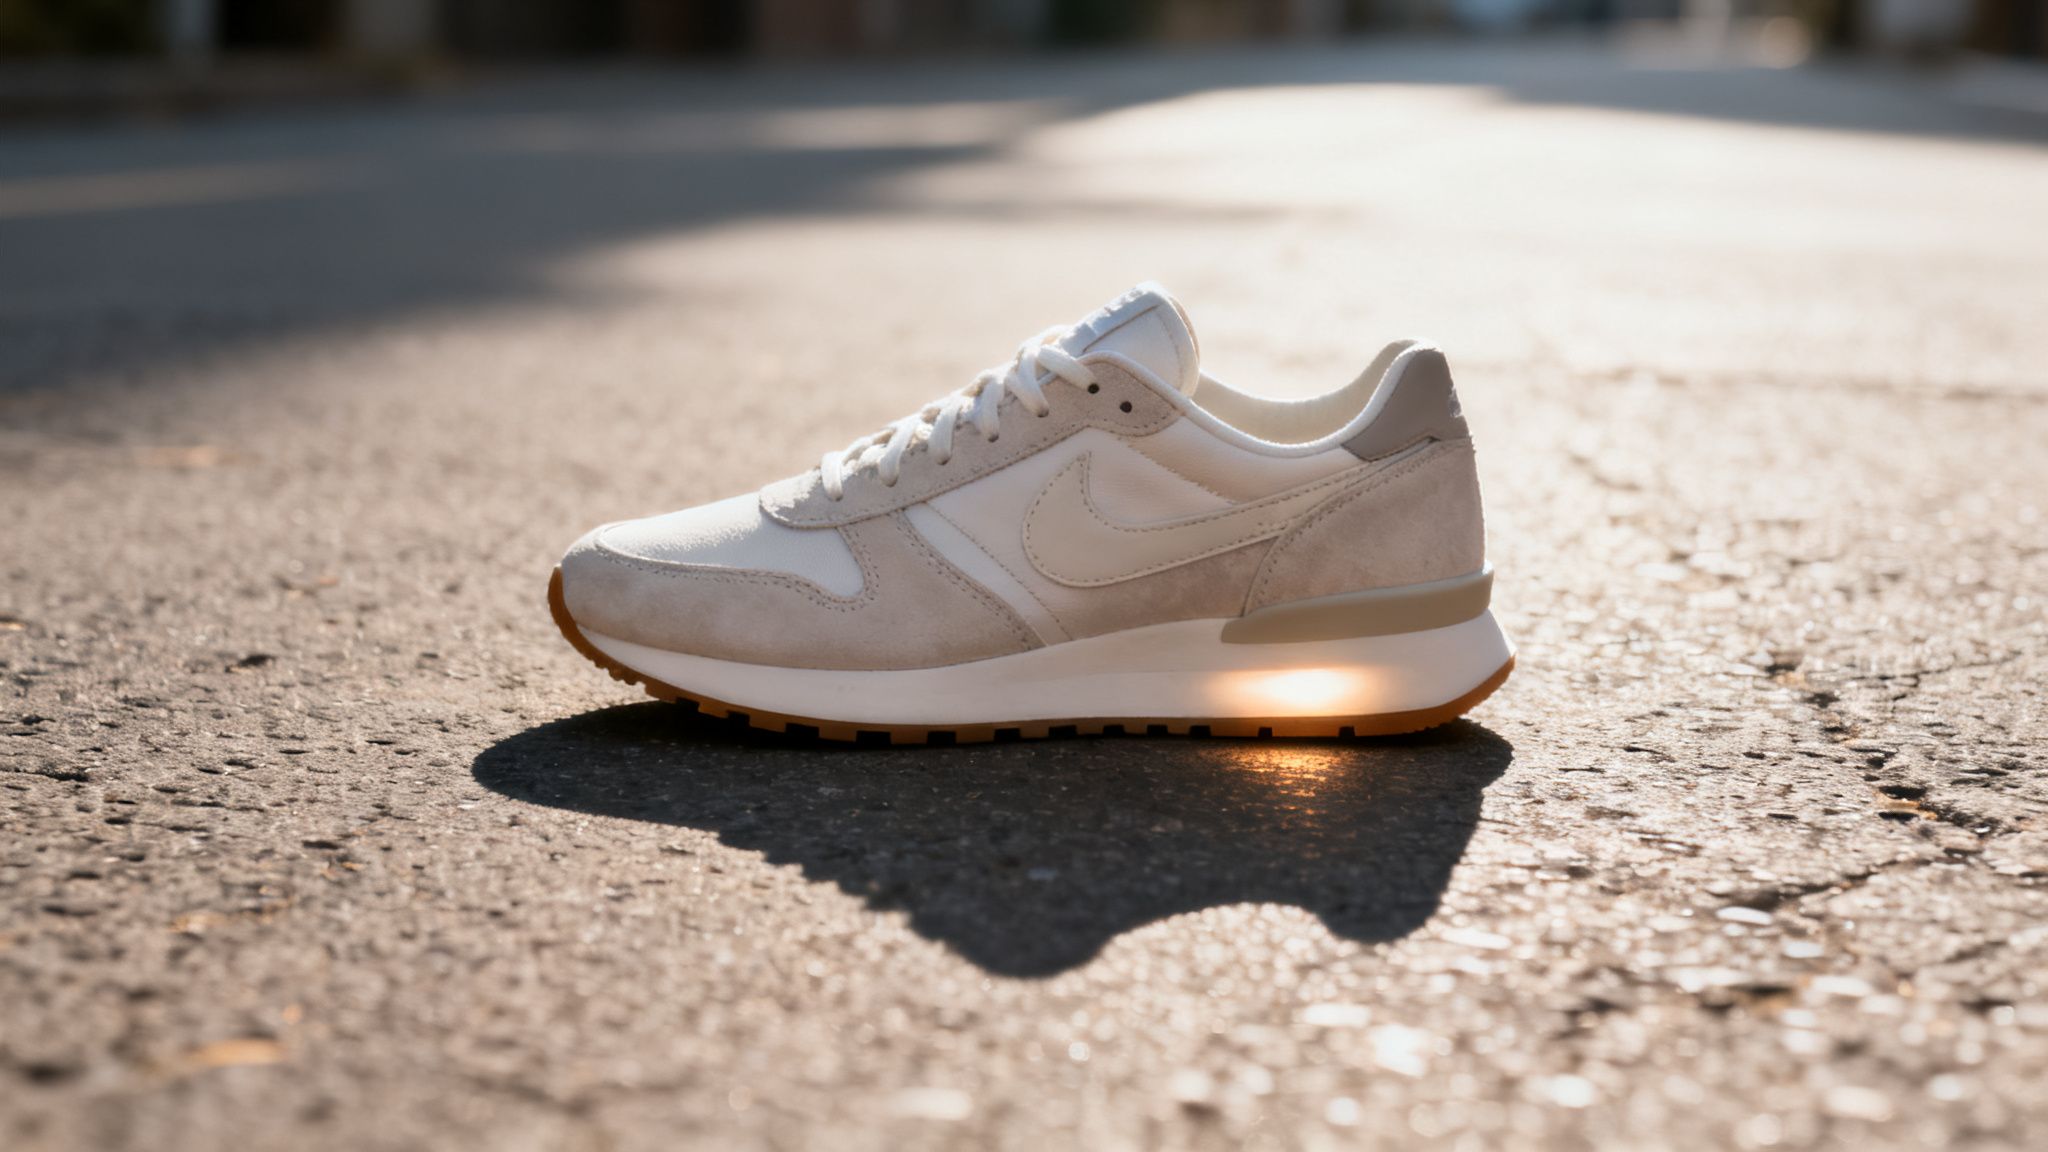
For a footwear brand like Allbirds, preserving the unique, fuzzy texture of their wool runners is key.
Using the Object Selection Tool, a designer can draw a loose box around the shoe, and Photoshop’s AI intelligently snaps the selection to its edges.
This initial selection is a strong base, but the real magic happens during refinement in the Select and Mask workspace.
Refining Your Selection for Professional Results
The Select and Mask workspace offers a suite of tools to perfect every edge. Here’s how fashion brands can tackle common challenges:
- Wisps of Hair: The Refine Edge Brush is essential for model photography. Painting over the edges of the hair lets Photoshop intelligently distinguish between the hair and the background.
- Sheer Fabrics: For materials like tulle or lace, use the Refine Edge Brush with a smaller size to gently paint over semi-transparent areas, retaining the fabric's delicate quality.
- Intricate Patterns: Zoom in and use the Quick Selection Tool to add or subtract small areas the initial AI selection may have missed.
Adobe's one-tap Remove Background feature, detailed on Adobe’s blog, automated this for fashion e-tailers. Mastering selections is foundational to many editing tasks, including learning how to remove a white background from an image.
How to Add Your New Background with Photoshop’s AI
Once your product is perfectly cut out, it’s time to add the new background. This is where you shift from technical cleanup to creative execution.
The traditional method is a simple layer drag-and-drop. You place your desired background image on a new layer underneath your product. It’s a reliable workflow when you already have a stock photo ready.
How Generative Fill Creates Unique Campaign Scenes
For something totally unique, Photoshop’s Generative Fill is a game-changer. This AI feature lets you create a background from scratch with just a text prompt.
Imagine a brand like Reformation testing campaign concepts for a new floral dress.
Instead of booking a pricey photoshoot in Paris, the team could use Generative Fill with prompts like ‘a quiet cobblestone street in Le Marais at sunrise.’
In minutes, they’d have multiple concepts to review — a process that used to take weeks and a massive budget.
The Generative Fill Workflow
Getting started with this AI method is surprisingly straightforward. It allows brands to create visuals that tap into current trends without logistical delays. Here’s how it works:
- Isolate Your Subject: Get your product onto its own layer with a transparent background.
- Select the Empty Space: Invert your selection (Select > Inverse) so everything except your subject is active.
- Write Your Prompt: Click the "Generative Fill" button and describe the scene you want. Be specific for better results.
- Generate and Refine: Photoshop provides 3 variations. Click "Generate" again for more options until you find the perfect one.
When Adobe rolled out Generative Fill in 2023, it was a major shift. The savings are clear: minimizing photoshoots frees up budget for marketing and product development.
How to Create Realism by Matching Lighting and Shadows
You’ve swapped the background. Now, you must make the product look like it actually belongs there. This is what separates a professional e-commerce shot from an obvious cut-and-paste job.
A product that looks like it’s floating on a background can kill credibility instantly.
To achieve this, you need to match the color and light of the new scene, then recreate believable shadows.
How to Align Color and Light with Match Color
Every photo has a unique color profile. A sunny beach scene will have warm, yellow tones. A modern office? Cool, bluish light.
Photoshop has a brilliant tool for this called Match Color (Image > Adjustments > Match Color). It analyzes the color data from your new background and applies that same feel to your product layer.
To use it, click on your product layer, open the Match Color dialog, and in the "Source" dropdown, pick your background image.
Instantly, Photoshop adjusts the color balance. This detail is why brands like Nike excel at integrating products into dynamic, aspirational settings.
How to Recreate Shadows to Ground Your Product
Shadows give an object weight and connect it to its environment. Without them, your product will look like it's hovering.
There are 2 types of shadows to create:
- Contact Shadows: Small, dark shadows right where the product touches a surface. They are essential for grounding.
- Cast Shadows: Larger, softer shadows the product throws, indicating the main light source.
To create a contact shadow, add a new layer below your product. Use a soft, black brush with low opacity (10–15%) and gently paint where the product meets the ground.
For cast shadows, duplicate your product layer, fill it with black, and use the Transform tool to position it like a shadow. Lower the layer’s opacity and add a Gaussian Blur to soften it.
Learning how to get rid of a shadow in a picture offers more tricks. Mastering light and shadow ensures every image you create helps sell your product.
How AI-Generated Content is Shaping Fashion's Future
Manual Photoshop edits are powerful, but the trend is shifting toward instant, AI-driven creation. The question is moving beyond how to add a background in Photoshop to how to generate entire visual concepts on the fly.
Photoshop's Neural Filters offer a glimpse into this future. Tools like the 'Background Creator' let brands generate unique backdrops from text prompts, bypassing stock photo libraries.
A fast-fashion leader like Zara can use this to create on-trend marketing visuals almost as fast as new designs hit their stores.
How Full-Stack Generation Slashes Photoshoot Costs
This evolution is where platforms like Picjam come in. While Photoshop generates a background, Picjam generates the entire scene — the AI model, styling, lighting, and background — in a single click.
A traditional photoshoot for just 10 outfits could easily cost $5,000–$10,000, including the model, photographer, studio, and retouching.
In contrast, generating 10 unique, on-brand scenes with AI can be done for a fraction of that cost and in minutes, not weeks.
This isn't about replacing creativity; it's about augmenting it. AI handles repetitive tasks, freeing up marketers to focus on high-level strategy.
Shaping the Brands of the Future
This approach democratizes high-quality visuals, allowing smaller brands to compete with the production value of established giants. As AI content evolves, it's important to learn how to critically evaluate digital information.
The ability to generate entire scenes unlocks new possibilities for personalization and A/B testing.
Brands that can create high-quality, on-brand visuals quickly and affordably will have a massive competitive edge. For a deeper dive, check out our guide on AI product photography.
Takeaway
- Master AI Selections to Save Time: Use Photoshop’s Select Subject and Object Selection tools to create a precise cutout in seconds. Refine the edges using the Select and Mask workspace for a professional finish.
- Use Generative Fill for Creative Agility: Instead of searching for stock photos, use Generative Fill to create custom backgrounds from text prompts. This allows brands like Reformation to test dozens of campaign concepts without costly photoshoots.
- Ground Your Product with Realistic Shadows: A convincing composite depends on matching light and shadow. Use the Match Color tool to align color tones and manually create contact and cast shadows to make your product look like it truly belongs in the new scene.
Curious how much you could save by switching from manual edits to an automated AI workflow?
Use the Picjam savings calculator to compare the cost of your current photography process with AI-driven content generation.

Picjam team
The Picjam team blends AI, product, and creative expertise to eliminate the cost and delay of traditional photography for modern eCommerce brands.
