How to Put a Background on Photoshop for Standout Product Photos
Learn how to put a background on Photoshop to elevate your product photos. A practical guide for e-commerce brands on creating stunning, high-converting images.
How to start saving money
Lorem ipsum dolor sit amet, consectetur adipiscing elit lobortis arcu enim urna adipiscing praesent velit viverra sit semper lorem eu cursus vel hendrerit elementum morbi curabitur etiam nibh justo, lorem aliquet donec sed sit mi dignissim at ante massa mattis.
- Neque sodales ut etiam sit amet nisl purus non tellus orci ac auctor
- Adipiscing elit ut aliquam purus sit amet viverra suspendisse potent i
- Mauris commodo quis imperdiet massa tincidunt nunc pulvinar
- Adipiscing elit ut aliquam purus sit amet viverra suspendisse potenti
Why it is important to start saving
Vitae congue eu consequat ac felis placerat vestibulum lectus mauris ultrices cursus sit amet dictum sit amet justo donec enim diam porttitor lacus luctus accumsan tortor posuere praesent tristique magna sit amet purus gravida quis blandit turpis.

How much money should I save?
At risus viverra adipiscing at in tellus integer feugiat nisl pretium fusce id velit ut tortor sagittis orci a scelerisque purus semper eget at lectus urna duis convallis. porta nibh venenatis cras sed felis eget neque laoreet suspendisse interdum consectetur libero id faucibus nisl donec pretium vulputate sapien nec sagittis aliquam nunc lobortis mattis aliquam faucibus purus in.
- Neque sodales ut etiam sit amet nisl purus non tellus orci ac auctor dolor sit amet
- Adipiscing elit ut aliquam purus sit amet viverra suspendisse potenti
- Mauris commodo quis imperdiet massa tincidunt nunc pulvinar
- Adipiscing elit ut aliquam purus sit amet viverra suspendisse potenti
What percentage of my income should go to savings?
Nisi quis eleifend quam adipiscing vitae aliquet bibendum enim facilisis gravida neque. Velit euismod in pellentesque massa placerat volutpat lacus laoreet non curabitur gravida odio aenean sed adipiscing diam donec adipiscing tristique risus. amet est placerat imperdiet sed euismod nisi.
“Nisi quis eleifend quam adipiscing vitae aliquet bibendum enim facilisis gravida neque velit euismod in pellentesque massa placerat”
Do you have any comments? Share them with us on social media
Urna ut fermentum imperdiet lacus, elementum etiam maecenas libero nunc, suspendisse massa, nisl, elit curabitur feugiat in quis ut nibh enim in tristique aliquam sed vitae dui, dis adipiscing pharetra aliquam turpis turpis nibh rhoncus enim, pellentesque leo laoreet neque in sed bibendum fermentum suspendisse tempus non purus adipiscing suscipit fringilla adipiscing convallis dolor nulla fermentum facilisis ullamcorper ut vehicula tortor libero metus donec velit, tristique fermentum, dictum euismod diam scelerisque enim non pharetra tristique lectus habitant pharetra est id
When a brand like Crocs tests AI-generated photos for a new collection, they're not just experimenting — they're searching for a faster, more cost-effective way to create compelling visuals. Learning how to put a background on Photoshop is a foundational skill for this process, but the manual approach is rapidly being outpaced by AI-driven efficiency.
To add a background in Photoshop, you place a new image on a layer underneath your product, then use selection tools and layer masks to blend them. The process involves isolating the product, refining its edges, and ensuring the new background’s lighting and color feel natural.
How High-Quality Backgrounds Drive Sales for Fashion Brands
For direct-to-consumer fashion brands like Everlane or Allbirds, a compelling background isn't decoration — it's a core part of the brand story. The right visual context transforms a simple garment photo into a high-converting asset that communicates brand identity.
A clean, marketplace-friendly white background serves a different purpose than a contextual lifestyle shot. One prioritizes clarity for platforms like Amazon. The other builds an emotional connection, showing the customer not just a product, but a lifestyle. This is where the manual control of Photoshop has traditionally excelled.
The True Cost of Pixel-Perfect Control in Photoshop
Mastering Photoshop for background swaps gives creative teams precise control. Of course, the foundation of any great product image is the original capture; learning how to take good product shots is step zero.
While the software’s importance is clear — a Vogue Business survey found that over 60% of fashion executives are increasing their tech budgets — that manual precision comes at a cost: time. The hours spent on masking, color matching, and creating shadows for one image bog down campaign launches. This is where AI platforms like Picjam create a new path.
How AI-Powered Backgrounds Cut Content Production Costs
While Photoshop offers deep control, Picjam delivers speed and scale. Instead of spending hours on a single image, brands generate entire on-brand photoshoots in minutes.
This approach doesn't just save time — it unlocks new creative possibilities. Suddenly, it’s cost-effective to produce dozens of visual concepts for A/B testing or social media, completely transforming a brand's content pipeline and reducing photography costs by up to 80%.
Isolating Your Product with Precision Selections
A believable background swap lives or dies by the quality of your selection. For fashion products with tricky details like lace, complex textures, or wisps of hair, a clean cutout is the most critical and time-consuming part of the job.
The secret is knowing which tool to use. Photoshop’s AI-powered tools like Select Subject and the Object Selection Tool are incredibly fast for well-defined shapes. For a simple t-shirt on a plain background, these tools get the job done in a single click.
Choosing Speed vs. Precision for Complex Garments
However, for more complex items, you need more control. This is where manual tools come into play.
The Pen Tool offers surgical precision, letting you create clean, smooth vector paths. It’s slower, but for the sharp edges on items like handbags or shoes, the result is unmatched.
For softer edges, like a mohair sweater or a model’s hair, the Select and Mask workspace is your best friend. This panel helps you refine your selection, using tools like the Refine Edge Brush to cleanly separate fuzzy details from the old background. It's a non-negotiable step for a professional composite.
"Take your image into Photoshop when Lightroom simply can't do the job — which is mainly for pixel editing, advanced colour toning, advanced portrait retouching or when you need to be more selective in your edits."
This process flow shows the journey from a basic product shot to a sophisticated, AI-generated campaign asset.
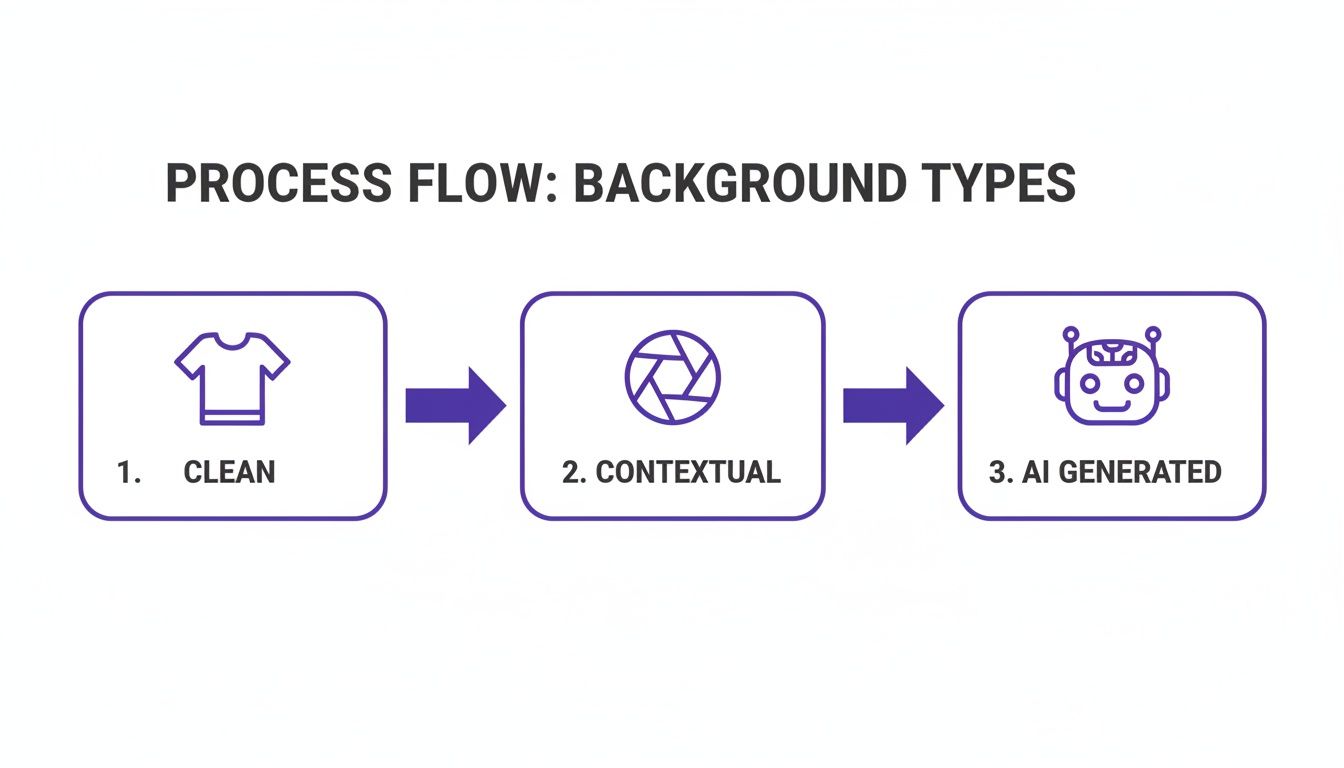
While clean and contextual backgrounds are foundational, AI-generated scenes represent the next leap in scaling content.
Why Manual Selections Are a Bottleneck for Growth
Manually tracing and masking a single product can take anywhere from 15 minutes to over an hour.
Multiply that by an entire collection. For a brand launching 50 new SKUs, that could easily consume a full week of a designer's time — spent on just cutouts.
This is where modern AI solutions offer a huge advantage. They automate this isolation process, delivering perfect cutouts in seconds. This lets creative teams bypass tedious work and focus on what matters: creative direction.
If you often work with simple product shots, learn how to perfectly remove a white background from an image in our dedicated guide.
Placing and Blending Your New Background Seamlessly
You've nailed the perfect cutout. Now for the creative work — moving beyond a simple cut-and-paste to make your product and its new background look like they belong together.
The goal is to create a final image that feels completely natural, as if it were shot on location.

First, place your new background image onto a fresh layer and drag it directly below your product layer. This simple stacking order is the foundation for everything that follows.
Matching Color, Tone, and Lighting for Realism
A classic mistake is dropping a product shot under cool studio lights onto a warm, sun-drenched beach background. The mismatch screams "fake."
The key is using non-destructive adjustment layers. Always clip them directly to your product layer for total control.
- Curves: Match brightness and contrast. Tweak the curve so the darkest and brightest points on your product align with the background scene.
- Color Balance: Match the color temperature. If your new background has a warm vibe, nudge the sliders toward yellows and reds on your product layer.
- Hue/Saturation: If one color on the product feels out of place, use this to target and adjust its intensity or hue without affecting the rest of the image.
Imagine how a brand like Reformation might shoot a model in a dress and then place her on a sun-drenched Italian street. The highlights on the fabric must catch the sun perfectly. The shadows need to fall realistically on the cobblestones. This meticulous work is why traditional photoshoots get so expensive.
Why Photoshop Proficiency Is an Industry Standard
Knowing these tools is standard practice. With Adobe Photoshop holding a massive 41.74% market share in graphic design software, proficiency is an expected skill for creative teams.
This dominance ensures that workflows for background removal align with professional standards. You can see more stats about Photoshop’s role in professional design on electroiq.com.
For apparel brands, investing in Photoshop skills ensures your team’s workflow aligns with industry-wide best practices.
It’s this manual work that consumes time and budget. Learning the steps for how to put a background on Photoshop is one thing, but executing it flawlessly across a collection is another. This is where AI platforms streamline the workflow, generating perfectly matched backgrounds in a fraction of the time.
For a deeper dive, check our guide on how to add a background in Photoshop. Once you understand the manual process, you can appreciate the efficiency gains new technologies offer.
Making It Look Real: Shadows and Lighting
A clean background swap is good. A great one is invisible. What separates an amateur edit from a professional one is the subtle details, and nothing screams "fake" faster than a product that looks like it's floating.
Creating believable shadows anchors your product to its new home.

The two types you must get right are contact shadows and cast shadows. Contact shadows are the tiny, dark lines where an object touches a surface. Cast shadows are the bigger, softer shadows thrown by the product.
Crafting Believable Shadows Manually
For a quick cast shadow, duplicate your product layer, fill it with black, and use the Transform tool (Ctrl/Cmd + T). Skew and position the shadow to match the light direction, then lower the layer's opacity and add a touch of Gaussian Blur.
Contact shadows need more finesse. Create a new layer and use a small, soft black brush with low opacity. Carefully paint where the product makes contact with the ground. It’s a tiny detail that makes a world of difference.
Creating convincing shadows isn't just a technical step. You're tricking the viewer’s brain into accepting the scene as real. That perceived authenticity builds trust.
For more on shadow work, our guide on how to get rid of shadows in pictures has techniques that work in reverse.
Matching the Light and Texture
Shadows are only half the battle. To sell the illusion, the lighting on your product has to match the new environment.
Imagine Gymshark placing a model into a gritty, urban gym scene. To make it look real, you’d need to paint subtle highlights on the apparel reflecting the gym's overhead lights.
You can do this by creating a new layer set to 'Overlay' or 'Soft Light'. Then, use a soft brush to paint in highlights or ambient colors.
A pro tip: match the grain. If your background has film grain or digital noise, a clean product will stick out. Convert your product layer to a Smart Object, then apply a subtle 'Add Noise' filter.
These finishing touches are what separate pros from amateurs, but they're also the most time-consuming part of the job.
Manual Photoshop Workflow vs. AI-Powered Platforms
When scaling product photography, the time spent on these edits adds up. Let's break down the difference.
While Photoshop gives you ultimate control, it comes at a steep cost in time and money. AI platforms like Picjam automate the entire integration process, reclaiming countless hours of repetitive work.
Getting Your Images Ready for Prime Time
You've made it to the most critical step: prepping your image for its digital debut. All that careful blending won't mean a thing if the final export is slow, pixelated, or has weird colors online. This is where you turn your work in Photoshop into a high-performing e-commerce asset.
Your main goal is to balance image quality and file size. A massive file might look gorgeous, but it'll slow your site to a crawl. According to Portent, a site that loads in 1 second has a conversion rate 3x higher than one that loads in 5 seconds.
Choosing the Right File Format for eCommerce
The file format you pick has a huge say in that quality-versus-size balance. For a brand like Staud, whose product pages pop with bold colors, getting the export settings right is key.
Here’s the breakdown:
JPEG (Joint Photographic Experts Group): The workhorse for most product photos. It offers excellent compression for small file sizes. It’s a "lossy" format, so a quality setting between 70 and 85 is the perfect compromise for the web.
PNG (Portable Network Graphics): Only use this if you need transparency, like layering a product onto different colored backgrounds on your website. PNG files are "lossless" but are significantly larger than JPEGs.
WebP: This modern Google format is a game-changer. It offers much better compression than JPEG and PNG. Using WebP can shrink your file sizes by 25-34% compared to JPEGs, a major speed boost for your site.
The Final Polish Before You Hit 'Save'
Before you export, a couple of last-minute checks ensure your image looks fantastic everywhere.
First, double-check that your color profile is set to sRGB, the standard for the web. If you skip this, your brand colors might look dull or wrong on different screens.
Second, run one final sharpening pass. I do this on a merged copy of all layers using the Unsharp Mask filter. Be subtle — the idea is to add crispness, not fake-looking edges. This polish makes every stitch and texture pop.
Takeaway: Actionable Insights for Your Brand
Mastering background swaps in Photoshop is a valuable skill, but efficiency is key for growth.
Prioritize Non-Destructive Editing. Always use Layer Masks instead of the Eraser tool. This single habit gives you the flexibility to refine selections without permanently deleting pixels, saving rework time.
Build a Background Library. Create a collection of on-brand backgrounds, including specific textures, solid brand colors, or approved lifestyle scenes. This streamlines content creation and ensures visual consistency across your product line.
Benchmark Your Manual Costs. The time spent on manual edits is a real business expense. Use an AI savings calculator to quantify the hours and budget your brand could reclaim by automating background generation. This isn't about replacing creativity; it's about freeing up your team for high-impact strategic work.
Ready to see the real numbers for your business?
Calculate Your Savings Now
Still Have Questions?
Here are answers to common questions we hear from e-commerce brands.
How Can I Change Backgrounds for 100+ Product Photos Quickly?
For that kind of volume, editing each photo in Photoshop is a non-starter. Imagine a brand like Zara, with thousands of new arrivals weekly — they can't operate that way.
The traditional method involves batch processing with Photoshop Actions. You’d record an Action for 'Select Subject' and apply a Layer Mask. The problem? You'll almost always have to manually clean up each photo.
A far better approach is an AI platform. A tool like Picjam can process hundreds of images in minutes, delivering perfect cutouts and consistent, on-brand backgrounds every time, saving significant content production costs.
How Do I Make a New Background Look Realistic?
Realism comes down to three things: light, shadows, and perspective.
- Light: The light source in your background must match the lighting on your product. Use Curves and Color Balance adjustment layers to blend them.
- Shadows: Without a shadow, your product will look like it's floating. It needs to cast a believable shadow onto the new background to ground it in the scene.
- Perspective: A classic mistake. Ensure the angle of your product matches the background. A product shot from a low angle will look out of place on a background shot from above.
Can I Change a Background Without Hurting Image Quality?
Yes, as long as you work non-destructively. Never permanently alter the pixels of your original image.
Your two best friends are Smart Objects and Layer Masks.
Convert your product layer into a Smart Object. This lets you resize and apply filters without degradation. Then, use a Layer Mask instead of the Eraser tool to hide or reveal parts of your image non-destructively.
Ready to stop the tedious manual work? Find out how much you could save by switching from your current photography process to an automated solution with the Picjam savings calculator.

Picjam team
The Picjam team blends AI, product, and creative expertise to eliminate the cost and delay of traditional photography for modern eCommerce brands.

