How to Take Product Photos That Sell Without a Big Budget
Learn how to take product photos that boost sales. This guide covers lighting, settings, and AI workflows for modern fashion brands.
Knowing how to take product photos isn't some dark art. It's a formula: plan shots meticulously, control your lighting, and style garments to showcase their best features. When the average e-commerce store sees a 9% conversion rate lift from high-quality images, getting this formula right moves from a creative task to a core business driver.
A great photo starts long before you pick up a camera.
Step 1: Create Your Blueprint for High-Converting Photos
Before touching a camera, you need a plan. This is where you map out your visual strategy, ensuring every image tells your brand’s story and speaks directly to your ideal customer. It’s the foundational work that separates amateur listings from professional, high-converting product pages.
This planning stage is also the perfect time to think about how AI can elevate your workflow. Instead of budgeting for expensive location shoots, you can capture clean product shots in-studio and let an AI tool like Picjam generate endless on-brand variations — saving thousands in production costs.
For a deeper dive into building out your pre-shoot strategy, this comprehensive guide on how to take good product shots that sell more is an excellent starting point.
Build a Mood Board and Shot List to Guide Your Vision
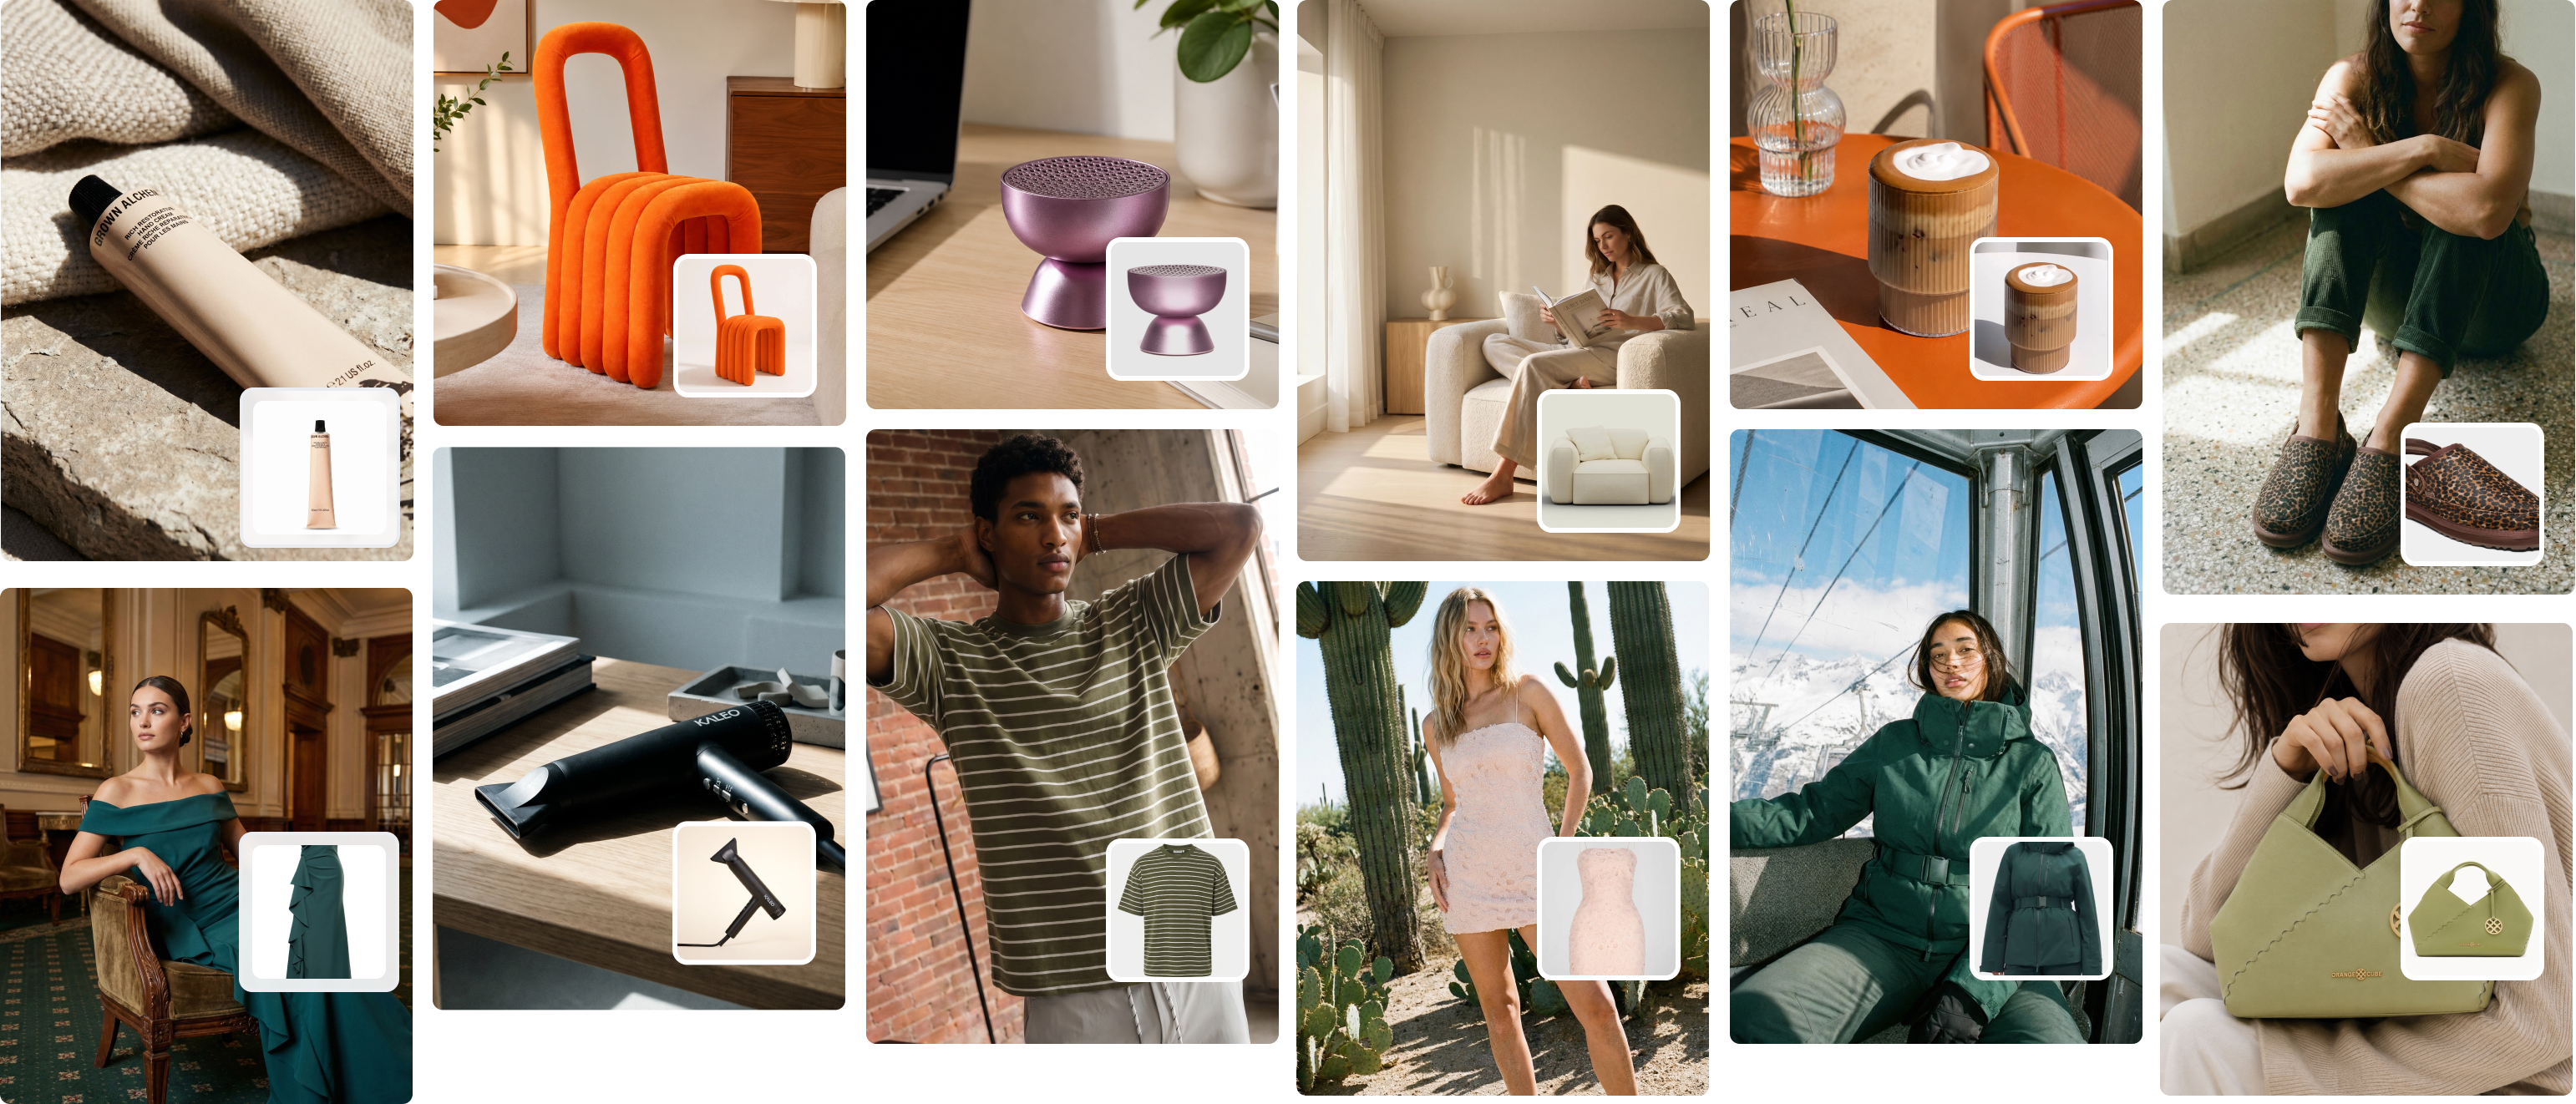
Your mood board is your visual north star. It’s a strategic tool you'll use to lock in your aesthetic. Brands like & Other Stories are masters at this, creating a consistent vibe across their entire catalog — from specific color palettes and lighting to model poses and prop choices.
Your mood board should answer a few key questions:
- What’s the mood? Is it bright and airy like Reformation, or dark and edgy like AllSaints?
- Who is the customer? What kind of world do they want to live in?
- What are the key textures and colors? How will you make them pop on screen?
Once your mood is locked in, create a detailed shot list. This is your non-negotiable checklist for the shoot day, guaranteeing you capture every angle and detail. It's what prevents expensive, time-wasting reshoots.
Your Essential Product Shot Checklist
Using this checklist ensures you're not just taking pictures, but creating a complete visual narrative that answers every question a potential buyer might have.
Understand Each Marketplace's Visual Requirements
Different platforms play by different rules. An artistic, moody shot that performs well on Instagram might get suppressed on Amazon. Figuring this out upfront will save you countless hours of editing.
- Amazon & eBay: Almost always require a pure white background for the main image. No exceptions.
- Instagram & Pinterest: Favor authentic, "in-the-moment" lifestyle photos that feel less staged.
- Your Website: This is your playground. You have complete creative freedom here to express your brand’s unique identity.
This visual shows how modern workflows combine classic planning with AI to scale content creation.
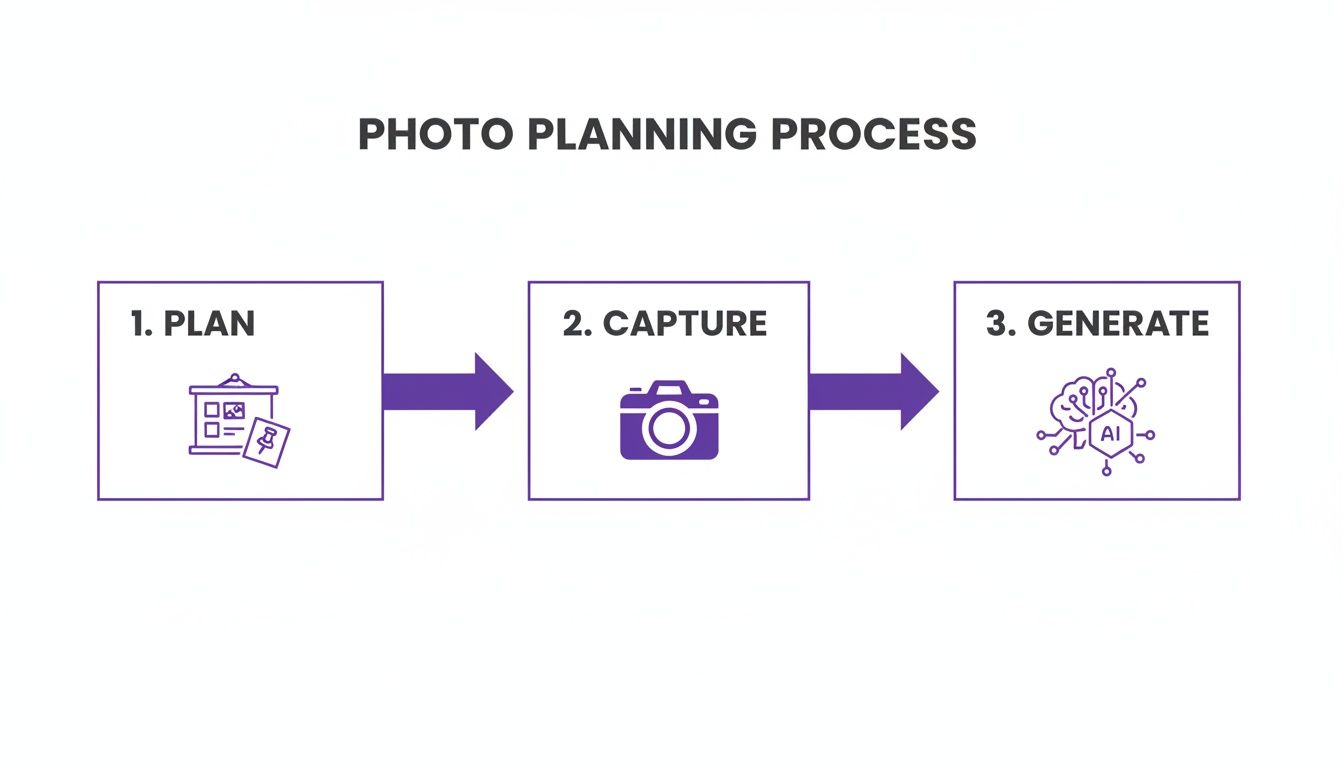
As you can see, a single, well-planned photoshoot can fuel an AI-powered content engine, creating endless variations from just a few core assets. This is how smart fashion brands are building scalable, agile content machines.
Step 2: Choose Your Gear and Dial In Camera Settings
You don't need a massive budget to create stunning product photos. High-end DTC brands like Everlane built their visual identity on crisp, clean imagery that feels approachable, not intimidating — all with relatively straightforward studio setups.
The secret isn't owning the most expensive gear; it's mastering the fundamentals of whatever gear you have.
Smartphone vs. DSLR: Which Is Right for You?
The debate between a dedicated camera and a modern smartphone isn't about which is "better." It's about what fits your workflow, team, and budget. Both can deliver professional results.
Smartphone: The camera in your pocket is a powerhouse. iPhones and high-end Androids have incredible features like Portrait Mode and Pro settings for manual control. They're perfect for brands that need to move fast and keep costs down.
DSLR/Mirrorless: A dedicated camera with a larger sensor will give you superior image quality, especially when the light isn't perfect. The ability to swap lenses unlocks a ton of creative control.
At the end of the day, the best camera is the one you know how to use. For a deeper dive, check out our full guide to the essential equipment for product photography.
Your Non-Negotiable Gear Essentials
Camera aside, there are 2 pieces of equipment that are absolutely non-negotiable for getting sharp, consistent fashion photos.
A Sturdy Tripod: This is the single most important accessory you can buy. A tripod eliminates camera shake and lets you lock in your composition, ensuring every product is shot from the exact same angle.
A 50mm Prime Lens: Often called the "nifty fifty," a 50mm lens is a favorite in fashion because it closely mimics how the human eye sees the world. It captures garments without the distortion that wider lenses can create.
Demystifying the Exposure Triangle
Aperture, ISO, and shutter speed are the 3 pillars that control your photo's brightness. Understanding how they work together lets you finally switch your camera off "Auto" and take full creative control.
These settings are a balancing act. If you adjust one, you'll probably need to adjust another to keep the exposure just right. The only way to get a feel for it is to practice.
Step 3: Create Flawless Lighting and Backgrounds
Of all the elements in product photography, lighting is king. It sets the mood, defines a garment’s shape and texture, and ultimately grabs a customer’s attention. Get the lighting right, and you're halfway to a high-converting image.

The difference between an amateur shot and a professional one usually boils down to how light is controlled. Look at a brand like Reformation. They masterfully use soft, diffused natural light to create an airy, romantic feel that defines their brand aesthetic.
How to Master Hard vs. Soft Light for Fashion
Learning the difference between hard and soft light is fundamental if you want to know how to take product photos that connect with people. Each serves a very different purpose.
Soft Light: Think gentle, subtle shadows. It’s flattering for any garment or model because it smooths over harsh lines. Get this with a large window on an overcast day, a softbox, or by bouncing your light source off a white wall.
Hard Light: This comes from a small, direct light source, like the sun on a cloudless day. It produces sharp shadows and is used to create drama or pop fabric texture.
For bread-and-butter e-commerce shots where clarity is everything, soft light is almost always the right call. It ensures customers see the product clearly, without distracting shadows.
The Power of a Simple, Clean Background
While a creative backdrop has its place, the industry standard for e-commerce is a simple, non-distracting background. A roll of seamless paper lets you create an "infinity sweep" — the clean, unbroken background where you can't see the corner where the wall meets the floor.
This technique makes the product the hero of the shot and dramatically simplifies post-production, especially if you need to remove the background later.
For lifestyle-focused shots, you can bring in subtle textures, like clean linen or polished concrete. The key is to make sure the background complements the product, never overpowers it.
How AI Backgrounds Can Slash Your Production Costs
Traditional photography hits a financial wall with location shoots. Scouting, permits, and crew for a lifestyle campaign are incredibly expensive. This is where AI completely flips the equation.
When you capture your garment on a simple, clean background, you create a perfect digital asset for a platform like Picjam.
From one shot, you can generate hundreds of hyper-realistic lifestyle scenes. Place a summer dress in a sun-drenched Tuscan field or a chic blazer in a Parisian café. Picjam's AI creates this in minutes, saving brands the enormous cost of physical location shoots. You can explore more ideas in our guide to the perfect product photography backdrop.
Step 4: Style Garments to Showcase Quality and Fit
How you style a piece of clothing is often the make-or-break moment for a sale. It’s not just about showing an item; it’s about selling a vision — bridging the gap between a customer scrolling online and them picturing that garment in their own closet.

Getting this wrong hits your bottom line hard. A staggering 22% of e-commerce returns happen because the product looked different in person. Nailing the styling and fit isn’t just about making pretty pictures; it’s a core strategy to slash your return rate. You can find more insights on how visuals impact e-commerce returns right here.
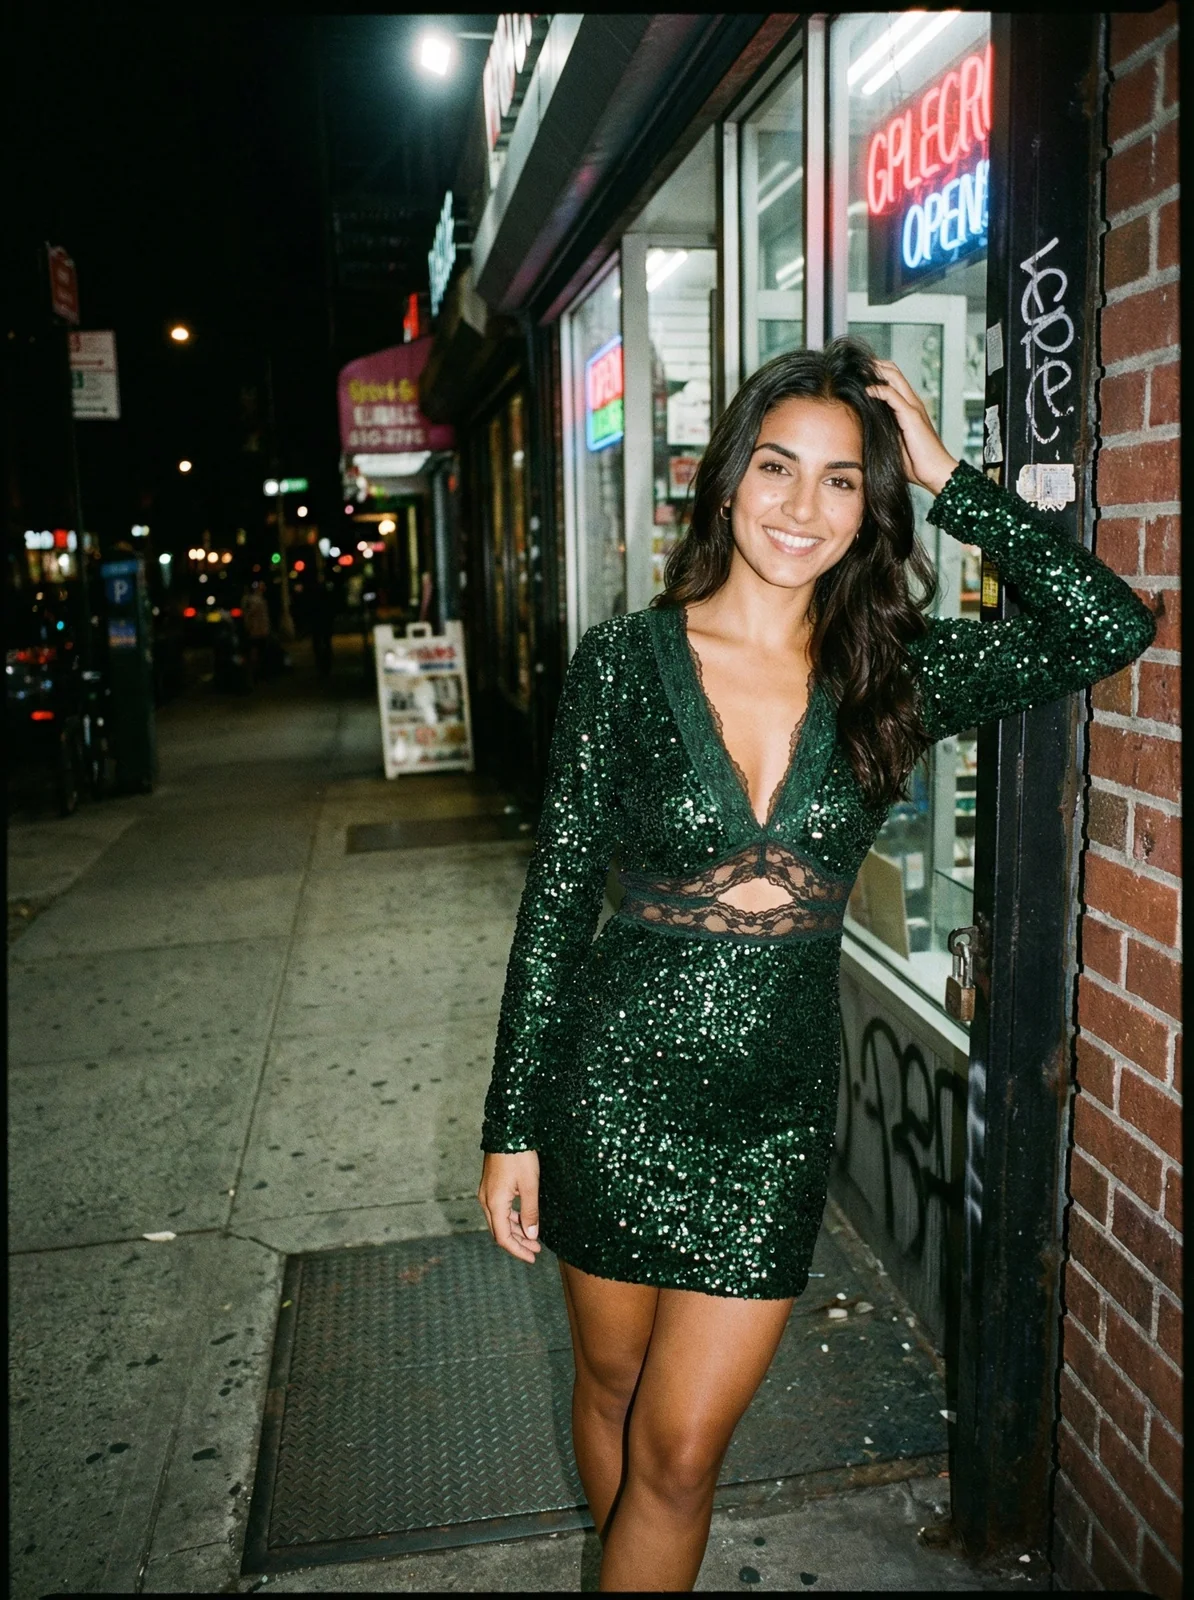
On-Model Styling That Sells a Vision
On-model shots are about aspiration and, most importantly, fit. Brands like Zara are masters at this. Their lookbooks feel effortless, with poses that are natural yet calculated to show how a garment drapes and moves.
Before picking up the camera, the garment needs to be prepped.
- Steam Everything: Wrinkles are the fastest way to scream "cheap." A good handheld steamer is an essential piece of kit.
- Get Friendly with Clips and Pins: Stylists use a secret arsenal of clips and pins on the back of the garment to sculpt the perfect silhouette from the front.
- Direct Natural Poses: Work with your model to find poses that feel authentic. Encourage movement — a hand in a pocket or a slight turn of the shoulder brings clothing to life.
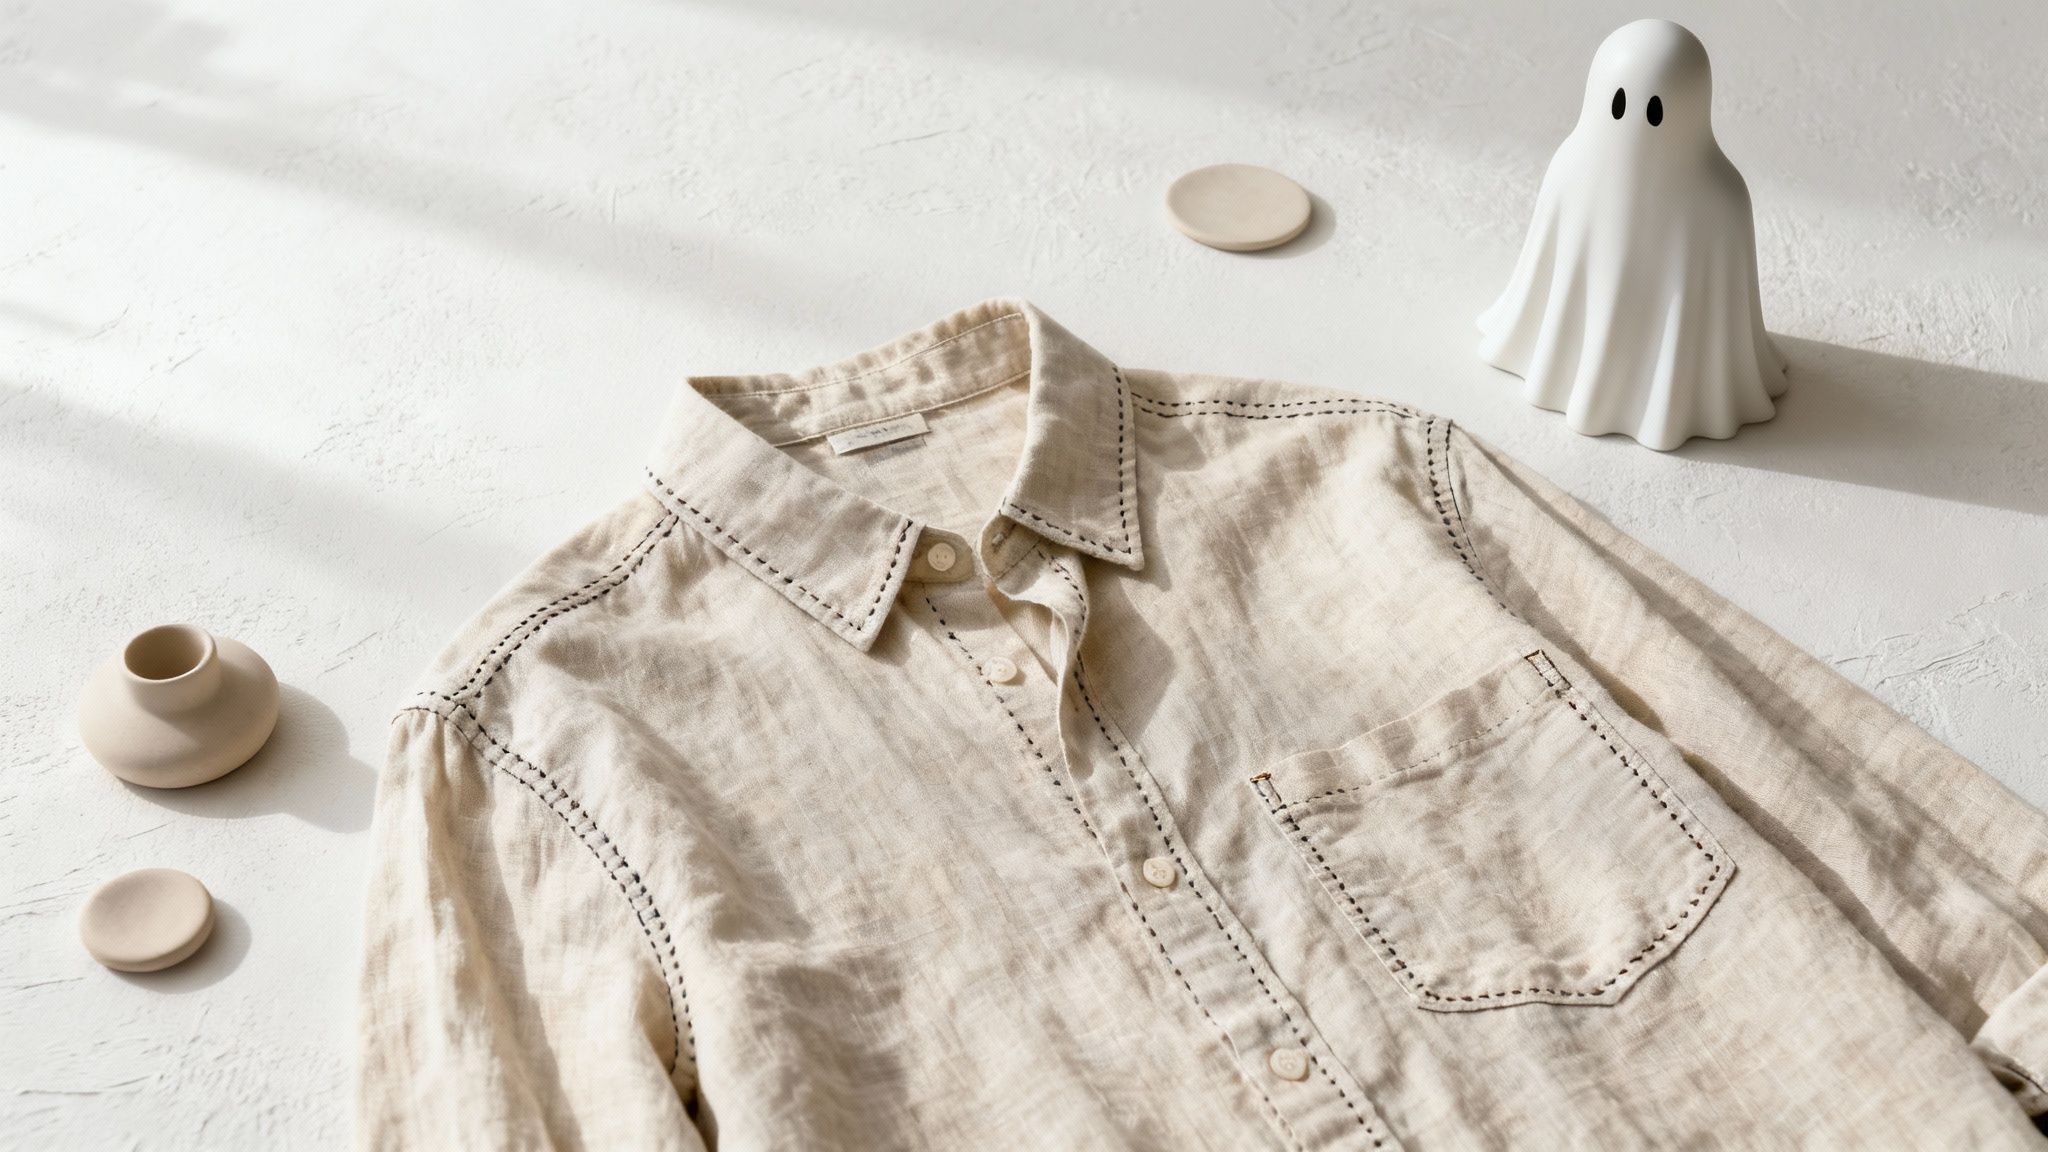
The Art of the Minimalist Flat Lay
While on-model shots sell the lifestyle, flat lays and ghost mannequin photos sell quality and construction. They offer a clean, unobstructed view of the details. A brand like Cuyana uses minimalist flat lays to communicate timeless quality.
Pulling off a high-quality flat lay is all about precision.
- Start with a Clean Surface: Use a neutral background like seamless paper, linen, or a clean wooden board.
- Lay It Out Symmetrically: Place the garment down and arrange it carefully. Use tissue paper underneath to give it a little volume so it doesn't look lifeless.
- Shoot from Directly Above: This is non-negotiable. You need a tripod with a horizontal arm to get that perfect, distortion-free top-down angle.
AI-Powered Styling for a Diverse Audience
Here's where technology changes the game. In the past, showing a garment on different body types meant hiring, scheduling, and paying for several models. It was expensive, slow, and a barrier to inclusivity.
This is exactly where tools like Picjam’s Fit to Model technology come in. You can take one clean photo of a garment and, in minutes, generate hyper-realistic images of it on a whole range of virtual models.
You can show the same dress on a size 2, a size 12, and a size 20 model, with different ethnicities and heights, all generated almost instantly. It's a way to deliver inclusivity at a fraction of the traditional cost.
Step 5: Streamline Post-Production with AI
The shoot is just the beginning. The real work — turning a good photo into a high-converting asset — happens in post-production. But for many brands, this editing phase is a massive bottleneck.
Traditionally, this meant hours in Photoshop removing backgrounds, retouching imperfections, or color-correcting an entire catalog. It’s slow work that doesn't scale.
This is where AI workflows can give you a massive leg up. Tools like Picjam can knock out these repetitive, rule-based tasks in seconds. This isn't just about cutting costs; it frees up your team to think about creative strategy. For a deeper dive, check out our guide on eCommerce photo editing.
Scale Your Creative and Boost Conversions
The real magic of an AI workflow is unlocking the ability to scale and test creative variations in ways that were previously impossible without a massive budget.
Think about a brand like Ganni, known for its bold, playful vibe. To test a new collection against different backdrops would normally mean multiple photoshoots. With Picjam, they could shoot the collection once and generate dozens of on-brand variations in minutes.
This opens up powerful testing opportunities.
- A/B Test Models and Backgrounds: Generate images of the same product on different virtual models or in various settings to see what actually resonates with your audience.
- Upscale for Detail: Use AI to increase image resolution, allowing for high-quality zoom on your product pages — a key feature for showing off fabric quality.
- Create Social Media Assets: Instantly convert static product shots into engaging short-form videos or GIFs for Instagram Reels or TikTok.
Once your photos are polished, techniques like Dynamic Creative Optimization (DCO) can use that AI-generated library to automatically test and serve up the best-performing visual combinations. This data-driven approach turns product photography into a measurable performance marketing channel.
Actionable Takeaways
Figuring out how to take great product photos is a skill you build over time. But you can start making huge improvements today that will genuinely move the needle on your sales.
1. Plan Before You Shoot. The best photoshoots are won before the camera comes out. Start with a detailed shot list and a solid mood board. This step ensures every image serves a purpose, fits your brand identity, and connects with your ideal customer. Just look at brands like & Other Stories — their cohesive catalog is built on a crystal-clear visual direction.
2. Master the Technical Fundamentals. You don't need a 5-figure equipment budget. You just need to get the fundamentals right. Focus on good lighting and understanding your core camera settings. Whether you're using a DSLR or your iPhone, knowing how to create soft, diffused light and nail your exposure is non-negotiable.
3. Integrate AI to Scale and Save. Bring AI tools like Picjam into your workflow to handle tedious post-production, scale up creative output, and drive more sales on a smaller budget. Take a single, well-lit photo of a garment and generate hundreds of variations — on different models, in new settings, and perfectly optimized for every marketplace. This is how you turn photography from a cost center into a growth engine.
Ready to see how an AI-powered workflow can impact your bottom line? Calculate your potential savings with Picjam and see exactly how much you can reduce your current photography costs.
Have More Questions? We've Got Answers
How many photos should I have for each product?
Aim for 5 to 8 solid images for every product. Think of it as building a complete visual story for your customer.
Make sure you cover all the bases: a clean hero shot, multiple product photography angles (front, back, side), a close-up on the fabric, someone wearing it to show the fit, and a lifestyle shot to help them imagine it in their own life.
Can I actually get professional results with just a smartphone?
Absolutely. The camera in your pocket is seriously powerful. The secret isn't the device, but how well you control the world around it.
If you're going the smartphone route, here's what you can't skip:
- Get a tripod: This is non-negotiable. It kills blur and keeps your shots sharp.
- Find good light: Get near a big window on an overcast day for perfect, soft natural light.
- Take control: Use your phone's "pro" or "manual" mode. Never use the digital zoom.
When you pair those techniques with a modern AI editor for background removal, your phone shots can genuinely go head-to-head with photos from fancier setups.
What's the biggest mistake you see brands make with their photos?
Hands down, it's inconsistent lighting. It’s the subtle thing that screams "amateur" to a shopper. One photo has weird shadows, the next makes the color look different — it shatters the cohesive, professional vibe you're working to build.
Your lighting setup has to be identical for every single product in your catalog. That consistency is what signals quality and makes customers feel like they can trust what they see.
How does AI actually help with model diversity?
This is where AI becomes a total game-changer. It lets you improve on-model diversity without the sky-high costs of casting, booking, and shooting tons of different models.
With a platform like Picjam, you can take one photo of your garment and instantly create a whole gallery of images. You can see it on AI models with different ethnicities, body types, and ages. This makes your brand more relatable and almost always boosts conversions.
Curious how much an AI-powered workflow could simplify your content creation and cut costs? Plug your numbers into our savings calculator and compare your current photography expenses with Picjam.

Picjam team
The Picjam team blends AI, product, and creative expertise to eliminate the cost and delay of traditional photography for modern eCommerce brands.