How to Produce Ghost Mannequin Images at Scale
Ghost mannequin photography slows down at 50+ SKUs. Here's how fashion brands break through the production ceiling — from workflow fixes to AI alternatives that cut cost by 90%.
Ghost mannequin photography works perfectly until your catalog grows.
At 15 SKUs, the workflow is manageable. Dress the mannequin, shoot front and back, composite the neck insert in Photoshop, repeat. A photographer and retoucher can clear a small seasonal drop in a couple of days.
At 150 SKUs — or 500 — that same workflow becomes the thing that holds your entire launch back. The editing queue grows faster than your team can clear it. New arrivals pile up waiting on images. Retouchers spend 20-45 minutes per garment on work that could be standardised.
This guide is for brands that have already figured out ghost mannequin photography as a technique. The question here isn’t what the effect is or how to achieve it on a single garment. It’s how to build a system that produces consistent, commercial-quality results across hundreds of SKUs without turning your production calendar into a permanent emergency.
Why Ghost Mannequin Breaks at Scale
The invisible mannequin effect has a compositing problem at its core. For every garment, you’re typically shooting:
- Front view with garment dressed on mannequin
- Back view
- Neck/label insert (garment turned inside-out to capture the interior collar area)
Then in post-production, someone masks out the mannequin, composites the neck insert into the front shot, cleans the edges, corrects colour, and exports. That’s a meaningful amount of skilled manual work per image — and it multiplies linearly with every SKU you add.
The brands that struggle here have usually hit one of three specific ceilings:
The shooting ceiling. Garment changeovers on a mannequin take time. Dressing a structured jacket, pinning it to fit, adjusting collar and cuffs, then undressing and redressing for the next piece — even with two people working efficiently, you’re looking at 10-20 minutes per garment in setup alone. At 100 garments, that’s 15-30 hours of shooting time before you’ve edited a single frame.
The editing ceiling. Ghost mannequin compositing requires someone who knows Photoshop well — not just background removal, but actual compositing work. If your retoucher is also your photographer (common in smaller teams), they’re a single-thread bottleneck. You can’t shoot while editing and can’t edit while shooting.
The consistency ceiling. Over a long production run, small variations in pinning, lighting, and styling accumulate. By the time you’re 200 SKUs in, the jackets you shot in week one look subtly different from the dresses you shot in week three. The catalog drifts without anyone making a deliberate decision to change it.
Three Approaches That Actually Work
Approach 1: Optimise Your In-House Batch Process
If you’re staying with the traditional ghost mannequin workflow, the single highest-leverage change is batching by garment type rather than shooting in catalogue order.
Group by garment category first. All shirts together. All trousers. All structured jackets. All knitwear. Each category has consistent styling rules — where the collar sits, how cuffs are folded, whether the front is buttoned — and grouping them means those rules are applied consistently without re-briefing every 20 minutes.
Shoot all front views across the entire batch before moving to backs. Don’t fully finish one garment before starting the next. Complete one shot type across all garments in the batch, then move to the next. This keeps your eye calibrated to the same thing rather than switching between tasks constantly.
Build a Photoshop template for each garment category. Your blazer template has the canvas size, layer structure, masks, and blend mode settings already set up. When an image comes in, it slots into the template rather than being built from scratch. This alone cuts editing time by 30-40% per garment.
Document your setup before you break it down. Photograph your lighting positions, measure light-to-subject distances, note your camera settings. When you return for the next batch — even the next day — you’re rebuilding an exact replica, not estimating. Catalog consistency is largely a documentation problem.
This approach works well for teams with established in-house capability. The ceiling is roughly 30-50 images per day with a two-person team.
Approach 2: Outsource the Editing, Keep the Shooting
For brands that can handle shooting in-house but don’t want to staff a full retouching operation, outsourcing the compositing and editing to a specialist service is a practical middle path.
Cost runs roughly $3-8 per image depending on garment complexity and turnaround speed. The real cost isn’t the per-image rate — it’s coordination. You need a style guide thorough enough that an external retoucher makes the same decisions your in-house person would. Every ambiguity in that brief becomes a revision round.
Throughput: 50-150 images per day depending on service size. Works well for predictable, steady volumes. Less suited to rapid turnaround on new arrivals.
Approach 3: AI-Powered Mannequin Removal (The Step-Change)
This is where the economics of ghost mannequin production change fundamentally.
Rather than shooting on a mannequin and spending 20-45 minutes editing each image, you upload the raw mannequin photo — or a flat lay — directly to an AI tool. The mannequin is removed automatically. You can stop there and get a clean floating-garment image, or take it further and have the AI place the garment on a realistic virtual model instead.
We did exactly this with Umbro.

Umbro came to us with over 50 SKUs — a mix of jackets, jerseys, joggers, shorts, and tees — all shot as flat lays or ghost mannequin inputs. The goal was to get the full range live on their site in time for a key selling window.

The Ireland training jacket above is typical of their input images — a clean flat lay on a neutral background, showing the garment’s structure, branding, and colourway clearly. We uploaded each SKU into PicJam, selected a model consistent with Umbro’s active, sport-forward demographic, and generated on-model images across the range.

The jacket alone generated multiple usable variants — different poses, different backgrounds — from a single flat lay upload. What would have taken a retoucher the better part of a day per garment was done in minutes.

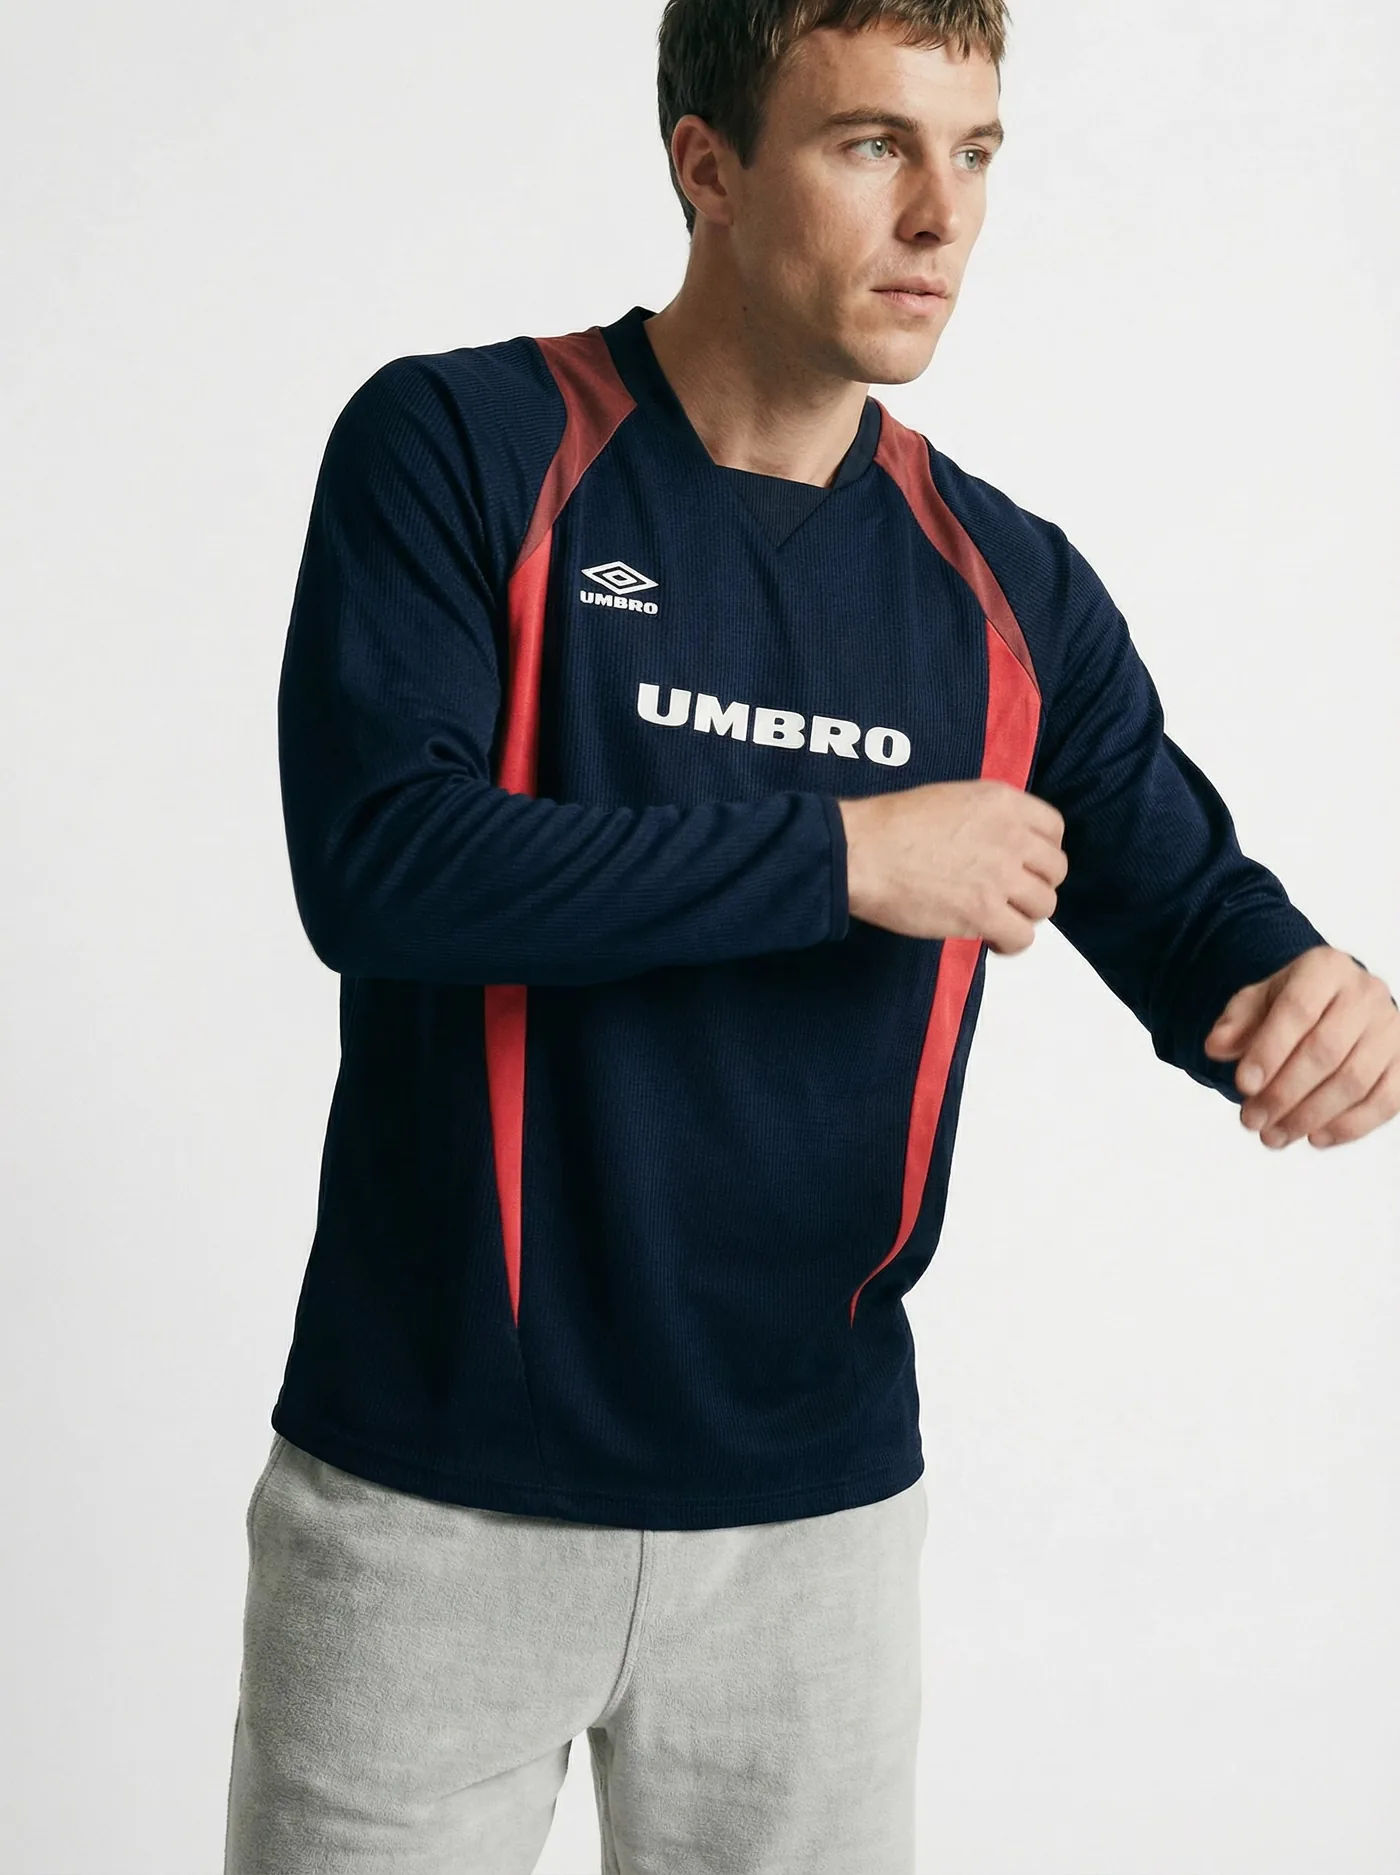
The jersey result shows what the AI preserves: the fabric texture, the panel colours, the Umbro branding, the seam placement. These aren’t approximations — the garment reads the same on a virtual model as it does on the flat lay input.


The full Umbro range went live on their e-commerce site. The result was a measurable ROAS increase — more converting product imagery, faster to market, at a fraction of the cost of a traditional model shoot across 50+ SKUs.
PicJam’s ghost mannequin removal tool handles this workflow. Upload your mannequin shot or flat lay, get back a clean product image — or a full on-model photo — ready for your PDP, Amazon listing, or wholesale deck. No Photoshop, no compositing, no retoucher required.
MethodCost per imageTime per imageDaily throughputTraditional workflow$10-3030-60 min30-50 imagesOutsourced editing$3-824-72hr turnaround50-150 imagesAI removal (PicJam)Under $2Seconds200+ images
At 50 SKUs — Umbro’s starting point — the difference between traditional retouching and AI removal is already significant. At 500 SKUs, it’s the difference between a six-week production run and two days of work.
The Bigger Shift: From Ghost Mannequin to On-Model
Ghost mannequin shows structure. A floating jacket tells a customer about the cut, the collar, the lapel width. What it doesn’t show is how the back rises when you sit down, how the fabric drapes when you move, whether the shoulders actually work on a real body. Customers have learned to read ghost mannequin imagery as a category signal — “this is a catalog shot” — not as a buying trigger.
On-model imagery creates a different kind of trust. The garment exists in space, on a person, with the visual cues that help a shopper answer the actual question they’re trying to resolve: will this work for me?
The reason ghost mannequin became the default for high-volume catalogs wasn’t because it converts better. It was because on-model shoots were too expensive to justify for every SKU in a deep catalog. AI has removed that cost constraint. The Umbro workflow above is the same one available to any brand.
The ghost mannequin removal tool is one step of that process. For brands that want the full on-model output rather than just the floating garment, the workflow is identical, just a different output selection.
Making the Transition
Start with your 10-20 best-selling products. Upload your existing mannequin shots or flat lays to PicJam’s ghost mannequin removal tool. If you’re generating on-model versions, pick a model that matches your customer demographic and keep that choice consistent across the test batch.
Run the results on your live product pages and track conversion rate and return rate over 3-4 weeks. Most brands that run this comparison don’t revert to their old workflow.
Once you’ve validated the approach, rolling out across a larger catalog is fast. A 50-SKU batch — like Umbro’s — is an afternoon. A 500-SKU backlog is a couple of days, not a six-week production run.
Frequently Asked Questions
Can AI handle complex garments — technical sportswear, structured tailoring, knitwear?
Yes, including across varied garment types in the same batch. The Umbro range covered structured track jackets, jersey fabric tops, woven shorts, and brushed-cotton joggers — each with different fabric weights, panel constructions, and branding elements. The AI preserved garment-specific detail across all of them.
What does my input photo need to look like?
Even, well-lit, and clean. The garment should be fully visible without harsh shadows cutting across it. A white or light-neutral background makes edge detection significantly more accurate. The Umbro inputs were clean flat lays on neutral backgrounds, which is the standard to aim for.
How do I maintain visual consistency across hundreds of AI-generated images?
Choose your output parameters — background colour, image dimensions, model selection — and apply them as a fixed template across your entire batch. AI applies the same settings to every image in a batch by default. Consistency is the baseline, not something you have to fight for.
At what catalog size does AI removal make economic sense?
At any size where your current workflow has a queue. Even at 20-30 images per month, the time saved is meaningful. At 50+ SKUs per season, the cost difference versus outsourced editing becomes substantial.
Does ghost mannequin imagery still have a place if I move to AI on-model?
Yes. Some marketplaces have specific requirements that favour ghost mannequin style. Some product categories — particularly accessories and certain types of outerwear — show construction more clearly without a model present. The choice is now aesthetic and strategic rather than forced by production economics.
Michael Pirone
Co-Founder