A Guide to Streamlining Apparel Product Photography for Ecommerce
Master apparel product photography with our guide. Learn on-model, flat lay, and AI techniques to create stunning visuals that drive ecommerce sales.
How to start saving money
Lorem ipsum dolor sit amet, consectetur adipiscing elit lobortis arcu enim urna adipiscing praesent velit viverra sit semper lorem eu cursus vel hendrerit elementum morbi curabitur etiam nibh justo, lorem aliquet donec sed sit mi dignissim at ante massa mattis.
- Neque sodales ut etiam sit amet nisl purus non tellus orci ac auctor
- Adipiscing elit ut aliquam purus sit amet viverra suspendisse potent i
- Mauris commodo quis imperdiet massa tincidunt nunc pulvinar
- Adipiscing elit ut aliquam purus sit amet viverra suspendisse potenti
Why it is important to start saving
Vitae congue eu consequat ac felis placerat vestibulum lectus mauris ultrices cursus sit amet dictum sit amet justo donec enim diam porttitor lacus luctus accumsan tortor posuere praesent tristique magna sit amet purus gravida quis blandit turpis.

How much money should I save?
At risus viverra adipiscing at in tellus integer feugiat nisl pretium fusce id velit ut tortor sagittis orci a scelerisque purus semper eget at lectus urna duis convallis. porta nibh venenatis cras sed felis eget neque laoreet suspendisse interdum consectetur libero id faucibus nisl donec pretium vulputate sapien nec sagittis aliquam nunc lobortis mattis aliquam faucibus purus in.
- Neque sodales ut etiam sit amet nisl purus non tellus orci ac auctor dolor sit amet
- Adipiscing elit ut aliquam purus sit amet viverra suspendisse potenti
- Mauris commodo quis imperdiet massa tincidunt nunc pulvinar
- Adipiscing elit ut aliquam purus sit amet viverra suspendisse potenti
What percentage of my income should go to savings?
Nisi quis eleifend quam adipiscing vitae aliquet bibendum enim facilisis gravida neque. Velit euismod in pellentesque massa placerat volutpat lacus laoreet non curabitur gravida odio aenean sed adipiscing diam donec adipiscing tristique risus. amet est placerat imperdiet sed euismod nisi.
“Nisi quis eleifend quam adipiscing vitae aliquet bibendum enim facilisis gravida neque velit euismod in pellentesque massa placerat”
Do you have any comments? Share them with us on social media
Urna ut fermentum imperdiet lacus, elementum etiam maecenas libero nunc, suspendisse massa, nisl, elit curabitur feugiat in quis ut nibh enim in tristique aliquam sed vitae dui, dis adipiscing pharetra aliquam turpis turpis nibh rhoncus enim, pellentesque leo laoreet neque in sed bibendum fermentum suspendisse tempus non purus adipiscing suscipit fringilla adipiscing convallis dolor nulla fermentum facilisis ullamcorper ut vehicula tortor libero metus donec velit, tristique fermentum, dictum euismod diam scelerisque enim non pharetra tristique lectus habitant pharetra est id
When the direct-to-consumer brand Everlane showcases a new cashmere sweater, they don't just show the front. They include macro shots of the knit, a video of the model turning, and user-generated photos for social proof. This multi-faceted approach to apparel product photography isn't just about aesthetics; it's a strategic move to build trust and reduce returns in a crowded digital marketplace.
Your goal is to create a visual experience that showcases the fit, fabric, and overall style — essentially doing the job of a physical fitting room.
Why Your Brand Needs More Than One Product Photo
The days of getting by with a single, flat photo of a t-shirt on a white background are long gone. Leading fashion brands craft a complete narrative around each piece.
Look at brands like Reformation and Ganni. They build a visual world around their products. Their product pages are a masterclass in using a strategic mix of images to answer customer questions before they're even asked. Nailing this new standard is a huge part of the best ecommerce website design{:target="_blank"}.
The New Standard: A Multi-Faceted Visual Strategy
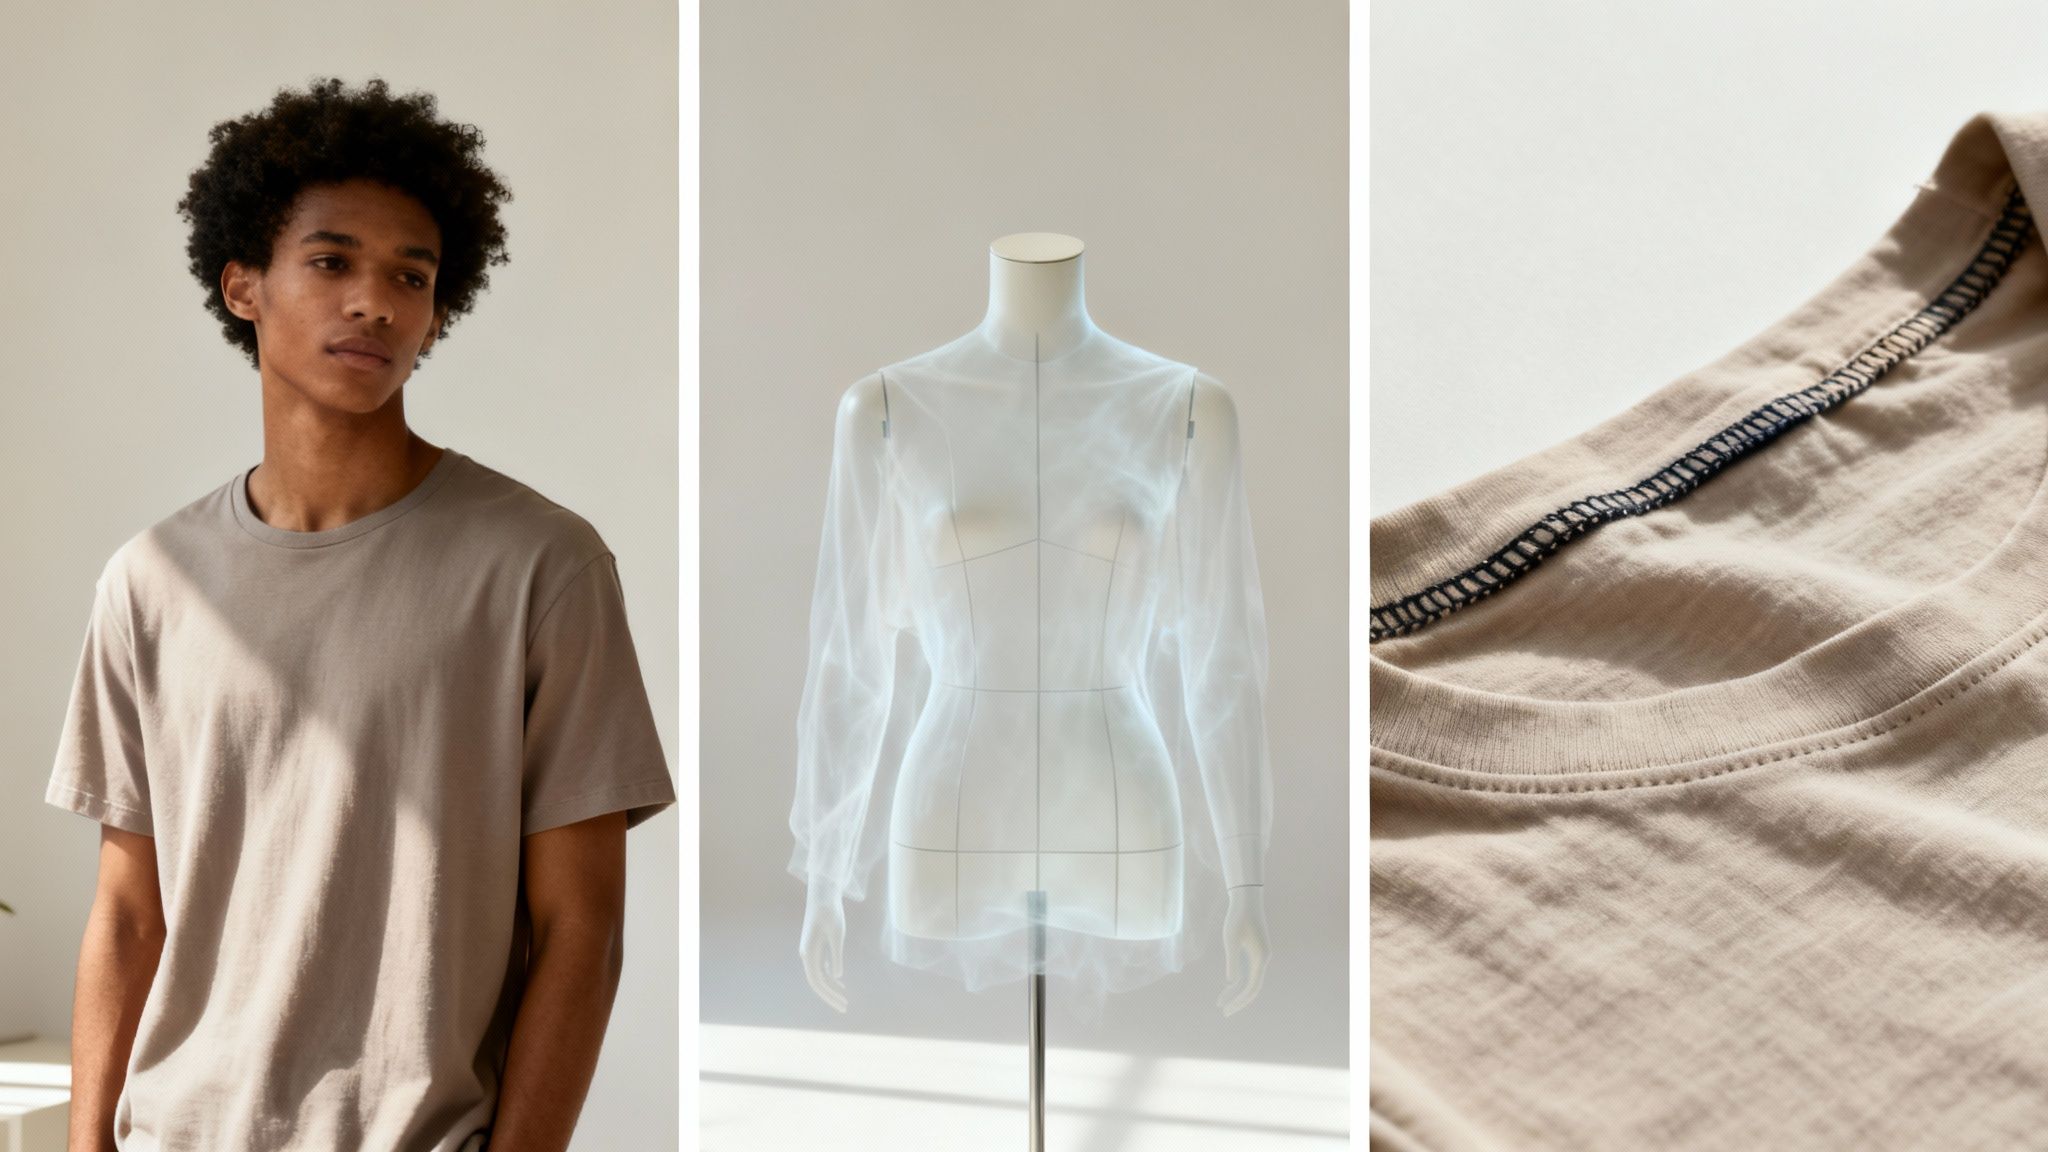
This modern approach to apparel product photography isn't about one single style; it's a blend. A solid visual strategy needs to include a few key elements:
- On-Model Photography: This is non-negotiable. It shows how the garment actually fits, drapes, and moves on a real person, giving crucial context for size and styling.
- Ghost Mannequin Shots: These create a clean 3D effect that highlights the garment’s structure and interior details without the distraction of a model.
- Detailed Flat Lays: These shots focus on the small details that communicate quality — the texture of the fabric, the precision of the stitching, or a unique button.
Combining these shot types gives a complete, 360-degree view of the product. It’s the industry benchmark because it builds shopper confidence and, crucially, cuts down on returns.
How AI Makes High-Volume Photography Affordable
Producing this kind of high-quality, varied content used to mean a significant investment in photographers, models, and studio time — a huge barrier for emerging labels.
AI-powered tools like Picjam are leveling the playing field. A brand can now take one simple product shot and, within minutes, generate an entire suite of diverse, on-model visuals. This isn't a small tweak; it's a dramatic cut in both cost and time. Suddenly, it’s possible to create high-converting imagery for every single product, not just the bestsellers.
By automating the heavy lifting of asset creation, AI allows brands of any size to adopt the same visual strategies as the industry giants. It helps transform a simple product catalog into a dynamic, engaging storefront.
How to Plan a Photoshoot That Actually Saves You Money
A successful apparel product photography shoot is won long before anyone picks up a camera. The most impactful, cost-effective productions are built on a rock-solid plan.
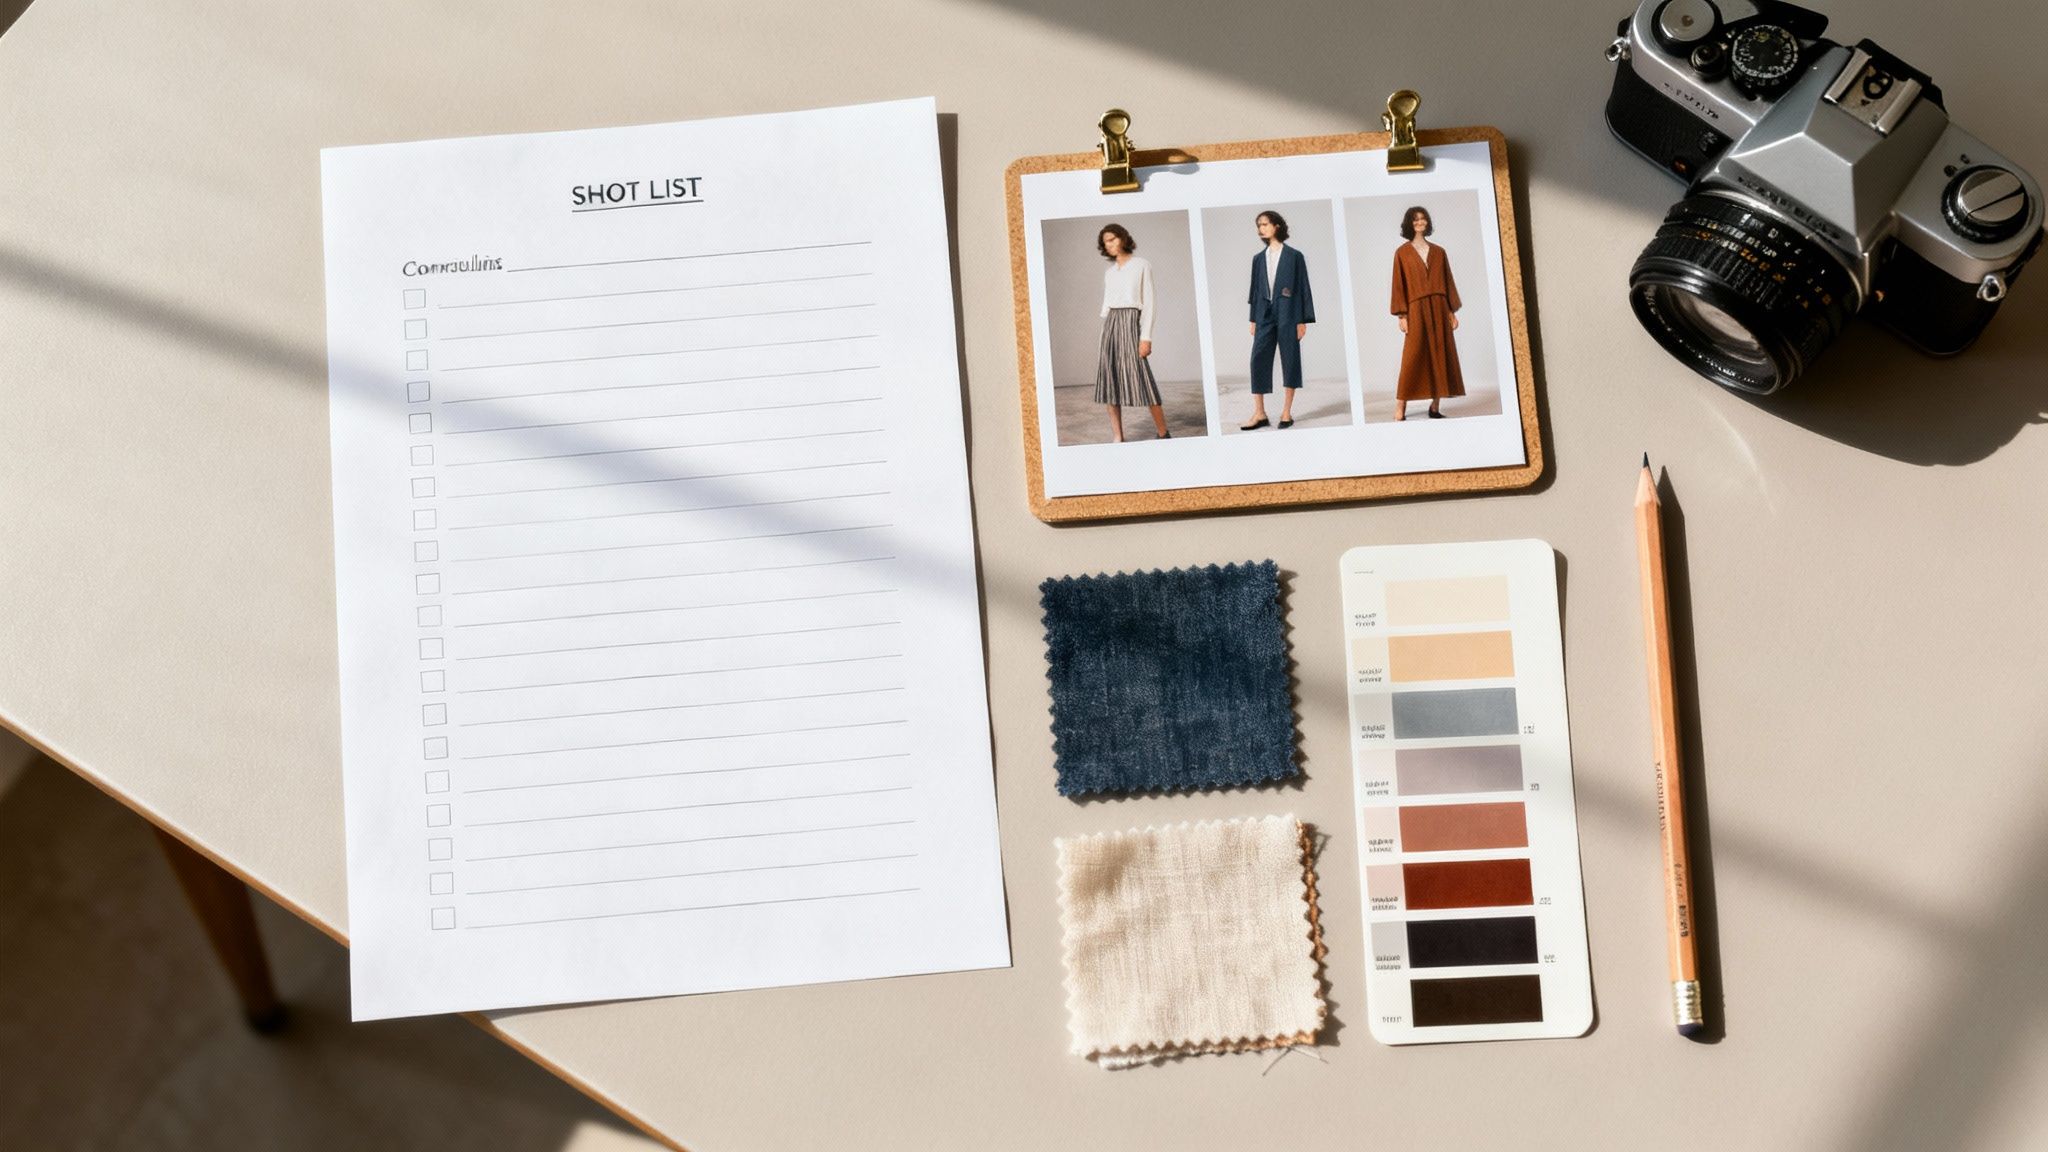
Before booking a studio, 3 documents are non-negotiable: a comprehensive shot list, an inspiring mood board, and a clear vision for your model and styling.
Get these right, and every minute on set is productive. Every photo that comes out of it will perfectly align with your brand.
The Anatomy of a High-Converting Shot List
Think of your shot list as the architectural blueprint for the entire shoot. It's a granular checklist that guarantees you capture every angle and detail needed to turn a casual browser into a paying customer.
A bulletproof shot list for any e-commerce brand should always include:
- Standard Angles: Front, back, and both sides are the bare minimum. Adding a 45-degree angle shot does wonders for showing dimension.
- Detail Shots: Get close-ups of unique fabric textures, custom buttons, or intricate stitching. Brands like Everlane are masters at this, using macro shots to communicate a premium, tactile feel.
- Fit and Movement: If you're shooting on-model, show how the garment actually lives and moves. A simple walk or a shot of someone sitting can say more about fit than a dozen static poses.
For a deeper look, our guide on setting up a professional e-commerce shoot studio{:target="_blank"} shows you how to organize your space to nail every item on your list.
Why a Mood Board is Your Creative North Star
A mood board is your visual north star. It’s a strategic tool that gets your entire creative team — from photographer to stylist to model — on the exact same page.
A truly useful mood board should clearly define:
- Lighting Style: Are you going for that bright, high-key commercial look, or something more editorial with dramatic shadows?
- Posing and Attitude: Collect examples of poses that reflect your brand's personality. Is it confident and powerful like Nike, or more relaxed and approachable like Madewell?
- Color Palette and Props: Lock down the background colors and any props you plan to use. The golden rule here is to use elements that elevate the product, not distract from it.
How AI Streamlines Photoshoot Planning
The old way meant locking in models, scouting locations, and sourcing physical props for every single look. It locks you into a creative direction that's expensive to pivot away from.
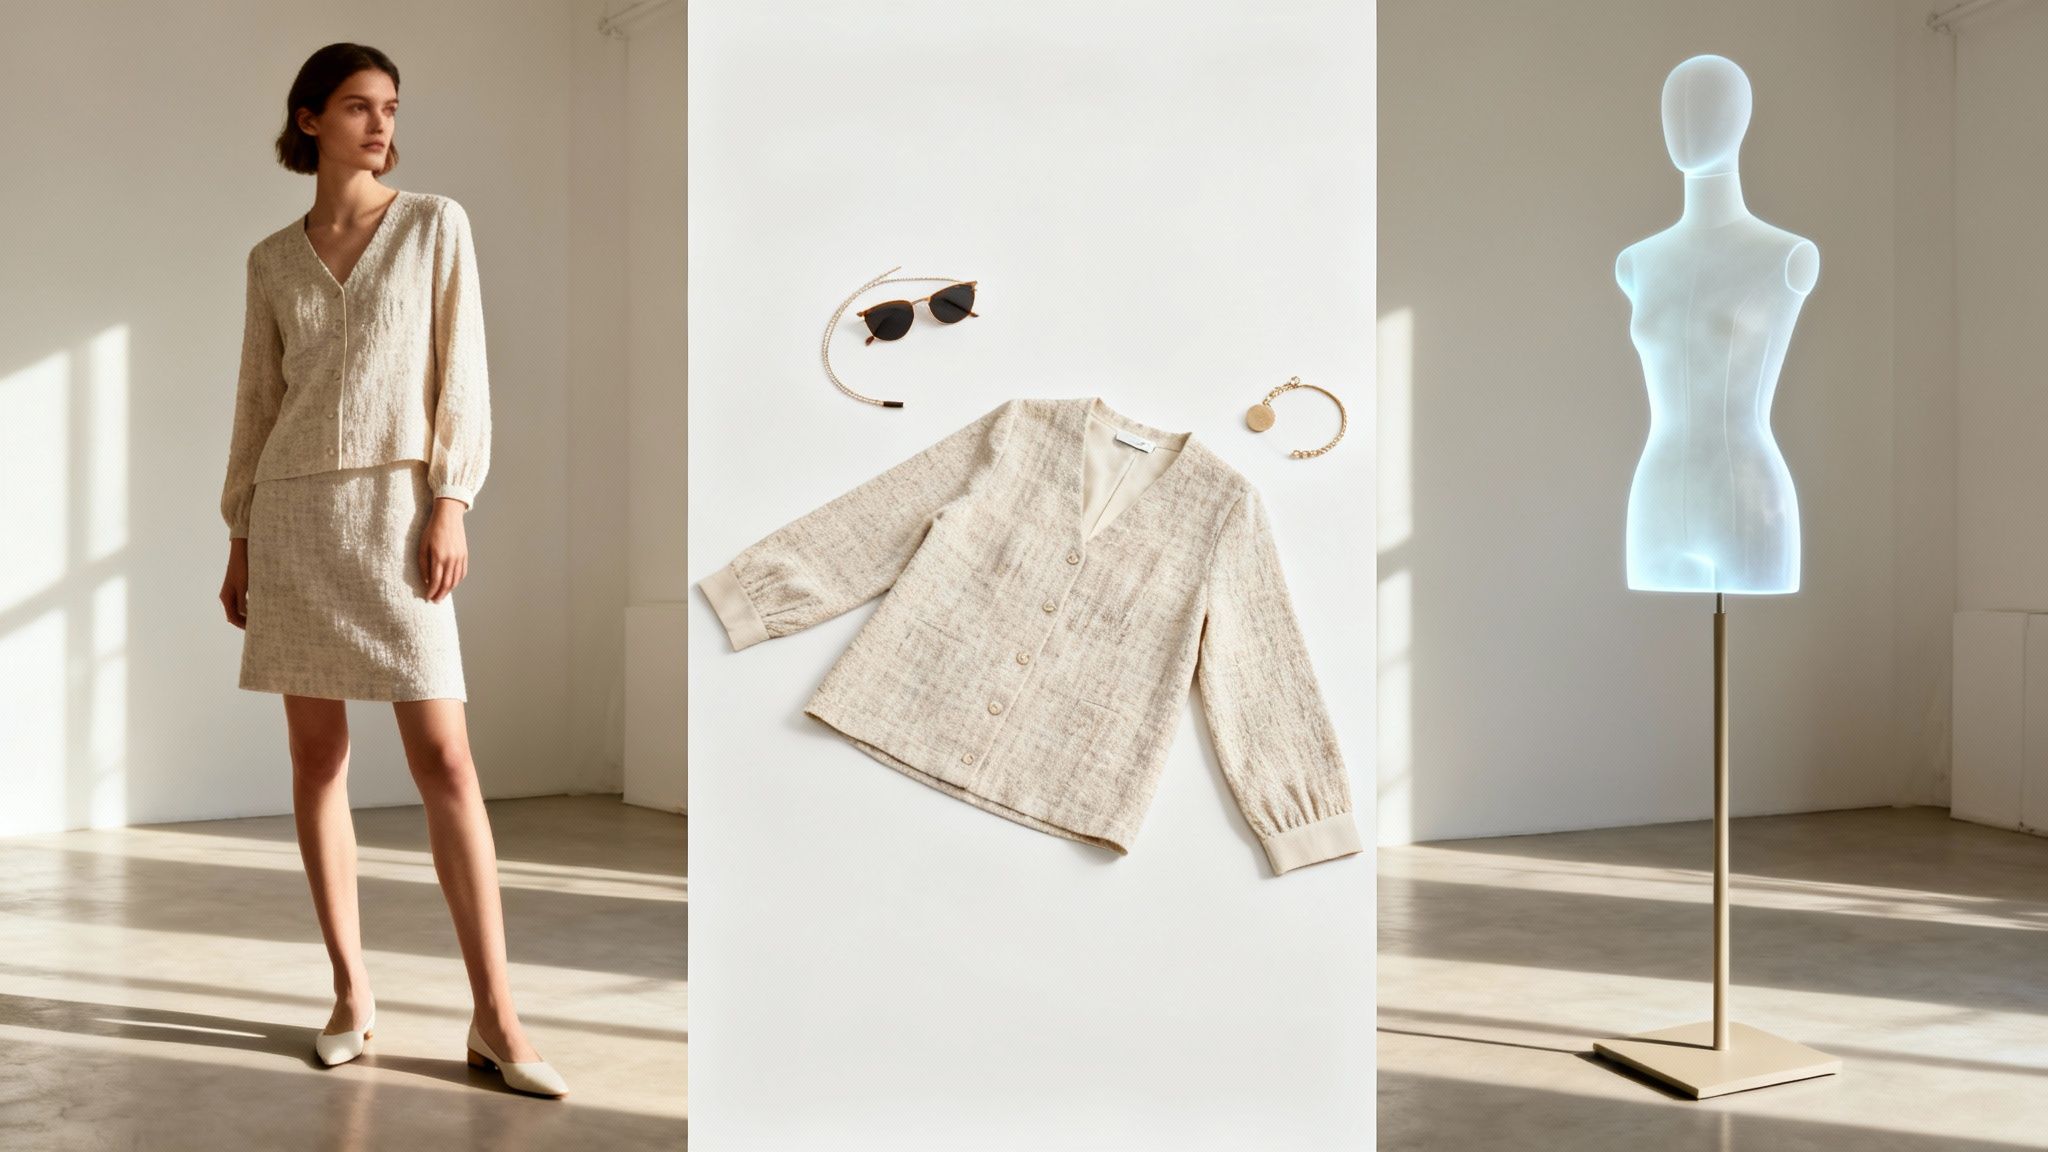
This is where AI-driven platforms like Picjam change the game. Instead of booking a human model and location for a full day, you can plan for a simple, perfectly lit studio shot of the garment on a mannequin. "Model selection" and "location scouting" happen later, virtually.
This AI-assisted approach introduces a new level of flexibility and savings. From a single base image, you can generate hundreds of on-model variations with different virtual models, poses, and backgrounds. This slashes logistical complexity and the $200 to $500 per hour cost of professional photographers and models.
Mastering Core Apparel Photography Techniques
The best online stores don’t just show a product; they build a visual argument for it. They do this by strategically blending on-model shots, clean flat lays, and informative ghost mannequin photos.
According to one recent study, a staggering 95.6% of fashion e-commerce brands rely on model photography to give their pieces context. What’s more, 76.1% of brands consistently use a mix of photography styles to give shoppers the full picture. It's all in this detailed fashion photography report{:target="_blank"}.
This variety is your best defense against abandoned carts and expensive returns. Let's get into the nitty-gritty of how you can master each of these essential apparel product photography styles.
Photography Technique Comparison for Apparel Brands
Understanding where each technique shines will help you allocate your budget more effectively. This table gives you a quick overview of what each style is best for.
On-Model Photography: Selling a Vibe, Not Just a Product
On-model shots are your heavy hitters. They instantly answer the customer's biggest question: "How will this actually look on a person?" Brands like Zara and Nike have built empires on this.
Their model photography is never static. A Zara model is caught mid-stride on a bustling city street, showing how that coat moves. A Nike athlete is frozen in a moment of action, proving the flexibility of the gear.
Getting that energy means directing your model effectively.
- Prompt Natural Movement: Ditch the stiff, catalog poses. Ask your model to walk, turn, or laugh. You’re looking for authentic, in-between moments.
- Show Off the Features: Got a dress with pockets? Have the model slip her hands into them. Selling flexible jeans? A shot of the model sitting communicates comfort better than any product description.
The Art of the Compelling Flat Lay
Flat lay photography is where you show off craftsmanship and detail. A good flat lay is clean, graphic, and stops people mid-scroll on Instagram.
The secret to a great flat lay is composition. Use crumpled tissue paper or cotton batting underneath the garment to give it a slight lift. This simple trick prevents it from looking lifeless and hints at how the clothing would drape on a body.
Lighting is also crucial. Use a soft, diffused light source from directly above or at a 45-degree angle. This minimizes harsh shadows and shows off the fabric's texture. We get into more detail in our guide to choosing the best background for clothing photography{:target="_blank"}.
Ghost Mannequin: The Key to Showing Fit and Form
The ghost mannequin technique gives you a 3D, hollow-body effect that perfectly showcases a garment's real shape and structure — all without the distraction of a model.
This is the go-to method for brands wanting a clean, consistent catalog that still gives shoppers a clear idea of how an item is built.
The process involves taking several shots: one of the garment on the mannequin, and then a few more to capture the interior parts (like the back of the collar) that the mannequin hides. In post-production, the mannequin is masked out, creating a seamless, 3D illusion.
How AI Slashes Photoshoot Costs and Timelines
AI is injecting a new kind of efficiency that translates directly into major savings and faster campaign launches for apparel product photography.
Just look at a major player like Levi's. They announced plans to test AI-generated models to supplement their human models, aiming to boost diversity and the sheer volume of content for their online store. This is a huge signal of where the industry is headed.
Platforms like Picjam create a new reality. Instead of budgeting for a complex, multi-day shoot, brands can now snap one perfect studio shot and let AI handle the heavy lifting.
Slashing Traditional Production Costs
Anyone who's managed a traditional photoshoot knows how quickly the costs stack up. AI-powered workflows target these specific expenses:
- Model Fees: Professional models can easily cost $200 to $500 per hour. With AI, you can generate an endless variety of virtual models without recurring talent fees.
- Location and Studio Rentals: A location shoot can cost tens of thousands. AI lets you place your product in those exact settings virtually for a fraction of the cost.
- Stylists and Crew: AI significantly cuts down the need for a large on-set crew. Styling, posing, and environmental context are all generated digitally.
According to McKinsey, AI is expected to add between $150 billion and $275 billion to the fashion industry's operating profits. This growth is fueled by rapid adoption. As you can see in this report on fashion industry trends{:target="_blank"}, about 30% of fashion professionals have already woven AI into their content creation process.
Accelerating Time to Market
Cost savings are great, but in fashion e-commerce, speed is the ultimate competitive edge. The traditional photoshoot process is painfully slow, often dragging on for weeks.
The ability to generate an entire on-model campaign in minutes, not months, is a seismic shift. A brand can get a new product sample in the morning, shoot a simple flat lay by noon, and have a full gallery of on-model, lifestyle images ready for their product page by the end of the day.
This speed unlocks rapid A/B testing for social media ads, email campaigns, and product pages without expensive reshoots.
Generating Limitless Creative Variations
Perhaps the most powerful part of an AI-driven workflow is the ability to generate unlimited visual diversity from a single source image.
Imagine you have a new blazer in 10 colors. Traditionally, you’d shoot each color on a model. Our guide on using an AI product photo generator{:target="_blank"} shows how you can now shoot just one blazer and let AI generate on-model images for all 10 colorways, each with different models and in unique settings.
This scalable approach means even your overlooked products get the same high-quality visual treatment as your bestsellers, lifting the perceived value of your entire catalog.
Optimizing Images for Performance and SEO
Capturing a great photo is only half the battle. The part that turns browsers into buyers happens in post-production. This is where you polish a good image into a high-performing e-commerce asset.
It begins with color correction and consistency. Every photo in a product gallery needs the same lighting and accurate colors. Brands that nail this, like Bonobos, make sure the color a customer sees on screen is exactly what they get in the box.
The Technical Checklist for a Lightning-Fast Site
Once creative touches are locked in, it's time to get technical. This part is non-negotiable because it directly impacts your site's load speed — a massive factor for both customer experience and SEO rankings.
Learning how to optimize website images for faster load times{:target="_blank"} is one of the most impactful things you can do for your conversion rates.
Here's a quick rundown of the essential specs for every image:
- Image Dimensions: A solid standard for product pages is 2000 x 2000 pixels. This gives you enough resolution for a clear zoom feature.
- File Format: WebP is the modern go-to. It delivers fantastic quality at a fraction of the file size of JPEGs or PNGs.
- Compression: This is a delicate balance. Aim to get your main product images under 100 KB if possible.
SEO and Marketplace Rules You Can't Ignore
Smart image optimization is your ticket to getting seen on search engines and marketplaces. This boils down to your file names and alt text.
A file name should be descriptive. Don't use IMG_8475.jpg. A better approach is everlane-womens-linen-shirt-white-front.jpg. Your alt text should do the same in a sentence: "A woman wearing Everlane's white linen shirt, front view."
Selling on different platforms adds another layer. Each marketplace plays by its own strict rules.
- Amazon: They demand a pure white background (RGB 255, 255, 255) for the main image. Your product must also fill at least 85% of the frame.
- Zalando: This platform emphasizes a clean, editorial vibe with consistent on-model styling and lighting.
If you don't stick to these guidelines, your listings can get buried or removed.
Your Top Questions, Answered
Let's tackle some of the most common questions brands have when they start thinking seriously about apparel product photography.
How Many Photos Should I Have Per Product Listing?
Aim for 5 to 8 images for a product page that converts. A solid photo gallery needs to cover all the bases: shots from every key angle (front, back, side), an on-model photo to show how it fits, and a close-up that shows off texture and details.
What Is the Best Background for Clothing Photography?
A clean, neutral background — usually off-white or light gray — is the industry standard. It cuts out noise, makes the product the hero, and keeps your store looking cohesive.
That said, for campaigns or lookbooks, you can break that rule. Contextual backgrounds that align with your brand's aesthetic, like the ones you see from Outerknown, can be incredibly powerful for setting a mood.
Can AI Really Replace Professional Photographers?
AI isn't here to replace photographers; it's here to elevate their work and solve the massive challenge of scaling content. You still need a high-quality, professionally shot source image of your product.
Where AI comes in is taking that one perfect photo and generating hundreds of variations — different models, locations, and styles. This is how brands like Levi's test a huge range of virtual models without crushing overhead. It's not about replacement; it's about transformation.
Takeaway
- Diversify Your Imagery to Tell a Full Story. Move beyond a single shot. Combine on-model, flat lay, and detail photos to answer customer questions about fit, fabric, and quality before they have to ask.
- Use AI to Scale Content, Not Just Cut Costs. Plan for a simple, high-quality base shot of your product. Then, use AI to generate endless on-model variations, allowing you to create campaign-level diversity for every single SKU without the campaign-level budget.
- Optimize Every Image for Performance and SEO. A fast-loading site with well-named images ranks better and converts more customers. Make compression, file naming, and alt text a non-negotiable part of your workflow.
Ready to see how this new approach could transform your budget? Compare your current photography costs with the savings from an AI-powered workflow.
Calculate Your Savings Now{:target="_blank"}

Picjam team
The Picjam team blends AI, product, and creative expertise to eliminate the cost and delay of traditional photography for modern eCommerce brands.