Flat Lay Photography for Clothing: The Complete Brand Guide (2026)
Everything fashion brands need to know about flat lay photography for clothing — including which garments need on-model backup shots and how to turn flat lays into AI-ready assets.
Every scroll stops for a reason. For fashion and apparel e-commerce brands, that reason is almost always a clean, well-composed flat lay. But knowing that flat lay photography for clothing matters and actually executing it consistently—across hundreds of SKUs, season after season—are two very different challenges.
This guide is for brand photographers, e-commerce managers, and creative directors who need more than "use natural light and a white background." You'll find a garment-type framework that tells you which pieces actually photograph well flat and which need supplemental on-model imagery, a complete setup and lighting breakdown, camera settings that maintain consistency across a full catalogue shoot, and—critically—how to position every flat lay you shoot today as a high-value AI-ready asset for tomorrow.
At Picjam, we've worked with 1,200+ brands on product and fashion photography workflows. This guide reflects what we've seen actually move conversion rates, not just what looks good on a mood board.
What Is Flat Lay Photography for Clothing?
Flat lay photography is a shooting technique where garments and accessories are arranged on a flat surface—typically a white seamless, textured fabric, or styled backdrop—and photographed from directly overhead (a 90-degree bird's-eye angle). The camera points straight down, eliminating perspective distortion and creating the clean, editorial look that dominates apparel e-commerce, Instagram content, and lookbook design.
For clothing brands, flat lay photography serves multiple commercial functions: primary product images on PDPs (product detail pages), social content, email campaign headers, lookbook pages, and increasingly, as the input image for AI-powered on-model imagery tools. That last use case is reshaping how brands think about their flat lay investment—more on this in detail below.
Flat lay photography is distinct from ghost mannequin (invisible mannequin) photography, where garments are shaped to imply a body, and from lifestyle photography, where models wear items in contextual settings. Each has its place, but flat lay offers the fastest path from rack to published product image.
The Garment-Type Framework: What Works Flat and What Doesn't
Not all garments photograph equally well as flat lays. One of the most common mistakes brands make is applying a single flat lay approach to their entire catalogue, then wondering why conversion rates vary so dramatically across categories. Here's the framework we use at Picjam:
Tier 1: High-Performance Flat Lays (Works Excellently)
- T-shirts and basic tees: Structured enough to lie flat, minimal draping issues. Steam, fold arms back symmetrically.
- Hoodies and sweatshirts: Excellent flat lay subjects. The ribbed cuffs and hood add natural texture and dimension. Lay hood up for casual, hood folded for clean.
- Denim (jeans, jackets): Inherently structured. Jeans should be flat with inseam visible—don't crumple. Jacket arms out to 45 degrees.
- Knitwear (non-draped): Chunky knits photograph extremely well flat. Show the texture from above.
- Accessories (scarves, belts, hats): Natural flat lay subjects. Style around garments as supporting cast.
Tier 2: Medium-Performance Flat Lays (Works with Effort)
- Blazers and structured jackets: Need careful lapel positioning and collar shaping. Foam or tissue stuffing helps shoulders hold shape.
- Polo shirts and collared shirts: Collar tends to collapse. Use collar stays or light tissue paper to keep collar open.
- Athletic wear (leggings, sports bras): Works flat but often looks better styled with a matching set.
- Button-ups: Button all buttons, position symmetrically. Press before shooting—creases show hard at f/11.
Tier 3: Needs Supplemental On-Model Imagery
- Dresses and skirts: Unless heavily structured (bandage, neoprene), dresses collapse into unreadable shapes. Flat lay as secondary image only.
- Wraparound garments: Draped fabric cannot convey fit. Always supplement with on-model.
- Bodycon and form-fitting styles: Shape is the selling proposition—flat lay destroys it.
- Bias-cut garments: The cut only reads on a body. Flat lay is an aesthetic exercise, not a conversion driver, for these pieces.
The practical implication: if Tier 3 garments make up a significant share of your catalogue, you need an efficient pipeline for generating on-model imagery. That's where flat lay photography and AI tools become complementary rather than competing strategies—covered in depth below.
For more detail on flat lay best practices across all garment types, see Flat Lay for Clothes: The Complete Guide to Flat Lay Fashion Photography.
Equipment and Setup for Clothing Flat Lay Photography
You don't need a studio to shoot excellent clothing flat lays, but you do need specific equipment if you want results that scale.
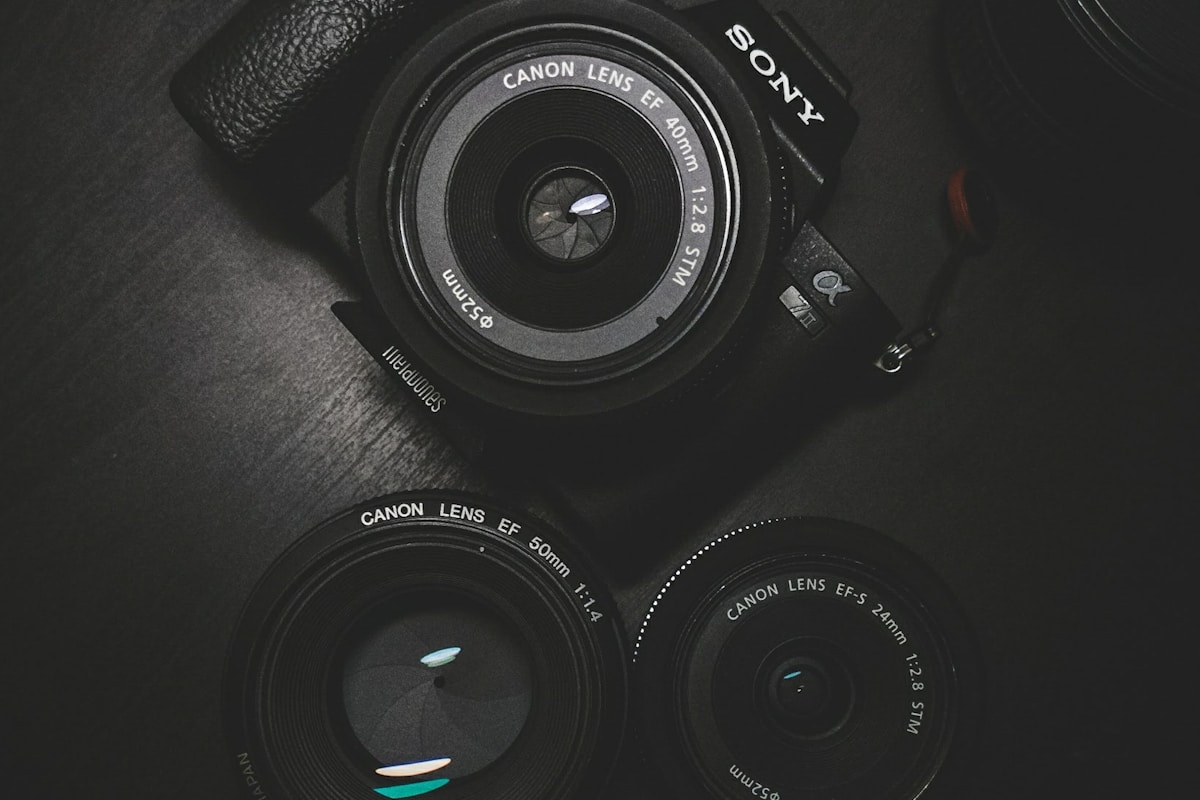
Camera
A full-frame DSLR or mirrorless camera (Sony A7 series, Canon R series, Nikon Z series) gives you the sensor size for clean, low-noise images at the apertures flat lay requires. For high-volume catalogue work, tether to a laptop so you can review at full size immediately. APS-C cameras work but watch noise at ISO 200+ if your light is imperfect.
Lens
A 50mm or 85mm prime on full-frame is ideal. Avoid wide-angle lenses—perspective distortion at the edges will bend garment lines. Macro lenses work beautifully for detail shots of embroidery, buttons, and fabric texture.
Overhead Rig or Boom Arm
A flat lay camera arm (overhead photography stand) is non-negotiable for any serious volume work. Holding a camera overhead by hand introduces tilt inconsistencies that are invisible during the shoot and obvious in post. Brands running more than 20 SKUs per week should invest in a fixed overhead rig.
Surface and Backdrop
White foam board or white seamless paper is standard. Textured backdrops (linen, marble contact paper) add interest but must stay consistent across the shoot—changing backdrops mid-shoot creates editorial chaos. For most DTC brands, white is the right default; it matches the product environment of every major marketplace.
Props and Styling Tools
Steamer (essential), gaffer tape or T-pins for fixing garment position, foam inserts or tissue paper for shaping, and small clips hidden out-of-frame for collar control. Budget for these before you budget for a second lens.
Lighting for Flat Lay Clothing Photography
Lighting is where most brands underinvest. Natural window light is workable but inconsistent—shoot on an overcast day with north-facing windows for the most diffuse, shadow-free result. For any production workflow, artificial lighting gives you control that natural light can't.
The Best Lighting Setup for Clothing Flat Lays
A large softbox positioned high and at 45 degrees from your surface is the workhorse setup. The size of the light source relative to the subject determines shadow softness—bigger is better. For a 60cm × 90cm flat lay area, a 90cm octabox at about 80cm distance is a solid starting point.
Add a second, lower-power fill light on the opposite side (or use a white foam reflector) to open shadows without eliminating dimension entirely. Zero shadows look artificial; natural soft shadows communicate material texture.
Avoiding Common Lighting Problems
- Hot spots on synthetic fabrics: Diffuse more aggressively. Nylon, polyester, and satin catch specular highlights badly.
- Flat, textureless result: Your fill is too strong. Drop it or move it back.
- Colour casts: Set a custom white balance from a grey card. Never trust Auto WB across a catalogue shoot.
Watch the video below for a practical demonstration of a flat lay lighting setup for e-commerce clothing:
Steaming, Prep, and Styling
The single highest-impact action you can take to improve flat lay quality is steaming every garment immediately before it hits the surface. Wrinkles that look minor in-hand become major distractions at f/11 from overhead. Budget 3–5 minutes per garment for prep, and schedule steaming as a dedicated step in your production workflow—not something that happens on-the-fly.
Garment Prep Checklist
- Steam thoroughly, paying attention to collar, cuffs, and any seam intersections
- Allow 2 minutes for fabric to cool and settle before positioning on surface
- Remove any loose threads, lint, or tags visible from above
- Check for fabric pills with the overhead light at a low angle before shooting
- For knitwear: block if necessary, then dry flat before shooting
Styling Principles
Symmetry signals professionalism. Both sleeves at the same angle, collar perfectly centered, hem straight. Styled imperfection (a deliberately folded cuff, an artfully placed belt) only works when the underlying garment is perfectly presented. Start from perfect symmetry, then add one intentional styling decision.
Camera Settings for Flat Lay Clothing Photography
Consistency across a catalogue shoot matters as much as quality for any individual shot. Here are the settings to lock in:
- ISO: 100–200. Keep it as low as your lighting allows. Any higher introduces noise in solid-colour fabric areas that's expensive to retouch.
- Aperture: f/11 to f/16. You want everything in the flat plane to be in focus. The garment is your plane—you don't want selective focus drawing attention to one section.
- Shutter speed: Adjust to exposure with your ISO and aperture locked. Use a cable release or 2-second timer to eliminate any camera shake.
- White balance: Custom, set from a grey card at the start of the session. Don't touch it until you change your light.
- File format: RAW always. JPEG for a catalogue shoot locks in choices you'll regret in post.
- Focus mode: Single-point AF on the center of the garment, or manual focus locked in.
For a deeper look at how a fashion brand built a consistent flat lay system, read A Fashion Brand's Guide to Flat Lay Photography That Sells.
Can You Use a Phone for Flat Lay Clothing Photography?
Yes—with caveats. Modern flagship phones (iPhone 15 Pro, Samsung Galaxy S24 Ultra) produce excellent flat lay results in good light, particularly at the wide or standard lens. Avoid the ultrawide lens for the same reason you avoid wide-angle lenses on a DSLR: edge distortion.
Use a tripod and a remote shutter or timer. The biggest limitation of phone flat lay photography isn't image quality; it's workflow consistency. Without RAW + tethering, maintaining colour consistency across hundreds of shots is harder. For brands shooting under 50 SKUs per season, a phone workflow is entirely viable. For catalogue-scale brands, the investment in a proper overhead rig pays back in retouching time within a single shoot.
Flat Lay Photography as an AI Asset: The 2026 Workflow
This is the section that will matter most to brands planning their photography investment in 2026. The relationship between flat lay photography and AI-generated imagery has shifted from "interesting experiment" to "standard operating procedure" for forward-thinking e-commerce brands.
Here is the core idea: a well-shot flat lay is not just a product image. It is an AI-ready input file. Every garment you photograph cleanly flat—with consistent lighting, a neutral background, and sharp fabric detail—is ready to be placed on a diverse range of AI-generated models at a fraction of the cost of a traditional on-model shoot.
Why Flat Lay Quality Directly Determines AI Output Quality
AI on-model tools (including Picjam) use your flat lay image to extract garment details: colour, pattern, texture, construction, and silhouette. The better your flat lay, the more accurately the AI can reconstruct those details on a virtual model. Specific elements that matter:
- Clean background: A pure white or grey background makes garment extraction cleaner. Textured or busy backgrounds create edge artefacts in AI-generated outputs.
- Sharp fabric detail: AI needs texture data. Flat, low-detail images produce flat-looking AI outputs. The same depth of field that makes for a great catalogue image (f/11–f/16) gives AI models the texture data they need.
- True colour representation: Custom white balance isn't just for your PDPs—it's for AI accuracy. If your flat lay has a warm cast, your AI-generated models will be wearing garments in the wrong colour.
- Full garment visibility: Avoid styling choices that fold key construction details out of frame. AI needs to see the full garment to reconstruct it accurately, including hem, cuffs, and any surface details.
The Hybrid Flat Lay + AI Workflow
The workflow that 1,200+ Picjam brands are using in 2026 looks like this:
- Shoot all new season garments as flat lays using the framework above. This produces the base catalogue image and the AI input file simultaneously.
- Tier 1 garments (tees, hoodies, denim)—flat lay is primary image. Use AI on-model as a secondary PDP image or social variant.
- Tier 3 garments (dresses, draped styles, bodycon)—flat lay is secondary image. Use AI on-model as primary PDP image, since fit and silhouette are the selling proposition.
- Generate on-model variants across diverse model demographics from the same flat lay input, enabling a level of representation that traditional shoots can't achieve at DTC budgets.
- Seasonal refresh: When you re-merchandise existing inventory, regenerate AI on-model images against the same flat lay file. No re-shoot required.
This workflow compresses a two-phase shoot (flat + on-model) into a single flat lay session, with AI handling the on-model generation downstream. The cost differential is significant: a traditional on-model shoot for 50 garments typically costs $3,000–$8,000 inclusive of talent, studio, and post. AI-generated on-model imagery from clean flat lays costs a fraction of that.
See how to execute this workflow in practice: Flat Lay to Model AI: How to Turn Product Photos On-Model.
Flat Lays as AI Training Data
An emerging use case: flat lay imagery as a consistent input for brand-specific AI model fine-tuning. Brands that maintain a large, consistent library of flat lay images—same lighting, same background, same angle across thousands of garments—are positioned to fine-tune AI tools on their specific aesthetic. The output isn't just efficient; it's brand-coherent in a way that generic AI generation cannot match.
This is a 2026 opportunity, not a 2023 one. The tools that enable brand-specific fine-tuning are now accessible to DTC brands without enterprise budgets. If you're building a photography library today, build it with AI-readiness in mind.
ROI Analysis: Flat Lay + AI vs. Traditional On-Model Shoots
For brands evaluating whether to invest in flat lay infrastructure or maintain a traditional on-model shoot schedule, the numbers are increasingly clear:
| Approach | Cost per 50 SKUs | Time to publish | Revision cost |
|---|---|---|---|
| Traditional on-model shoot | $3,000–$8,000 | 2–4 weeks | Re-shoot required |
| Flat lay only | $500–$1,500 | 3–5 days | Minimal re-shoot |
| Flat lay + AI on-model (Picjam) | $800–$2,000 | 3–5 days + 24h AI | Re-generate at near-zero cost |
The flat lay + AI approach closes most of the gap with traditional on-model photography while retaining the flexibility of flat lay production. For growing brands with limited photography budgets, this is the most capital-efficient path to a complete imagery library. Learn more about Understanding Product Photography Cost in 2026.
Ready to explore the flat lay + AI workflow? See Picjam's pricing for options that fit DTC to enterprise teams.
How to Make Your Flat Lays Look Interesting
A technically correct flat lay is not automatically a compelling one. Here are the principles that separate flat lays that convert from ones that just catalogue:
- The rule of supporting elements: One prop maximum per flat lay (a watch, sunglasses, a folded magazine). More than one becomes visual noise. The prop should relate to the garment's use case, not just be "on-brand."
- Negative space is active: Empty surface area isn't wasted—it pulls focus to the garment. Overstuffed flat lays compete with themselves.
- Texture contrast: Placing a knit hoodie on a smooth marble surface creates visual interest. Placing it on a textured linen background competes. Match your backdrop to the garment's surface character.
- Diagonal placement: Rotating the garment 15–30 degrees from the horizontal adds dynamism without looking over-styled. Perfectly horizontal/vertical reads as catalogue; slight diagonal reads as editorial.
- Partial reveal: A second garment or accessory entering the frame from the edge, partially cropped, implies a larger world and is a proven Instagram engagement technique.
Frequently Asked Questions
How do you photograph clothing flat lays to look clean and professional?
Steam every garment immediately before shooting and allow it to cool on the surface before releasing. Use a white foam board or seamless paper backdrop, set your camera to f/11–f/16, ISO 100–200, and shoot from directly overhead using a fixed camera arm or boom. Custom white balance from a grey card, shoot in RAW, and tether to a laptop to review at 100% before moving to the next garment. The difference between amateur and professional flat lay photography is almost always steaming quality and lighting consistency, not camera equipment.
What is the best lighting for flat lay clothing photography?
A large softbox (90cm or larger) positioned at 45 degrees above the surface with a white foam reflector or secondary low-powered fill on the opposite side. This produces the soft, directional light that shows fabric texture without harsh shadows. For brands shooting without studio equipment, an overcast day beside a large north-facing window approximates this setup. Avoid direct sunlight—it creates hard shadows that flatten fabric detail and are inconsistent as the sun moves.
How do I make my flat lays look interesting?
Start from perfect technical presentation (symmetry, steaming, correct exposure), then add one intentional styling decision: a relevant supporting prop, a diagonal placement angle, or a partial second element entering the frame from the edge. Interesting flat lays are always technically correct first. Styling over a poorly steamed garment or inconsistent background doesn't save the image—it draws attention to the problems.
What camera settings are best for flat lay photography?
ISO 100–200, aperture f/11 to f/16, shutter speed adjusted to correct exposure with those settings locked. Use a cable release or 2-second self-timer to eliminate camera shake. Shoot RAW, set custom white balance from a grey card, and use single-point autofocus on the center of the garment. Lock these settings and don't change them across the shoot unless you change your light source—consistency across a catalogue shoot is as important as quality in any individual image.
Can you use a phone for flat lay clothing photography?
Yes. Modern flagship phones produce excellent flat lay results in good light—use the standard (1×) lens, avoid ultrawide. Fix the phone above the surface on a tripod and use a Bluetooth remote shutter or self-timer to eliminate camera shake. Enable RAW capture if available (ProRAW on iPhone). The main limitation isn't image quality; it's workflow consistency and tethered review. For brands shooting under 50 SKUs per season, a phone flat lay workflow is entirely viable.
What is flat lay photography used for?
Primarily e-commerce product images on PDPs (product detail pages), where the clean overhead angle shows garment details without the distraction of a model. Also used for social content (Instagram, Pinterest), email campaign headers, lookbook pages, and wholesale catalogue imagery. Increasingly in 2026, flat lay photography is used as the input image for AI on-model generation tools—producing diverse, on-model lifestyle imagery from a single flat lay source file without the cost or logistics of a traditional model shoot.
The Flat Lay Photography Pre-Shoot Checklist
- Camera overhead, level, and secured to rig
- Settings locked: ISO 100–200, f/11–f/16, custom WB, RAW
- Backdrop clean, no creases or debris
- Garment steamed, cooled, positioned symmetrically
- Collar, cuffs, hem all visible and styled intentionally
- Lighting consistent from previous setup check
- Tether active and laptop reviewing at 100%
- No visible pins, tape, or support structures in frame
Next Steps: Building a Flat Lay System That Scales
Flat lay photography for clothing is a repeatable process once you build the right system. The garment-type framework in this guide—Tier 1 through Tier 3—makes the decision-making explicit so you can delegate it without quality dropping.
The brands seeing the best results from flat lay photography in 2026 are treating every shoot as a dual-purpose session: product imagery for today and AI-ready input files for on-model generation tomorrow. That means the investment in a proper setup, consistent settings, and clean execution pays double.
If you're building a flat lay workflow and want to understand how it connects to AI on-model generation, start with Flat Lay to Model AI: How to Turn Product Photos On-Model—it covers the exact steps from flat lay file to published on-model imagery using Picjam.
Michael Pirone
Co-Founder