Fit Model Measurements: The Complete Reference Guide
Fit model measurements explained with charts, exact landmarks, garment-specific ranges, measurement protocol, and AI sizing trends for apparel e-commerce teams.
By Michael Pirone, Founder of Picjam & Vidico
If your fit process keeps breaking after the first sample, the problem is usually not the pattern alone. It is the measurement system behind it.
Most brands do one of two things wrong. They reduce fit-model measurements to bust, waist, and hip, or they rely on a model who is visually close to the base size but off at the landmarks that actually control the garment. That is how teams approve a sample in the studio, then lose consistency once grading, sourcing, and ecommerce sizing all have to work from the same data.
Fit-model measurements are not a casting detail. They are a technical reference for product development. When the measurement method is consistent, the base size is clear, and fit notes are tied to named landmarks, teams move faster and make cleaner decisions.
Recent apparel guidance still points to the same practical standard: garment-specific landmarks matter, fit sessions need documented workflows, and tolerance bands can be tight before production, depending on category and control point (SAGE apparel fit guidance).
What a Fit Model Actually Does in Apparel Development
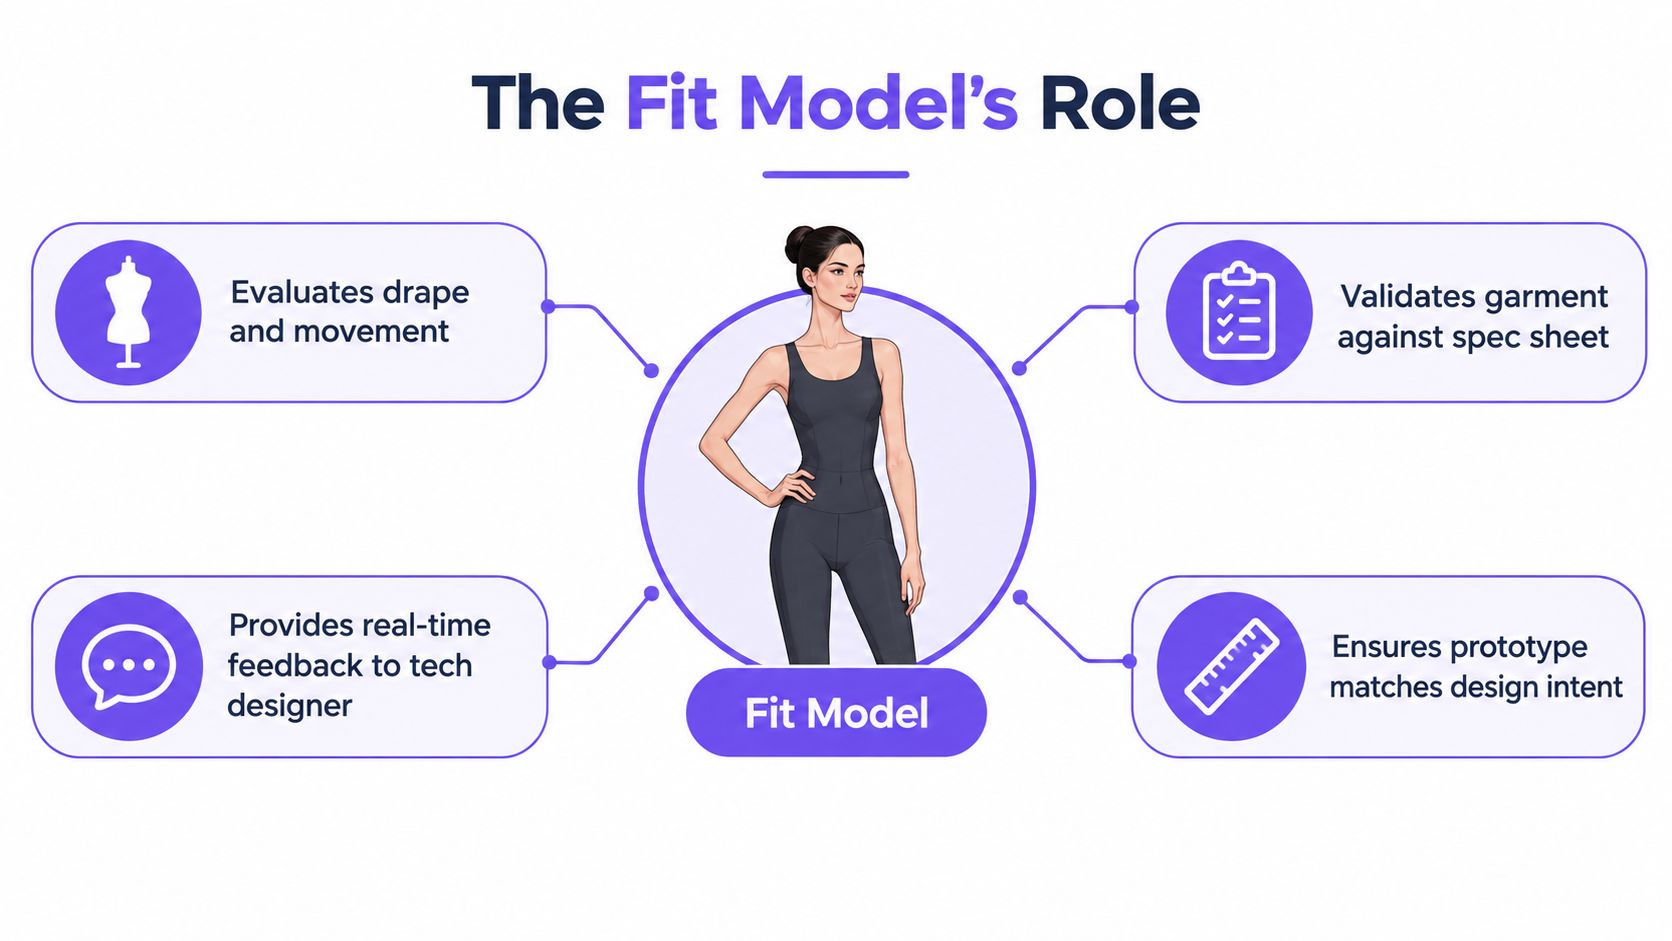
A fit model is the live body a brand uses to evaluate a garment against its base size.
In a fit session, the goal is not appearance. The goal is to check balance, ease, length, strain, proportion, and movement on a body that matches the block the brand is building around. The outcome of that session affects specs, grading, fit comments, and eventually the size chart the customer sees.
That is why fit-model selection is tied to grading strategy, not just sample-room convenience (University of Minnesota fit research).
The 3 roles teams usually confuse
Different stages of development need different bodies and different checks.
- Prototype fit models are used early to review silhouette, construction, mobility, and overall balance.
- Size-set fit models are used later to validate grading decisions across the size run.
- Digital fit models can support 3D workflows, but only when the body data and garment targets are accurate.
If your team treats all three as interchangeable, approvals get slower and fit feedback gets less reliable.
Why a live body still matters
Dress forms help with setup and visualization. They do not replace live fit approval.
A live body shows what static forms cannot: breathing change, soft-tissue compression, posture shifts, shoulder roll, seat shape, and the way a garment reacts during movement. Those factors are often what expose issues in trousers, woven shirts, tailored jackets, close-fit dresses, and other shape-sensitive categories.
Practical rule: If closure, movement, recovery, or balance matters, approve the garment on a live fit model before finalizing the sample.
It also helps to separate runway sizing references from fit specifications. Industry guides often cite runway measurements for context, but those numbers are not a usable fit standard for product development (GetModel measurement guide).
How Sizing Standards Shaped Modern Fit Model Selection
Fit-model measurement practice comes from apparel standardization, not intuition.
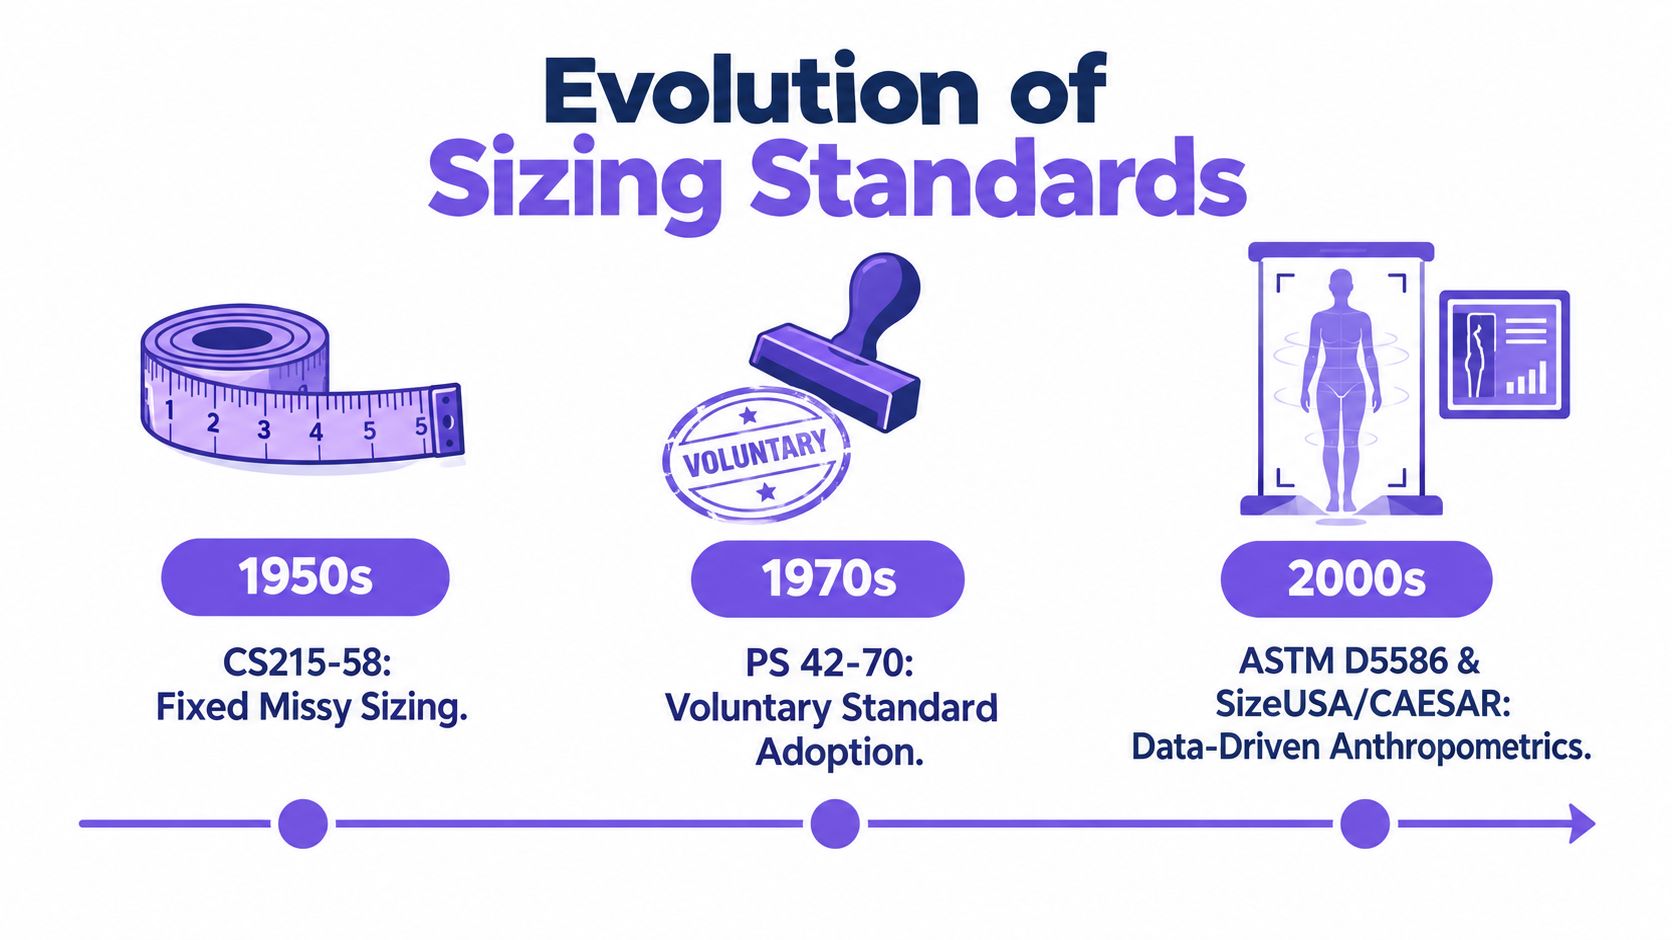
A University of Minnesota paper on body-garment fit notes that only 6 major anthropometric sizing surveys were conducted in the U.S. over 75 years, spanning 1941, 1988, 1990, 1993, 1998, and 2002. It also cites the 1958 voluntary women's apparel standard CS215-58, which used 9 sizes with bust ranges from 30.5 inches to 43 inches. NIST's apparel measurement work then helped formalize standard body dimensions for apparel sizing (NIST apparel measurement work).
Why standards matter in the sample room
If measurement landmarks are not defined, two teams can measure the same body differently and both believe the data is correct.
That is one reason ISO 8559-1:2017 and ISO 8559-2:2017 matter. They provide a shared framework for body measurement and garment dimension definitions, which helps brands, pattern teams, and suppliers work from the same reference points (ISO 8559 standards).
In practice, this means the fit team should document specific body landmarks and the garment dimensions expected to sit on those landmarks. That is more useful than shorthand like "size 8" or "standard medium."
What works and what fails
What works is a standards-based approach:
- choose a fit model that matches the target base size and block
- define landmarks clearly
- measure the same way every time
- connect body data to garment specs and fit comments
What fails is intuitive casting. A model can look right in a meeting and still be wrong for the block if shoulder width, rise, torso length, or posture do not match the brand's fit target.
A fit model is only useful when the body, the measurement method, and the target garment dimensions all align to the brand's size strategy.
The Complete Fit Model Measurement Reference
Most teams do not lose fit accuracy because they collect too much data. They lose it because they collect too little, or they record measurements without enough landmark detail to repeat them.
Standardized body-measurement guides use a much fuller map than the basic bust-waist-hip set, including underbust, shoulder width, back width, torso length, thigh, knee, calf, ankle, and arm measurements (standard body-measurement guide).
That fuller record matters because many fit problems start outside the obvious control points.
Core rules before you start
Before taking measurements, set a few rules that do not change:
- use one unit system for the season, either centimeters or inches
- measure under the correct undergarment conditions for the category
- record height, weight, and posture notes as reference variables
- use the same landmark definitions across all teams and suppliers
Height, weight, and posture are not fit specs on their own. They help explain why two people with similar circumference measurements can still wear the same sample differently.
Fit Model Measurement Reference Table
| Measurement | Landmark / Technique | Unit |
|---|---|---|
| Bust | Measure at the fullest point, level under the arms, tape snug but not tight | cm or in |
| Underbust | Measure directly under the bust fold, level to floor | cm or in |
| Waist | Measure at the natural crease after a normal exhalation | cm or in |
| High hip | Measure around the body approximately 9-10 cm below the waist | cm or in |
| Full hip | Measure the largest circumference at seat level, confirm in standing and seated check | cm or in |
| Shoulder breadth | Measure across shoulder points over the trapezius area | cm or in |
| Across back | Measure horizontally across the back about 8 cm below the neck base | cm or in |
| Front length waist | Measure from collarbone or high point shoulder to natural waist | cm or in |
| Sleeve length | Measure from acromion to wrist with elbow slightly bent | cm or in |
| Inseam | Measure from crotch point to floor along inner leg | cm or in |
| Outseam | Measure from waist to floor along side leg | cm or in |
| Thigh | Measure at the largest point, about 1 cm below the gluteal fold | cm or in |
| Knee | Measure around the knee at mid-patella | cm or in |
| Calf | Measure at the largest part of the calf | cm or in |
| Ankle | Measure at the narrowest point above the ankle bone | cm or in |
| Neck | Measure around the mid-cervical area with 2-finger ease | cm or in |
| Height | Barefoot, standing straight against a wall or stadiometer | cm or in |
| Weight | Record for control reference only, not as a fit determinant | kg or lb |
| Posture notes | Record shoulder pitch, pelvic tilt, sway back, forward head, or asymmetry | text note |
One useful cross-check
Footwear assumptions affect hem behavior, trouser break, and overall lower-body balance. If your category includes trousers, dresses, or long coats, it helps to keep shoe assumptions consistent during fit review. A practical companion reference is the sizing advice from Vivien Lauren, especially when heel height or foot volume changes how the garment sits.
Standard Measurement Ranges by Size Category
Brands often make a simple sourcing mistake. They compare a fit-model candidate to generic model standards instead of to the actual fit slot in the size range.
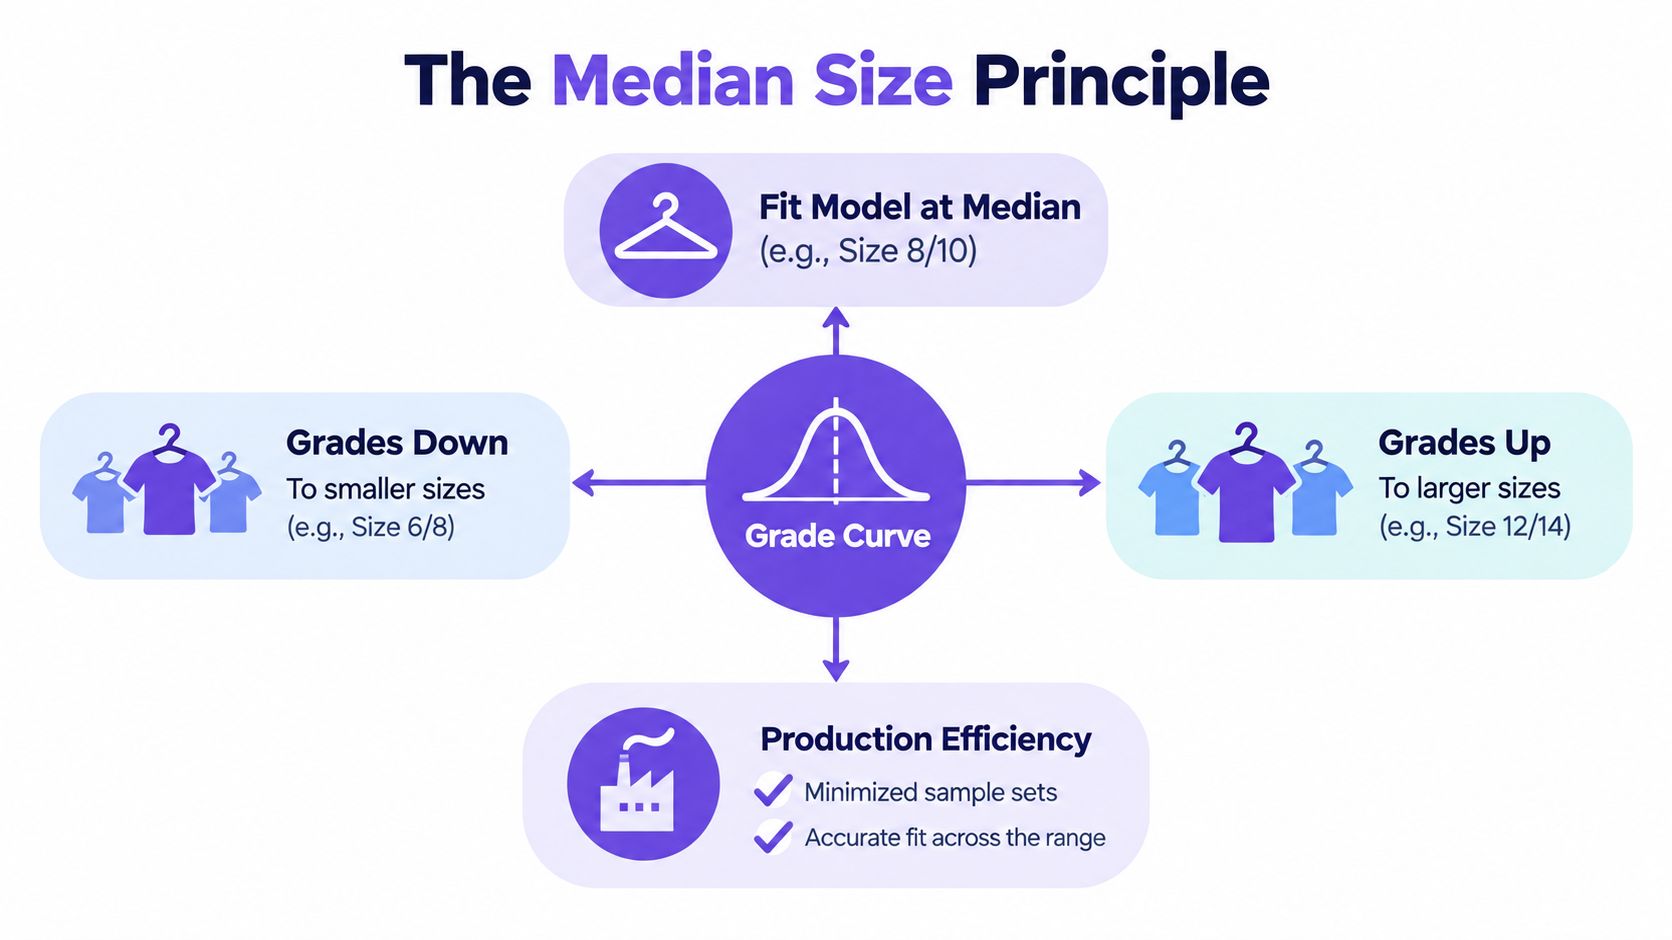
Fit-model selection is usually anchored to the center of the range. One apparel industry explanation notes that manufacturers often fit the median size of the line, then grade up and down from that point. When the range contains an even number of sizes, the fit size is often the smaller of the 2 middle sizes (Petite Poire on fit-model proportions).
Fit Model Measurement Ranges by Size Category
| Measurement | Women's Range | Men's Range | Unisex Range | Runway (Reference Only) |
|---|---|---|---|---|
| Height | Commercial standards commonly begin around 5'8" to 5'11"; dedicated fit models align to brand base size and block | Common runway guidance is about 5'11" to 6'3"; fit models align to brand block | Usually selected for broader proportional tolerance tied to target customer | Women often around 5'9" to 6'0"; men often about 5'11" to 6'3" |
| Bust / Chest | Dedicated fit models should match the brand's target base size closely, not just a generic fashion standard | Chest usually sits close to the target block; runway references often cite 38-42 inch chest range | Broader tolerance than gendered blocks, especially in casual categories | Women often cited around 34 inches bust; men around 38-42 inches chest |
| Waist | Commercial bodies allow more flexibility than runway; fit models need tighter alignment to size spec | Men's waists often need tighter control because rise and waistband balance fail quickly | Greater tolerance is common if silhouette is relaxed | Men's runway references often cite 30-32 inch waist |
| Hip | Hip alignment matters more in fitted bottoms and dresses than in loose tops | Seat and hip shape affect trouser balance and pocket placement | Depends heavily on garment ease and intended shape | Runway references are less useful here for commercial fit |
| Inseam | Controlled to category and intended shoe assumption | Critical in tailored and straight-leg bottoms | Often more forgiving in oversized silhouettes | Reference only, not a fit target |
| Sleeve | Depends on shoulder point accuracy and posture | Strongly linked to shoulder slope and armhole depth | Often tolerated more loosely in casual or dropped-shoulder blocks | Reference only |
How to read the ranges
Use these ranges as context, not as approval criteria.
The fit model has to match the brand's block closely enough to test drape, ease, movement, and proportion with confidence. If the candidate is off at the controlling landmarks, the team may still get a wearable sample, but the resulting fit decisions will be less dependable.
If a candidate looks right but is dimensionally wrong at the key landmarks, they are the wrong fit model for that category.
How to Take Accurate Fit Model Measurements
A fit process becomes unreliable fast when measurements are taken from different landmarks or under different conditions.
One person measures the waist at the narrowest visual point. Another measures the anatomical waist. Someone else measures over the wrong bra or under a different shoe assumption. The numbers may look close, but the next sample arrives with the wrong balance and the team ends up debating the pattern instead of the body data.
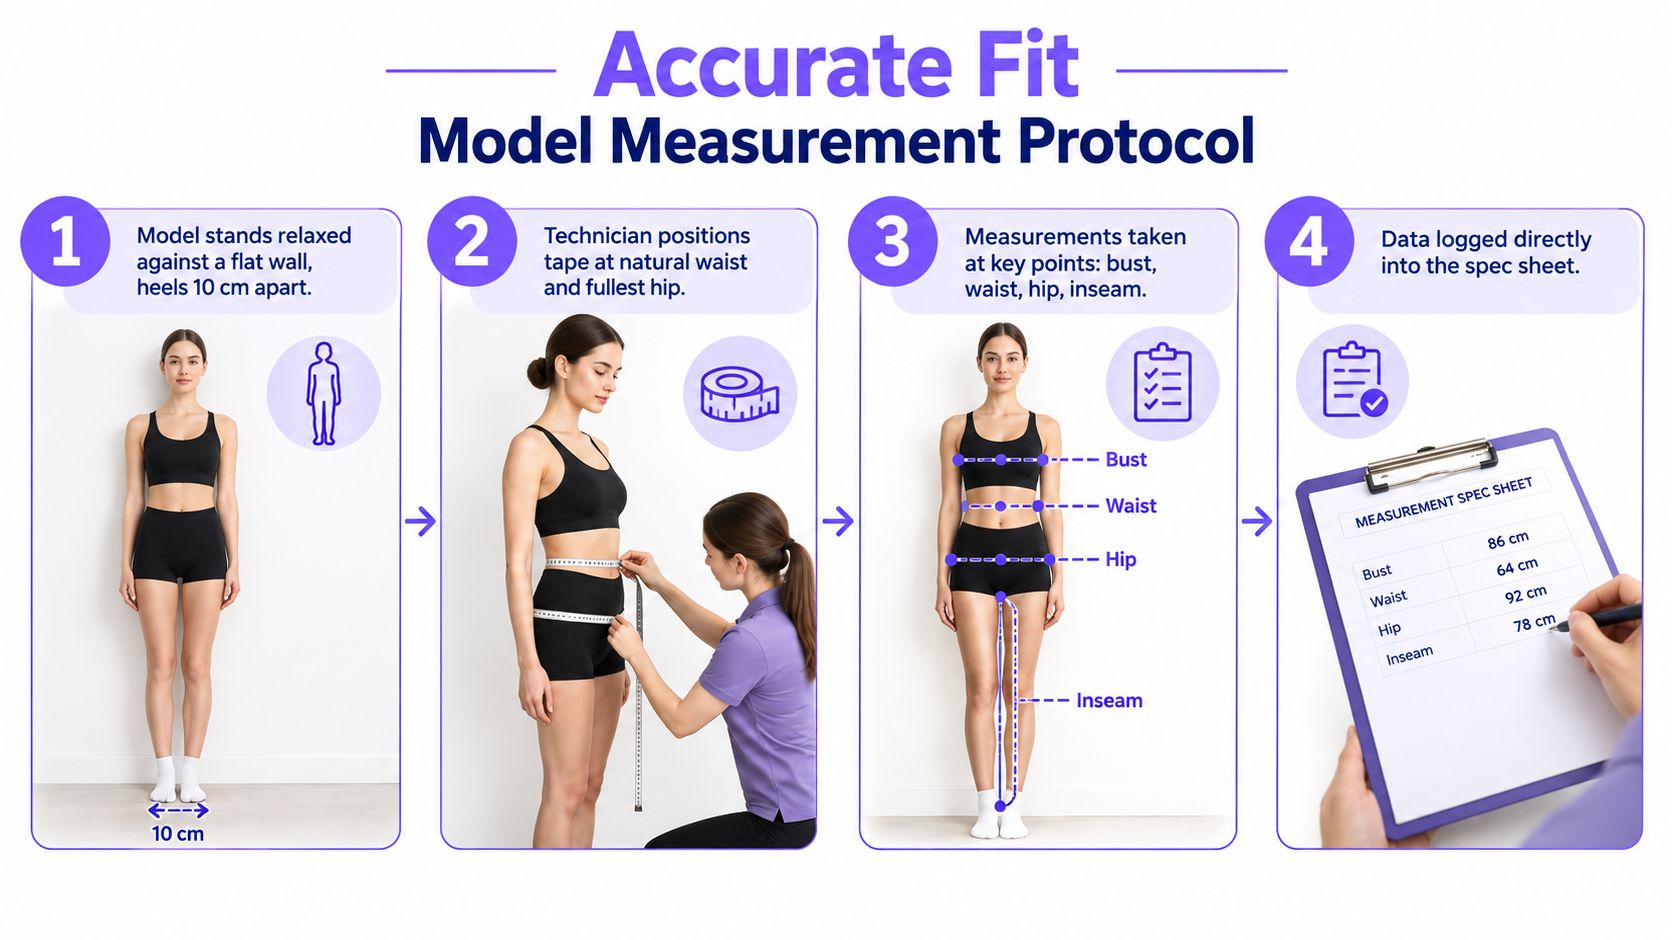
Accurate fit-model measurement is about repeatability. The goal is to collect the same measurements, from the same landmarks, in the same conditions, so the data stays useful from first fit to final spec.
The measurement protocol that holds up in development
Set measurement conditions first
Confirm undergarments, footwear assumption, and garment category before taking any readings. The model should stand relaxed, balanced, and upright, with a neutral head position and natural arm placement.Mark the true landmarks
Use a waist elastic if needed. Identify high point shoulder, shoulder endpoints, bust apex, underbust, high hip, full hip, crotch level, side waist, and any other control points needed for the category. On menswear, confirm neck base, chest, natural waist, seat, and bicep before recording lengths.Measure in a fixed order
Use the same sequence every time, typically upper body, torso, lower body, then lengths. Consistent order reduces omissions and transcription errors.Control tape tension and breathing
The tape should make contact without pressing into the body. Take readings at a normal breath state, not on a deep inhale or forced exhale.Record the condition with the value
A body measurement without context is incomplete. If the bust was taken over a specific bra, or the inseam assumes a certain heel height, log that with the number.
Where technical teams lose accuracy
The first mistake is building ease into the body measurement. Body measurements should stay clean. Ease belongs in the garment spec.
The second mistake is treating every landmark as equally important. That is not how fit works. For a tailored jacket, shoulder point, across back, chest, and sleeve length usually matter more than full hip. For leggings, waist, high hip, full hip, rise, and inseam matter much more than bust.
The third mistake is relying on a single read where the body is difficult to stabilize. Recheck bust, waist, hip, rise, and key verticals when needed. Small inconsistencies there can block a sample even when the rest of the chart looks fine.
For teams training junior staff, Display Guru's measurement guide is a useful plain-language reference. In a production environment, it should be backed by the brand's own landmark definitions, measurement order, and repeatability rules.
Measure the body at fixed landmarks, under fixed conditions, for the garment category being developed. That is what makes fit data usable.
Garment-Specific Measurement Priorities and Tolerances
The important question in fit work is not just what size the fit model is. It is which measurements control the garment, and what deviation is acceptable before the sample needs correction.
Public guidance increasingly reflects that point. Fit work depends on garment-specific measurements such as shoulder width, sleeve length, inseam, rise, front length, and torso length, with tighter tolerance at the most sensitive control points (Robosize on fitting-model measurements).
Garment-Specific Measurement Priorities and Production Tolerances
| Garment | Primary Measurements | Secondary Measurements | Tightest Tolerance | Sample-Blocking Measurement |
|---|---|---|---|---|
| Tops | Across shoulder, bust or chest, sleeve length, upper arm | Front length, across back, neck | Typically the shoulder area because seam placement is hard to hide | Across shoulder |
| Bottoms | Waist, high hip, full hip, rise, inseam, thigh | Knee, calf, outseam | Waist and rise usually drive the hardest stop | Waist |
| Dresses | Bust, waist, high hip, full hip, torso length | Sleeve, shoulder, waist-to-knee length | Waist balance often decides whether silhouette reads correctly | Waist-to-body balance |
| Swimwear | Underbust, torso length, hip | Leg opening, strap length | Usually the smallest tolerance band because recovery is unforgiving | Torso length |
| Outerwear | Chest, bicep, shoulder, sleeve, hem sweep | Back width, collar, closure position | Closure alignment and layered ease tend to fail first | Chest plus closure alignment |
What actually blocks approval
For tops, shoulder accuracy often determines whether the session is productive. If the shoulder point is off, the sleeve hangs incorrectly, the front balance shifts, and the rest of the read becomes less reliable.
For bottoms, waist and rise usually control the outcome. When those are off, pocket placement, crotch shape, and side seam balance become hard to judge.
If your team is reviewing fit alongside product presentation, it helps to keep the technical and visual workflows separate. Body-based fit approval comes first. Visual output comes after. For teams producing ecommerce assets from approved garments, AI fashion photography workflows can support content production once the fit decisions are already locked.
If your team is still relying on forms for early visual review, it helps to compare that process with body-based fitting. clothing design mannequins can support development, but not replace category-specific fit approval on a matched body.
Why Fit Models Anchor to the Median Size of the Range
Most brands do not build around the smallest or largest size. They anchor the fit model near the middle of the size run because it gives grading a more stable starting point.
That approach helps pattern adjustments move up and down the range with less distortion than they would from an endpoint size.
The production reason
Building from the middle reduces accumulated error at the outer sizes. It does not solve every edge-case issue, but it usually creates a cleaner base for grading.
This matters most in categories where proportional changes do not scale evenly, such as fitted denim, custom suiting, bras, or petite trousers. Small mistakes at the base size can become visible problems at the top or bottom of the range.
When to break the rule
Some brands build dedicated petite, tall, or plus-first ranges. In those cases, the base fit model should sit in the middle of that specific range, not in the middle of a standard misses or menswear block.
Median anchoring works best when the size range is coherent. If body proportions change sharply across the run, split the range instead of forcing one base body to carry the whole job.
Human Fit Models Versus AI Measurement Capture
Measurement technology can support fit development, but it does not replace the role of the fit model.
Recent sources describe systems that extract 50-80 body measurements from smartphone photos and measurement widgets used for made-to-measure or custom apparel orders. At the same time, independent guidance still notes that accuracy depends on posture, minimal clothing, correct tape placement, and not adding ease during measurement (AI fit prediction and measurement capture).
Human Fit Model vs. AI Measurement Capture
| Attribute | Human Fit Model + Manual Tape | AI / 3D Body Scan Capture |
|---|---|---|
| Static measurement detail | Strong when technician is well trained | Strong when capture inputs are controlled |
| Movement feedback | Excellent for breathing, reach, seat, and fabric response | Limited on dynamic drape and load behavior |
| Repeatability | Depends on protocol discipline | Depends on image quality, posture, and calibration |
| Speed at scale | Slower for large customer datasets | Better for broader measurement collection |
| Edge-case failure mode | Technician inconsistency or poor landmarking | Bad input posture, clothing interference, or landmark misread |
| Best use | Fit-sensitive development and sample approval | Intake, recommendation systems, and pre-fit data capture |
Picjam's AI virtual model workflow
The realistic hybrid workflow
The practical approach is hybrid. Use live fit models and manual measurement for fit-sensitive product development. Use digital capture where it helps with intake, customer comparison, or size recommendation workflows.
What matters is not the tool alone. It is whether the input data is clean enough to support decisions across fit, size charts, and ecommerce operations.
Fit Session Workflow and Documentation Best Practices
A strong fit session should be consistent and easy to audit.
The best teams set the fit brief before the model enters the room. They define what the garment is supposed to do, which measurements matter most, and what counts as pass, revise, or block.
The session sequence that keeps comments usable
- Before dressing the model: Confirm the fit brief, target measurements, sample version, and intended use.
- At first wear: Photograph front, back, and side in a neutral stance using the same camera height and lighting each time.
- During review: Check static balance first, then category-specific movement such as sitting, walking, reaching, squatting, or arm lift.
- After review: Tie each observation to a named landmark and a pattern action.
What documentation should look like
Bad note: “Front looks tight.”
Good note: “Front bodice pulling across high bust above apex. Shoulder seam sitting back. Request front width review and armhole rebalance.”
That level of detail matters because the factory can act on it. Vague comments create guesswork. Specific comments create corrections.
The checklist worth standardizing
- Fit brief with target silhouette and use case
- Measurement tools including one approved tape and backup
- Undergarment standard for the category
- Photo set with front, side, back, and movement frames
- Spec linkage connecting each comment to a measurement delta, sample version, and pattern correction
Clean fit notes reduce rework because the factory can see the problem, the location, and the intended fix in one record.
From Fit Model Data to Better E-Commerce Sizing
Fit-model data should not stay trapped inside the sample room.
The same body measurements and fit notes used during development should inform the size chart, product detail page guidance, and returns analysis. If those systems use different landmarks, different units, or vague translations of technical measurements, sizing communication gets weaker.
Where the value shows up
Customers make better decisions when the size guidance reflects real garment and body data, not just generic labels.
For brands, that means better consistency across categories, clearer internal handoff between product and ecommerce teams, and a stronger basis for reviewing return reasons by landmark instead of by broad comments like "too small" or "bad fit."
The practical handoff
Use the same landmark names from development in the customer-facing size chart wherever possible. If front length from HPS to waist controls the garment, keep that definition clear internally and simplify it carefully for the customer instead of replacing it with vague language.
Then review returns against those same control points. If a style repeatedly gets comments about waist squeeze, short sleeve, seat tightness, or rise issues, that points back to the spec.
Actionable Takeaways for Fashion Brand Teams
Most fit inconsistency comes from simple operational gaps.
Teams switch units mid-season. They approve visually without recording landmarks. They use a model who is close enough overall but wrong at the body points that control the garment. Those shortcuts create avoidable confusion in development and weak size communication in ecommerce.
3 moves worth making now
- Standardize capture: Build one fit-model measurement SOP and use it across categories, sample rounds, and suppliers.
- Treat records as working data: Fit-model files should feed specs, grading, size charts, and returns review.
- Audit complaints by landmark: Do not stop at "runs small." Track whether the issue is waist, rise, bicep, shoulder, torso, inseam, or another named point.
The second fix is to separate visual approval from technical approval. A garment can look good on camera and still fail at the controlling measurements.
The third fix is to adopt technology where it reduces friction without replacing technical judgment. Better measurement discipline makes every downstream workflow more reliable.
If you lead product, ecommerce, or brand operations, start with the measurement system. It is one of the few parts of fit that improves every other part when it gets tighter.
Picjam helps apparel teams turn existing product imagery into on-model visuals while keeping fit communication closer to the actual garment. If you're trying to reduce reshoots, streamline content production, and pressure-test the cost impact of cleaner fit data, compare your current workflow with Picjam and run the savings calculator at Picjam's pricing calculator.

Picjam team
The Picjam team blends AI, product, and creative expertise to eliminate the cost and delay of traditional photography for modern eCommerce brands.