Image Upscaling Online for Apparel Brands
Learn when online image upscaling helps apparel brands improve PDP, marketplace, and campaign assets without compromising fabric detail, logos, or product accuracy.
Grand View Research's market analysis
Online image upscaling is useful for apparel brands when it solves a specific production problem: a product image is slightly too small for the crop, zoom view, marketplace requirement, or campaign placement you need to ship. It is not a magic fix for weak photography, heavy compression, or missing garment detail.
For apparel teams, the real question is simple. If you enlarge the file, does the product still look true to the garment? Can a shopper still read the fabric texture, stitch definition, logo shape, print edge, or hardware finish without the image looking processed?
That is where online upscaling earns its place. Used carefully, it can help extend the life of usable assets, reduce avoidable reshoots, and support ecommerce production across PDPs, marketplaces, and campaign formats. Used carelessly, it can soften labels, distort logos, add fake texture, and make a product look less trustworthy.
Picjam supports practical enhancement workflows for apparel teams, including controlled enlargement options for product imagery. The important point is not the setting itself. It is how you choose the source file, set the crop, review the output, and approve the asset before it goes live.
Why Online Upscaling Matters for Apparel Imagery
Shoppers buy apparel from images. They judge fabric, finish, weight, and quality through close crops, zoom states, thumbnails, and mobile screens. If the file is soft, the product can look cheaper than it is. If the enhancement invents detail that was never captured, the image can become misleading.
That is why upscaling should be treated as a controlled production step, not a cosmetic last pass.
Production rule: Use upscaling to support merchandising accuracy, not to simulate detail that the camera never captured.
In practical ecommerce terms, online upscaling is most useful when:
- a PDP image needs more room for zoom or tighter crops
- a marketplace requires larger dimensions than the current asset library provides
- a campaign layout needs a slightly larger placement from an otherwise usable file
- an approved garment cutout needs more resolution before compositing
It is less useful when:
- the source was exported too many times
- the file came from chat, slides, or a DAM preview
- logos, labels, and print edges are already broken down into mushy pixels
- the team is hoping software will recreate missing weave, embroidery, or trim detail
A standard resize only makes pixels bigger. AI-based super-resolution attempts to reconstruct likely detail from what remains in the image. That distinction matters because reconstructed detail is still an interpretation. It can be visually helpful, but it is not recovered ground truth.
For apparel brands, the acceptance test is operational. Does the enlarged file still represent the product honestly across every required crop and placement? If not, the upscale has failed, even if it looks sharper at first glance.
What Upscaling Can and Cannot Do
Upscaling can improve a usable file. It cannot rescue a file that never contained enough information in the first place.
If the original image still holds visible tonal structure in the knit, seam, or fabric surface, a careful 2x pass may improve clarity. If the original capture never resolved the rib pattern, logo edge, or leather grain, no tool can restore the true missing detail. At best, it will guess.
That is the line apparel teams need to keep clear.
What usually responds well
Some asset types can benefit from modest enlargement:
- flat lays with clear fabric texture
- ghost mannequin or hollow-mannequin garment shots
- clean still product images on simple backgrounds
- selected cropped details for PDP zoom
These files often retain enough real structure for a restrained upscale to help. When the source is clean, the goal is not dramatic transformation. It is simply more usable dimensions with believable texture.
If your team is preparing isolated garments for PDP and catalog use, this usually works best after product cleanup steps such as ghost mannequin removal, while the garment layer is still clean and easy to inspect.
What often breaks first
Other elements need stricter review:
- small chest logos
- woven labels
- care tags
- fine embroidery
- dense prints and patterns
- reflective hardware
- skin, hair, and facial features in on-model imagery
A comparative review of super-resolution metrics
These details are where reconstruction errors become obvious. A knit may look acceptable while the logo becomes too thick. A clean hem may survive while a printed wordmark develops jagged or shiny edges. A model shot may gain sharper clothing but also overprocessed skin or false hair detail.
That is why apparel review should never stop at the overall image. Teams need to inspect the exact product details that influence purchase confidence.
How to Decide if a File Should Be Upscaled
review of deep-learning super-resolution
The decision should start with the file source, not the tool.
Ask four questions before upload:
- What is the source file? Use the original export from the shoot whenever possible. Start from RAW-derived edits, PSDs, or high-quality TIFF and JPEG exports, not screenshots or preview files.
- What does the asset need to do? PDP zoom, marketplace compliance, email crop, paid social, and campaign banners have different dimension needs.
- Is the product detail still intact? Check fabric texture, stitch lines, branding, and edges before processing.
- Would a tighter crop solve the problem better than enlargement? Sometimes the right answer is to crop more intelligently instead of making the whole canvas larger.
A file that is slightly undersized but otherwise clean is a good candidate. A file that is heavily compressed, noisy, or already soft in key product details is not.
Source-File Quality Matters More Than the Upscale Setting
The best upscaling results usually come from boring discipline upstream.
Pull the best source available. That means the original edited master, not a file saved out of Slack, PowerPoint, Google Slides, a marketplace download, or a low-res DAM derivative. Every export step strips information the model could have used.
Common source-file problems include:
- JPEG compression from multiple saves
- previous sharpening halos
- noise reduction that already erased textile detail
- tiny crops enlarged once before
- color artifacts in dark garments
- moiré in fine stripes or checks
When those issues are already present, upscaling often makes them more convincing rather than more correct.
For teams building new assets from scratch, it also helps to connect resolution planning with the broader product-image workflow. If you are already standardizing apparel content in a system like AI product photography, define target crops and output sizes before the catalog reaches the last-minute fix stage.
Choose the Crop Before You Choose the Scale
One of the most common production mistakes is enlarging the full frame first, then deciding how the image will actually be used.
Start with the crop requirement.
If the platform only needs a waist-up on-model crop or a tighter product cutout, upscale the intended crop, not the full untouched canvas. This keeps file sizes more manageable and reduces the amount of image area the model has to reinterpret.
In practice:
- for a standard PDP image, start with the actual approved crop
- for zoom views, test the crop that shoppers will inspect most closely
- for marketplaces, work from the required framing and minimum dimensions
- for campaign placements, upscale the asset version that matches the final layout
This sounds simple, but it changes results. A 2x pass on the right crop often performs better than a larger upscale on an oversized frame that will be cropped later.
Start Conservatively, Usually at 2x
For apparel, more enlargement is not automatically better.
A conservative 2x pass is usually the best starting point because it gives you more flexibility without asking the model to invent too much surface detail. In many ecommerce workflows, that is enough to support a sharper PDP crop, cleaner marketplace submission, or more usable campaign placement.
Larger jumps can be useful in selected cases, but they deserve more scrutiny. The bigger the enlargement, the more likely the system is to misread texture, edges, and graphic details.
As a working rule:
- start at 2x for still product images
- use extra caution on on-model assets
- be skeptical of aggressive enlargement on UGC or compressed lifestyle imagery
- reject the upscale if the product no longer looks truthful
Export Settings Affect What You Think You Are Seeing
Evaluation can go wrong when export settings hide the real result.
During review, keep output quality high enough to judge the actual image, not the compression. For apparel assets with visible texture, use PNG or high-quality JPEG while testing. Avoid low-quality exports during approval because compression can mask fabric problems, edge artifacts, and logo distortion.
Denoise should also stay restrained.
For clean studio product photography, low or minimal denoise is usually the safer choice. Heavy denoise can flatten knits, wash out denim character, and reduce the exact surface cues shoppers use to assess quality. A noisier lifestyle image may need a little more cleanup, but the team should review whether that cleanup erases product truth.
The distinction matters because enlargement and enhancement are not the same thing. Picjam's guide to AI image enhancement explains that some workflows change noise, contrast, and perceived sharpness in addition to size. For apparel teams, that means you should review not only dimensions, but also whether the product surface still looks accurate.
QA the Details That Sell the Garment
Never approve an upscaled apparel image from thumbnail view.
Review at 100%, or close to it, and inspect the parts a shopper will use to judge quality:
- collar and cuff ribbing
- seam lines and topstitching
- embroidery
- chest logos and wordmarks
- buttons, zippers, and snaps
- leather or coated trims
- print edges and distressed graphics
- care labels where visible
- garment edges against light backgrounds
Look for the most common failure modes:
- texture that repeats in a stamped pattern
- halos along garment edges
- logos that have thickened or warped
- print edges that look brittle or shiny
- false grain on smooth fabric
- oversmoothed skin in on-model images
- invented strands in hair or lashes
If any of those defects make the product less accurate, reject the file. Sharpness is not the goal. Trust is.
Batch Upscaling for Catalogs, PDPs, and Marketplaces
Batch upscaling can save time, but only when the inputs are standardized and the review process is strict.
Before processing a catalog drop:
- normalize color space, usually sRGB for ecommerce delivery
- keep source exports consistent by category
- separate still product, on-model, and UGC into different queues
- flag files with known issues before they enter the batch
- use a naming convention that tracks SKU, view, colorway, and status
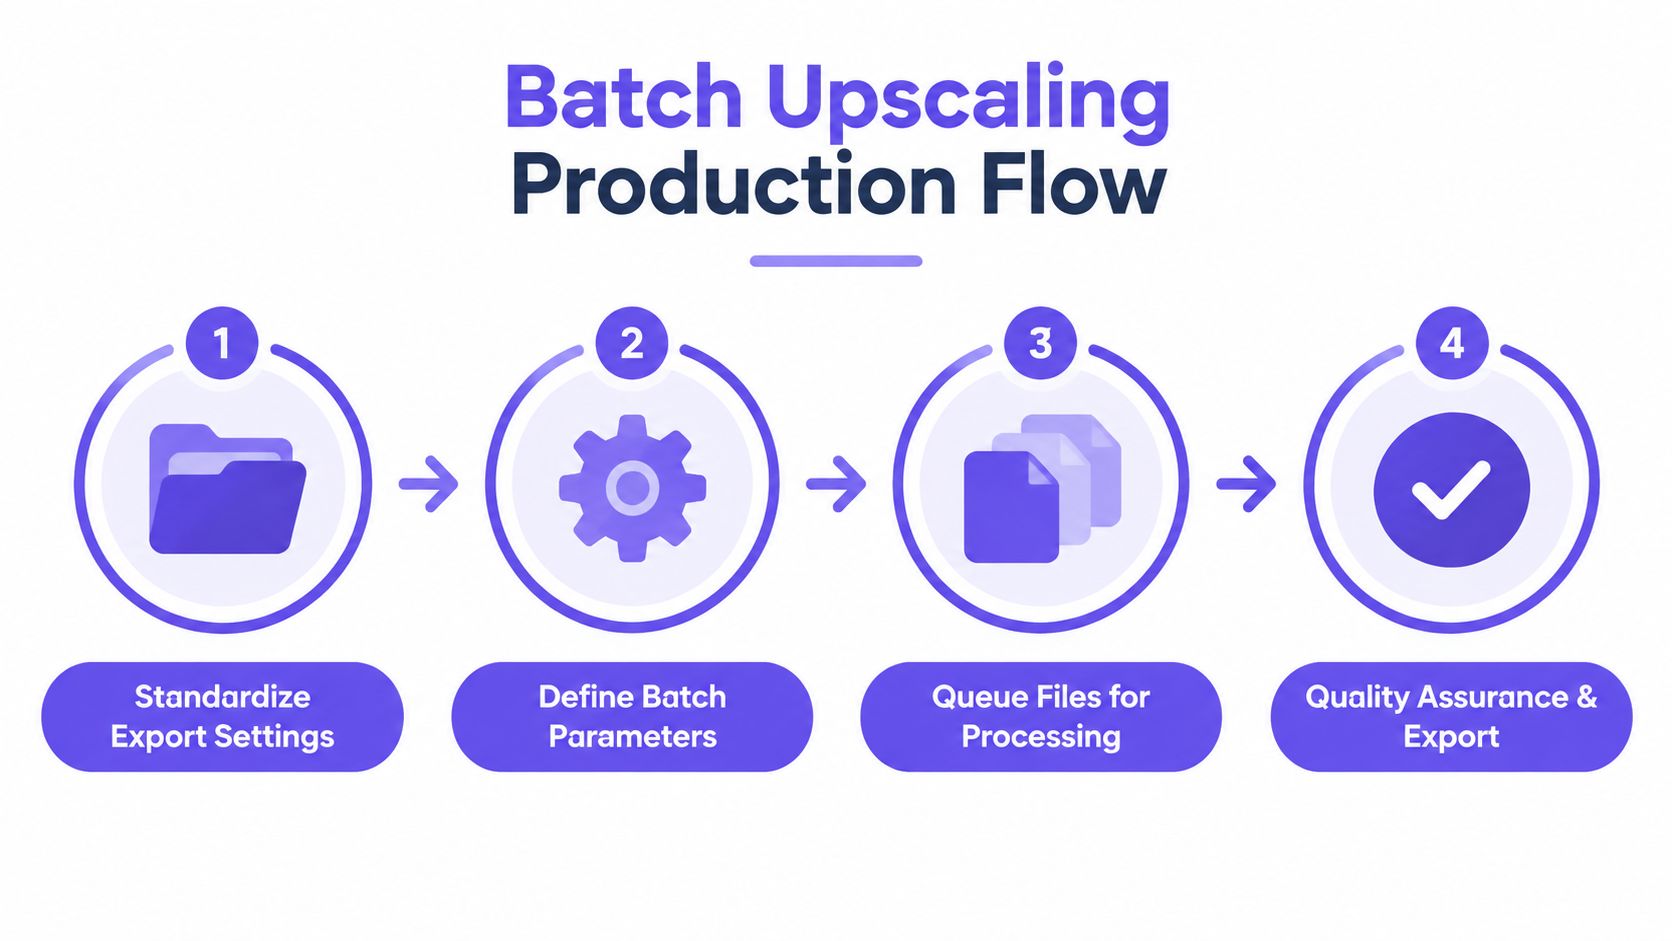
Run a pilot, not the whole drop
Do not send the full batch through the first preset and hope for the best.
Instead:
- lock the intended settings
- run a small pilot across multiple garment types
- include at least a few difficult files, not just hero shots
- compare results against the originals at full size
- record where the preset works and where it fails
This is especially important when your assortment mixes knits, outerwear, graphics, denim, and shiny trims. A preset that behaves well on fleece may break on jewelry hardware or fine logo embroidery.
For teams building repeatable production systems, this batch generation workflow is useful context. The same operating principle applies here: standardize inputs first, then process, then sample for QA.
Asset-Specific Guidance for Apparel Teams
Different asset types need different rules.
| Asset Type | Recommended Approach | Main Risk |
|---|---|---|
| Still garment on simple background | Start at 2x, low denoise | Fake or plastic-looking texture |
| Ghost mannequin product image | Start at 2x after cleanup | Edge halos or distorted seams |
| On-model PDP image | Conservative pass, inspect face and garment separately | Skin smoothing, false hair detail, broken logos |
| Marketplace export | Match the exact required crop first | Oversized files with no visual gain |
| UGC or influencer content | Use only if source is already usable | Compression artifacts turning into false detail |
| Graphic apparel close-up | Review print edges at full size | Jagged or shimmering artwork geometry |
White and light-background assets deserve extra edge inspection. A faint outline may not be obvious in isolation but becomes obvious on the live PDP once placed against the site background.
Teams working with printed apparel should also keep artwork geometry in mind. This practical check overlaps with advice in this guide to designing a shirt for DTF transfers, especially when reviewing whether a graphic edge still looks clean after enlargement.
Where Upscaling Fits in the Production Pipeline
Upscaling usually performs better earlier in the garment workflow, before the image has been through too many downstream transformations.
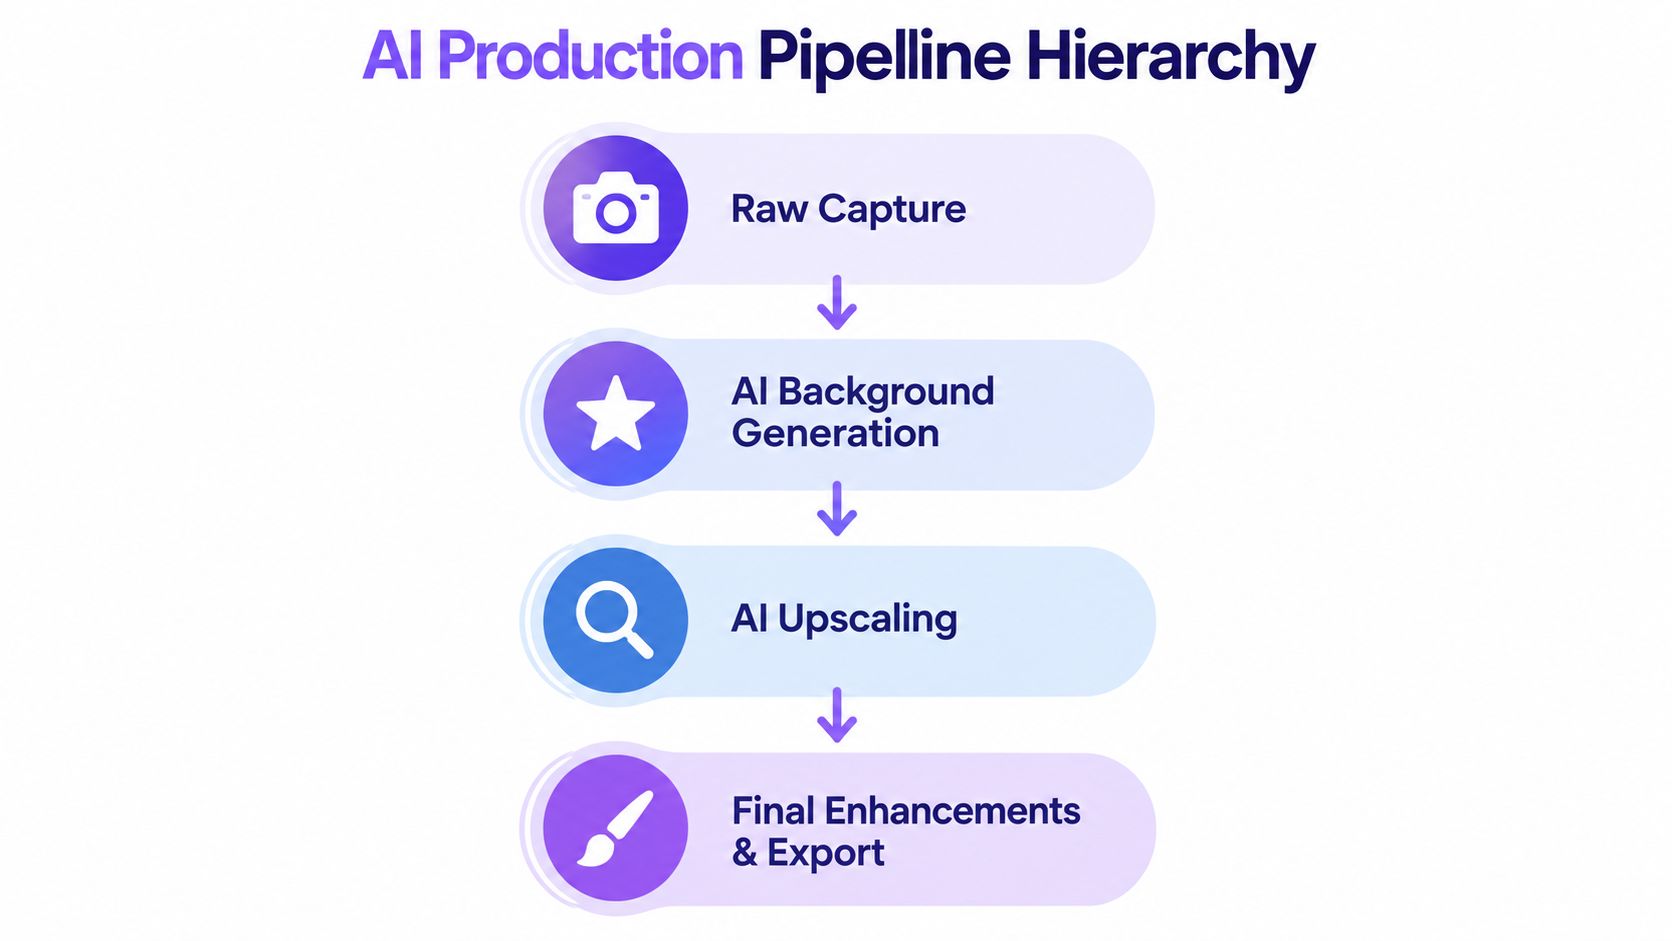
A strong sequence looks like this:
- capture or export the best source file
- isolate or prepare the garment layer
- upscale the garment or approved crop
- inspect the result for product accuracy
- composite, place on model, or export to channel-specific formats
This order helps because the model sees a cleaner product asset. If you wait until after multiple edits, scene generation, or compositing, the tool may sharpen the wrong things, including background compression, edge artifacts, and already-softened fabric detail.
That is one reason apparel teams often place controlled enlargement after isolation and before creative production. The garment itself should be approved before it is embedded in a more complex image workflow.
The JPEG artifact-correction research is relevant here because it highlights a practical separation between enlargement and compression repair. If the source file is damaged by heavy JPEG artifacts, that issue should be identified early rather than hidden under a later upscale.
Picjam fits well in this stage of the process because it supports garment-focused workflows where teams can prepare, review, and reuse product assets before final distribution.
A Practical QA Checklist Before You Ship
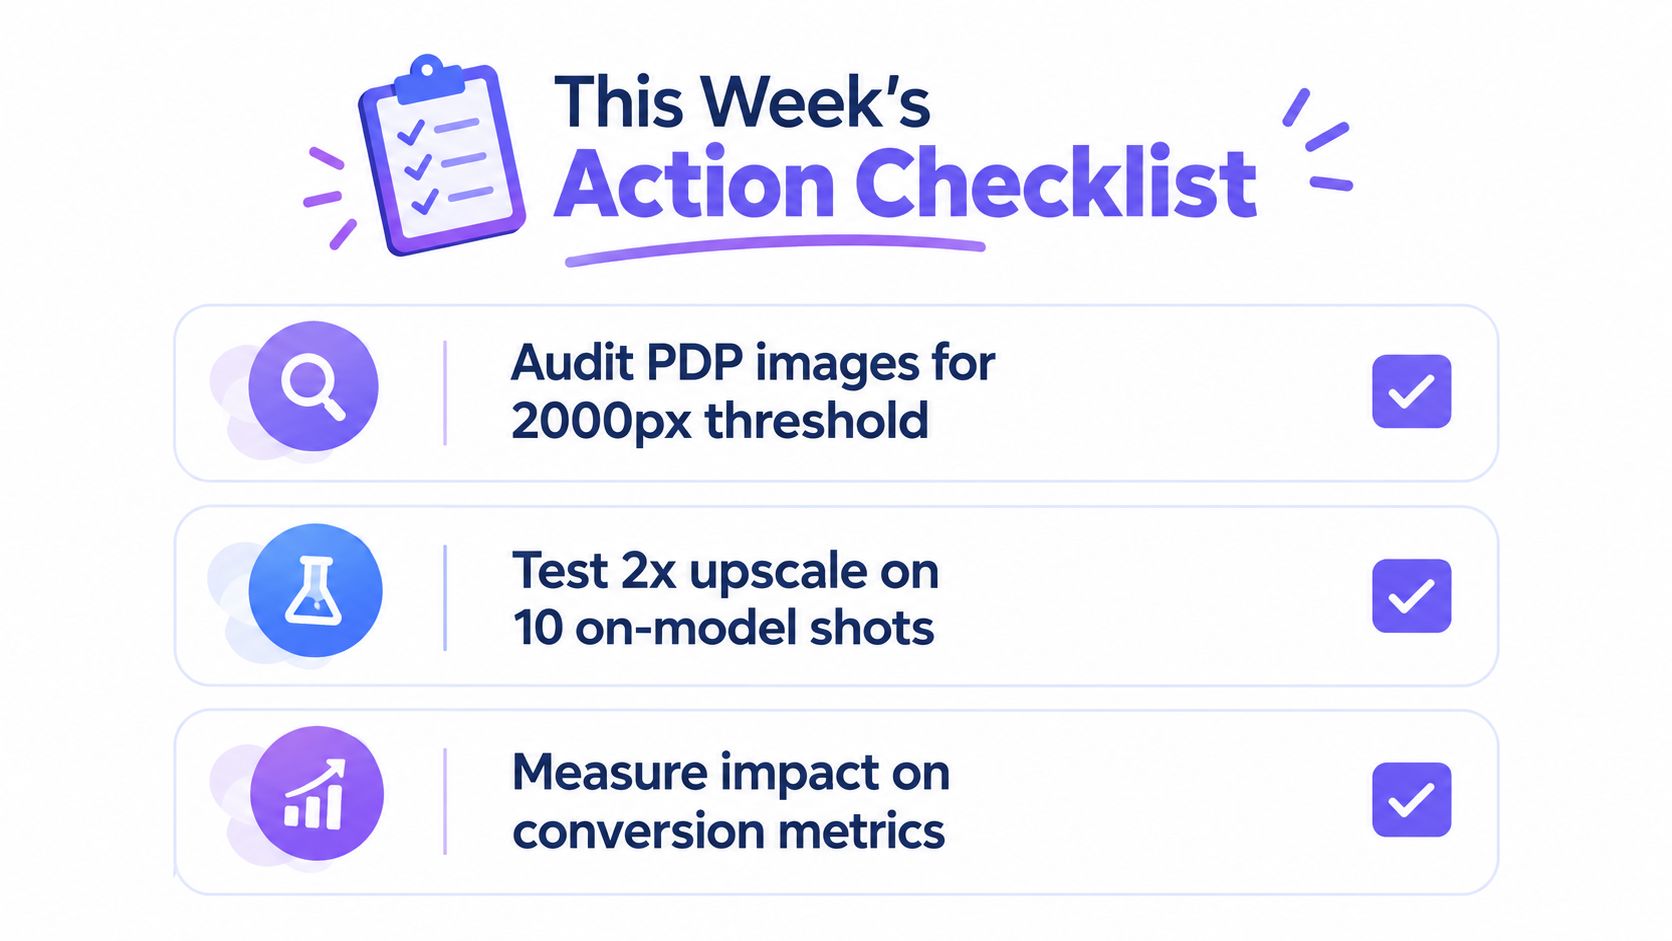
If your team is shipping this week, keep the approval bar simple and strict.
1. Audit the files that actually need help
Do not process the entire image library by default. Find the assets that are undersized for current use cases, then group them by:
- PDP
- marketplace
- campaign
- still product
- on-model
- UGC
- source quality level
This creates a smaller queue and keeps the team focused on images where upscaling can realistically help.
2. Test difficult files first
Hero shots can flatter any tool. Stress-test the workflow on weaker but still important assets:
- dark garments
- textured knits
- dense prints
- reflective trims
- low-light on-model imagery
- compressed marketplace leftovers
If the process fails there, it will not become more reliable at scale.
3. Compare against the original, side by side
Do not review the processed file in isolation. Compare it with the source and ask:
- did fabric texture become more readable or just more artificial?
- did the logo stay true in shape and weight?
- did edges stay clean?
- did skin, hair, or hardware become overprocessed?
- would a shopper be misled by this version?
4. Define rejection rules in advance
A team moves faster when approval standards are explicit. Reject any file that introduces:
published upscaling benchmark workflow
- altered branding
- false weave or stitch structure
- visible haloing
- broken print edges
- fake texture on smooth areas
- distracting skin or hair artifacts
5. Archive the approved output correctly
Keep the original source and the approved upscaled version side by side with clear file naming. That protects reversibility and prevents teams from accidentally overwriting the best source with a processed derivative.
Final Takeaway
this Shopify product image size guide
Online image upscaling is useful for apparel brands when the source is still fundamentally good, the output requirement is clear, and the team reviews the result like merchandisers, not like software buyers.
It can help you get more usable life out of existing product images for PDPs, marketplaces, and campaign assets. It cannot restore product truth that the original capture never contained.
That is the standard that matters most. Product accuracy comes first. If the upscale helps the customer see the garment more clearly without changing what it is, it has done its job. If it adds confidence but reduces truth, do not ship it.
Picjam helps apparel teams prepare garment assets, clean product layers, and apply controlled enlargement where it actually supports ecommerce production. Visit Picjam to compare the workflow with your current process and decide where upscaling fits, if at all, in your image pipeline.

Picjam team
The Picjam team blends AI, product, and creative expertise to eliminate the cost and delay of traditional photography for modern eCommerce brands.