Rug Product Photography: Top-Down, Scale & Room Shots
Rug product photography: top-down heroes, room scale shots, pile lighting, runners and outdoor rugs, mistakes and FAQs for ecommerce.
Short answer: To photograph rugs for ecommerce, shoot top-down for the hero, then add a three-quarter floor view, edge and fringe detail, a scale shot in a room, and every colourway on the same set. Use large soft light, keep the camera square to the rug, and straighten perspective so patterns do not lean.
Rugs are hard to sell from a single flat photo. Buyers need to judge size, pile, pattern scale and how the piece sits on a floor. This guide covers the rug product photography shot list, top-down versus room scenes, lighting for pile and sheen, phone and camera setup, outdoor and runner quirks, common mistakes and ideas that help rugs sell.
- The rug shot list
- Top-down heroes that stay square
- Room and scale shots
- Lighting pile, sheen and pattern
- A simple setup
- Runners, rounds and outdoor rugs
- Common mistakes
- Rug photography ideas
- Skip the shoot
- FAQs
The Rug Product Photography Shot List
- Top-down hero. The full rug, square to the camera, on a clean floor or seamless background. This is usually the main listing image.
- Three-quarter floor view. Shot from standing height so buyers see thickness and how the rug sits on the floor.
- Edge and fringe detail. Binding, fringe, tassels and corner finish.
- Pile close-up. Texture under raking light so cut pile, loop pile or flatweave reads clearly.
- Scale in a room. Sofa legs, a coffee table or a person standing at the edge.
- Lifestyle room scene. Styled space that matches the rug's design language.
- Every colourway and size you sell, on the same background and crop.
- Fold, roll or reverse if the back, pad or reversible design matters.
For more on angles, see our product photography angles guide. Large home pieces also benefit from the approach in our furniture product photography guide.

Top-Down Heroes That Stay Square
A crooked top-down shot makes patterns look drunk and sizes look wrong.
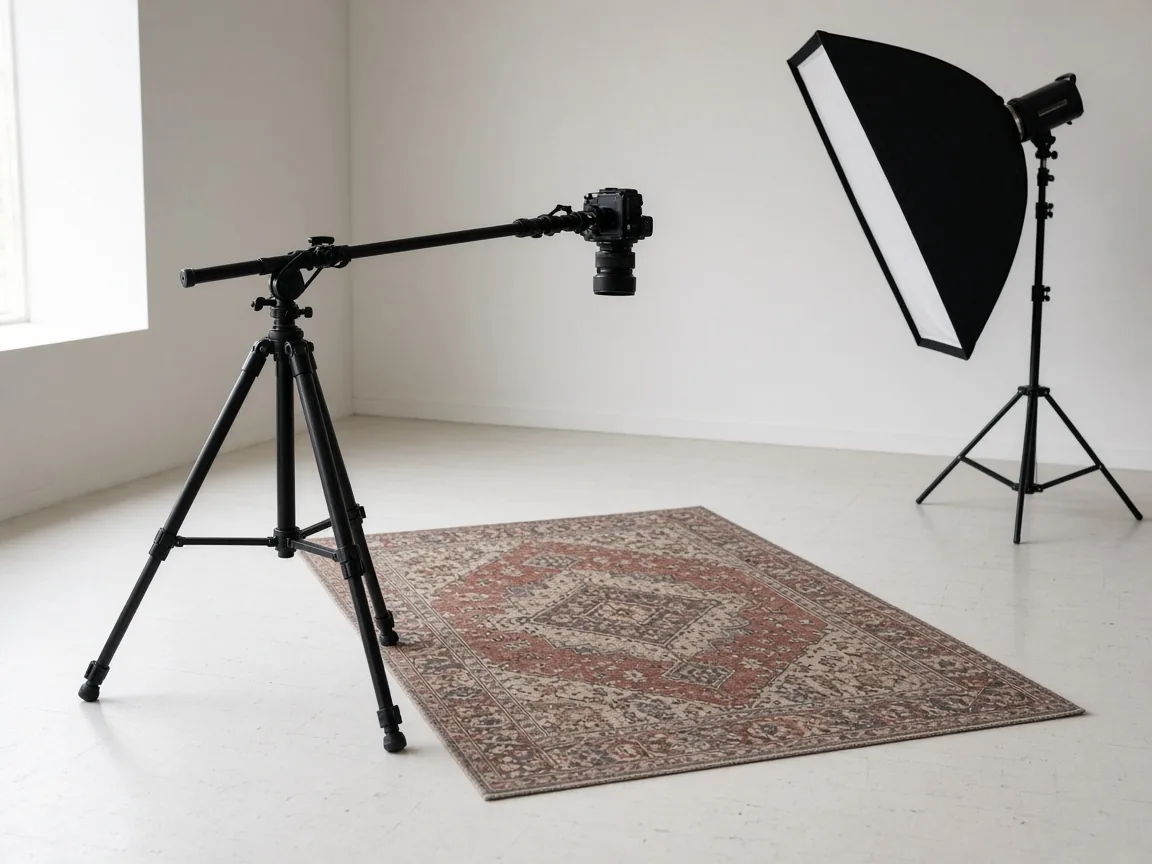
- Get above the centre. Use a ladder, tall tripod boom or overhead rig so the lens sits over the middle of the rug.
- Keep the camera parallel to the floor. Even a small tilt turns rectangles into trapezoids.
- Use a longer focal length from higher up rather than a wide lens close in, so edges stay straighter.
- Leave a little floor around the rug if your marketplace crops tightly, then crop evenly in edit.
- Straighten in post with a grid overlay, matching opposite borders.

Room and Scale Shots
Top-down alone rarely answers "will this fit my living room?". Add at least one scale cue.
| Shot | What it shows | Tip |
|---|---|---|
| Furniture overlap | How the rug sits under a sofa or table | Keep furniture legs in frame; do not hide the whole border |
| Person at the edge | Length and pile height | Shoes off if you sell a barefoot lifestyle brand |
| Empty room plate | True size on timber or tile | Match the floor tone across the range |
| Corner lift | Thickness and backing | Useful for thick wool and outdoor rugs |
Room scenes sell style; cutouts and top-downs keep category grids consistent. Most rug shops need both. See our product lifestyle photos guide for styled sets.

Lighting Pile, Sheen and Pattern
- Large soft light from the side or slightly behind keeps pile from looking chalky.
- Watch sheen on viscose, silk and polished wool. Move the light until the highlight describes the pile direction instead of blowing out a stripe.
- Raking light for texture close-ups; flatter light for even colour in the hero.
- Match white balance across colourways so cream and ivory do not flip warm and cool between shots.
- Turn off mixed bulbs when you shoot near a window.
More on light size and direction in our photography lighting basics guide.
A Simple Rug Photography Setup
- Clear floor with even colour, or a large sweep if you cut the rug out later.
- One large soft light or a bright window with diffusion.
- Tripod or overhead support marked so every rug lands in the same crop.
- Tape the rug corners lightly if the piece curls, without damaging fibres.
- Vacuum or lint-roll before the first frame.
- Shoot tethered or review at 100% so you catch wrinkles and debris.
Runners, Rounds and Outdoor Rugs
- Runners: include a full-length shot and a mid-section crop so the repeat reads.
- Rounds: centre carefully; oval crops look accidental.
- Outdoor rugs: show the patio or deck context and any UV or wet-look claims with honest detail shots.
- High-contrast patterns: expose for the midtones so black motifs keep detail.
Common Rug Photography Mistakes
- A wide-angle top-down that warps the border.
- No scale reference, so a 160 cm rug looks like a 240 cm rug.
- Colourways shot on different floors with different white balance.
- Fringe kicked out of place or buried under furniture.
- Only a lifestyle scene, with no clean hero for marketplaces.
Rug Photography Ideas
- Morning side light across a low-pile geometric.
- Layered rug detail for thick wool.
- Kids' playroom scale shot with toys just in frame (no faces needed).
- Before/after of a wrinkled rug steamed flat.
- Macro of hand-knotted texture beside a clean hero.
- Outdoor rug on wet stone to show drainage claims carefully and honestly.
Skip the Shoot
If you already have one strong rug photo, Picjam can help you build extra packshots and room-style scenes for the gallery, with no prompts to learn. Free to start (two free turns). Start at the AI product photography and packshot generator, or check gaps with the Listing Image Score.

Frequently Asked Questions
How do you photograph a rug for ecommerce?
Shoot a square top-down hero, a three-quarter floor view, edge and pile details, and at least one scale or room shot. Keep the camera parallel to the rug and use large soft light so pattern and pile stay true.
Should rug product photos be top-down or in a room?
Use both. Top-down keeps category grids consistent and shows the full pattern. Room and scale shots answer size and lifestyle questions buyers cannot get from a flat cutout alone.
How do you keep a rug looking straight in photos?
Place the camera directly above the centre, keep the sensor parallel to the floor, use a longer focal length when you can, and straighten borders on a grid in edit.
What light is best for rug photography?
One large soft source from the side for heroes, plus raking light for pile close-ups. Avoid small bare lights that create hot stripes on shiny fibres.
How many photos does a rug listing need?
Plan for a hero, floor view, two details, a scale shot and a lifestyle frame, then repeat for each colourway. Marketplaces vary, but thin galleries lose large-ticket sales.
Can I use AI for rug product photography?
Yes for extending a gallery from a real product photo: extra angles, clean packshots and room-style scenes. Keep the starting photo honest to the real rug's pattern, colour and proportions.

Picjam team
The Picjam team blends AI, product, and creative expertise to eliminate the cost and delay of traditional photography for modern eCommerce brands.