Activewear Photography: A Practical Guide for 2026 Brands
Master activewear photography in 2026 with this practical guide covering lighting, posing, AI tools, and conversion-driven styling for apparel brands.
When an activewear launch looks polished in the studio but underperforms on the PDP, the problem usually is not the product. It is the proof. Shoppers need to see stretch, support, coverage, recovery, and accurate color fast. If the gallery does not answer those questions, they hesitate.
That is what makes activewear photography different from generic apparel photography. Your images are not just there to look good. They need to reduce doubt and make the product easier to buy.
Why Activewear Photography Works Differently
Activewear has to show performance. A clean front shot is useful, but it is rarely enough on its own. Customers want to inspect waistband hold, seam placement, opacity, compression, and how the fabric behaves when the body moves.
If the image hides those details, the customer fills in the gaps with risk.
The fabric changes everything
Technical fabrics react differently under light and movement. Ribbed knits, nylon-spandex blends, mesh panels, reflective trims, and brushed performance fabrics all create different problems on set. Highlights can make leggings look thinner than they are. Flat lighting can erase seam structure. Bad angles can hide support panels completely.
That is why activewear should be shot as a product category with performance claims, not as standard fashion.
Practical rule: if the frame does not show what the fabric does on the body, it is not ready for the PDP.
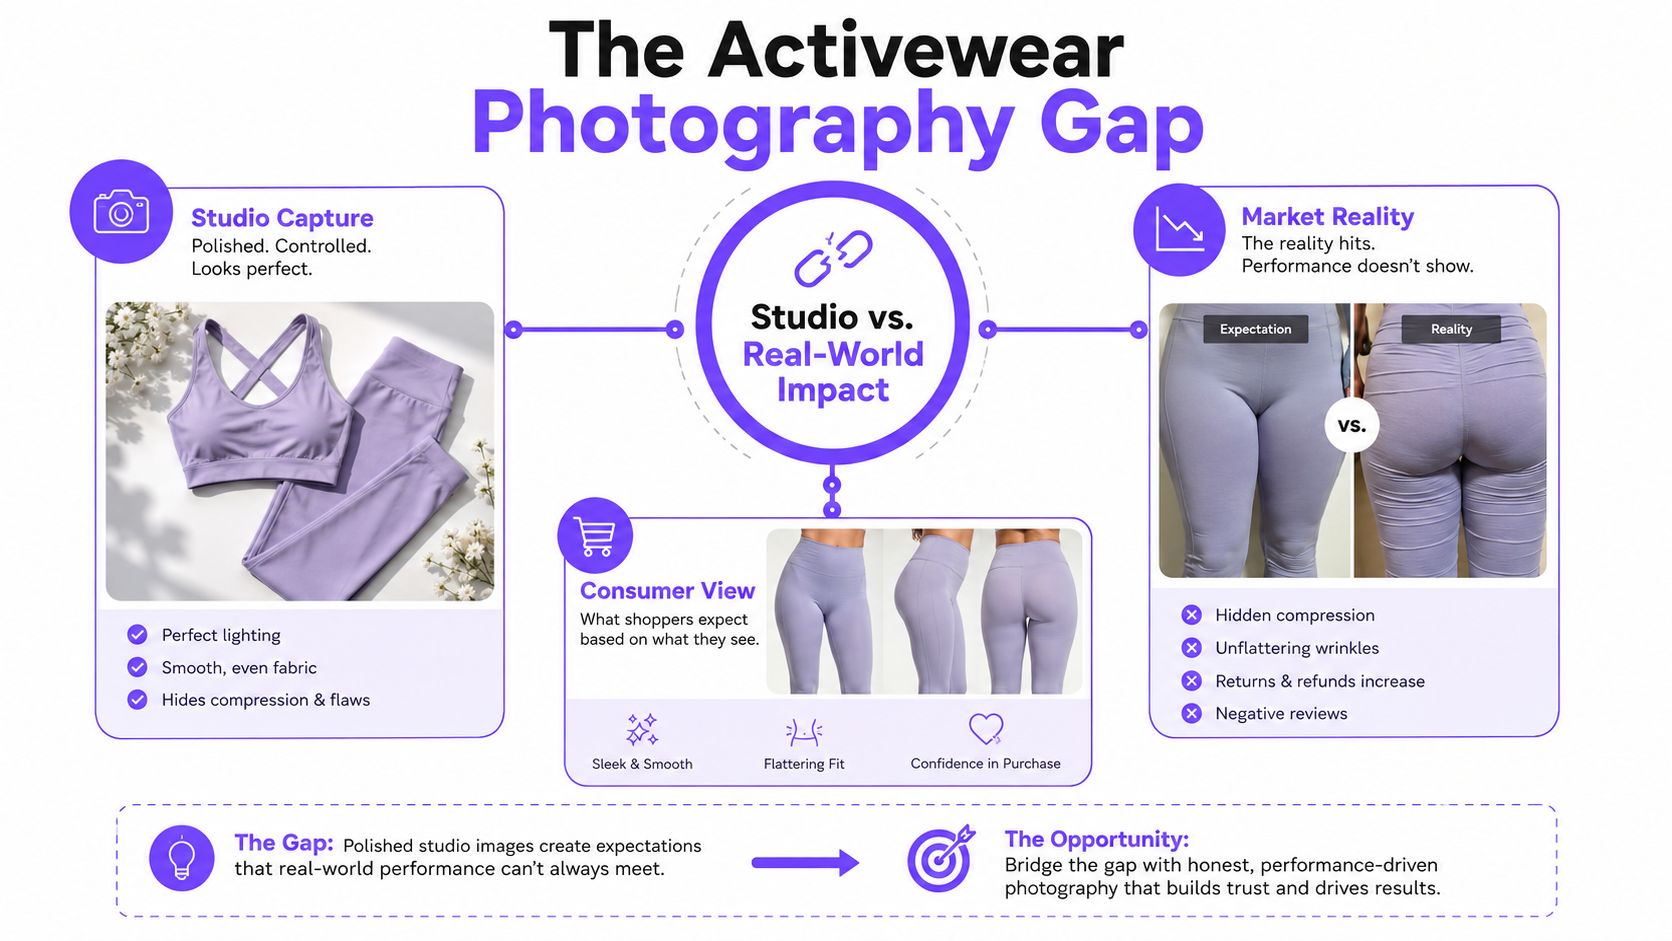
What the customer is actually trying to verify
For most activewear SKUs, customers are looking for answers to a short list of questions:
Picjam's guide to photographing clothing
- Will this stay in place when I move?
- Is it see-through when stretched?
- Does the fabric look supportive or flimsy?
- Does the color look true?
- Will the fit on my body be closer to compression or comfort?
Your image set should be built to answer those questions in order.
Plan the Shoot Around Product Proof
A good activewear shoot starts with the product page, not a mood board. Before anyone gets on set, define what the product needs to prove.
If the product copy says four-way stretch, sculpting fit, high support, or squat-proof coverage, your shot list should show those claims clearly. That does not mean forcing every claim into one image. It means assigning each claim a specific frame.
Build a shot list that maps to the PDP
For most activewear products, a practical gallery includes:
- Hero front image for silhouette and overall look
- Back view for coverage, seam layout, and waistband shape
- Side or three-quarter view for contour and panel construction
- Close-up detail for fabric texture, waistband, straps, mesh, or stitching
- Movement frame for stretch, hold, and recovery
- Optional lifestyle image for context if the brand needs it
This approach keeps the gallery useful. It also makes reviews easier later because every image has a job.
Cast for the product, not just the campaign
The right model makes the product easier to understand. Compression leggings need a body that shows tension and support clearly. Low-impact sets need calm, controlled poses. Training gear needs talent who can repeat athletic positions without losing form.
If you sell across a wide size range, plan that visibility into the shoot from the start. Size representation is not just a brand message. It helps customers calibrate fit.
A sizing reference can help the styling and casting team stay aligned. A practical resource is the ClothME sizing guide, especially when the fit call has to work across multiple SKUs and body types without creating visual inconsistency.
On-set priority: get fit and fabric behavior right before chasing the prettiest frame.
For a useful reference point on activewear motion content, the embedded video below shows how movement changes what the garment communicates in a frame.
Keep production simple
Complex shoots create inconsistency. If the job is PDP imagery, keep the setup repeatable. Lock the background, lighting, lens choice, and crop rules early. Steam everything before the first frame. Check every sample for fit, lint, twisting seams, and color variation before it reaches set.
The more variables you remove, the easier it is to keep the catalog clean.
Lighting, Camera Setup, and Fabric Control
Lighting activewear is about readability. You need to show shape and fabric detail without creating glare, false transparency, or heavy contrast that hides construction.
For color-critical garments, a practical studio reference is to use large, fully diffused light placed around 45 degrees, keep continuous LED sources around 5600K with CRI 95+, and standardize the white balance with a gray card (Studiofy). That same source recommends a minimum 60x90 cm softbox or larger for model-on-white and detail work, which helps seams, stretch, and sheen stay visible without harsh hotspots. A two-light setup with a roughly 2:1 key-to-fill ratio also keeps texture consistent across a catalog.
Match the light to the fabric
There is no single setup that works for every material.
- Matte fabrics can handle slightly more directional light to keep shape visible.
- Glossy nylon-spandex blends usually need a larger diffused source to control hotspots.
- Ribbed or textured fabrics need enough side definition to keep texture from disappearing.
- Mesh and perforated panels need careful exposure so detail stays visible.
If the product has a strong compression story, do not flatten it with overly soft, front-facing light.
Use camera settings that preserve detail
A practical benchmark from activewear production guidance is to use f/8, ISO 100, and 1/160 with strobes at 1/4 power for matte knits, then move to f/11 and 1/8 power through a 1.2m octa for glossy leggings. Those settings are less about style and more about preserving visible texture, ribbing, and panel transitions.
Freeze motion cleanly
Picjam's photography lighting basics guide
Movement images only help if they are clear. Independent activewear guidance recommends fast shutter speeds around 1/1000s or faster to freeze movement cleanly, alongside soft diffused light to control glare on technical fabrics (Pixofix).
Use movement to answer a specific question. Show a squat for coverage, a twist for waistband hold, or a reach for strap stability. Do not add motion frames just because they look dynamic.
| Fabric Type | Key Light Source | Aperture | ISO | Shutter | Notes |
|---|---|---|---|---|---|
| Matte recycled knit | Harder key with diffusion | f/8 | 100 | 1/160 | Keeps texture visible without flattening structure |
| Shine-prone nylon-spandex | Large diffused source | f/11 | 100 | 1/160 | Reduces hot spots on hips and thighs |
| Motion-heavy training set | Continuous LED or synced strobes | f/5.6 to f/8 | 100 to 200 | 1/500 to 1/1000 | Freezes movement while preserving fabric behavior |
Model Shots, Flat Shots, and PDP Coverage
Most activewear brands need more than one image type. Model photography usually does the heavy lifting because customers need to see fit and performance on-body. But model shots work best when they are supported by cleaner product-focused images.
A strong PDP mix often includes:
- On-model images for fit, silhouette, and performance context
- Flat or ghost-mannequin images for construction and clean shape reference
- Detail crops for fabric, stitching, trims, and hardware
- Motion or short-form video for products where movement affects the buying decision
The goal is consistency, not variety for its own sake. Customers should move from thumbnail to gallery to cart without relearning the brand's visual logic.
Keep framing consistent across SKUs
A good catalog is boring in the right way. Similar products should share the same camera height, crop, pose logic, and image order. That makes colorways easier to compare and reduces friction on collection pages.
Crescade's overview of AI-driven marketing strategies
If one legging is shot straight-on, another at a dramatic angle, and a third in heavy shadow, the customer has to work harder to compare them. That slows conversion.
Styling That Supports the Sale
Styling should help the customer understand the product faster. In activewear, that usually means cleaner choices, fewer distractions, and a clear sense of how the garment is meant to be worn.
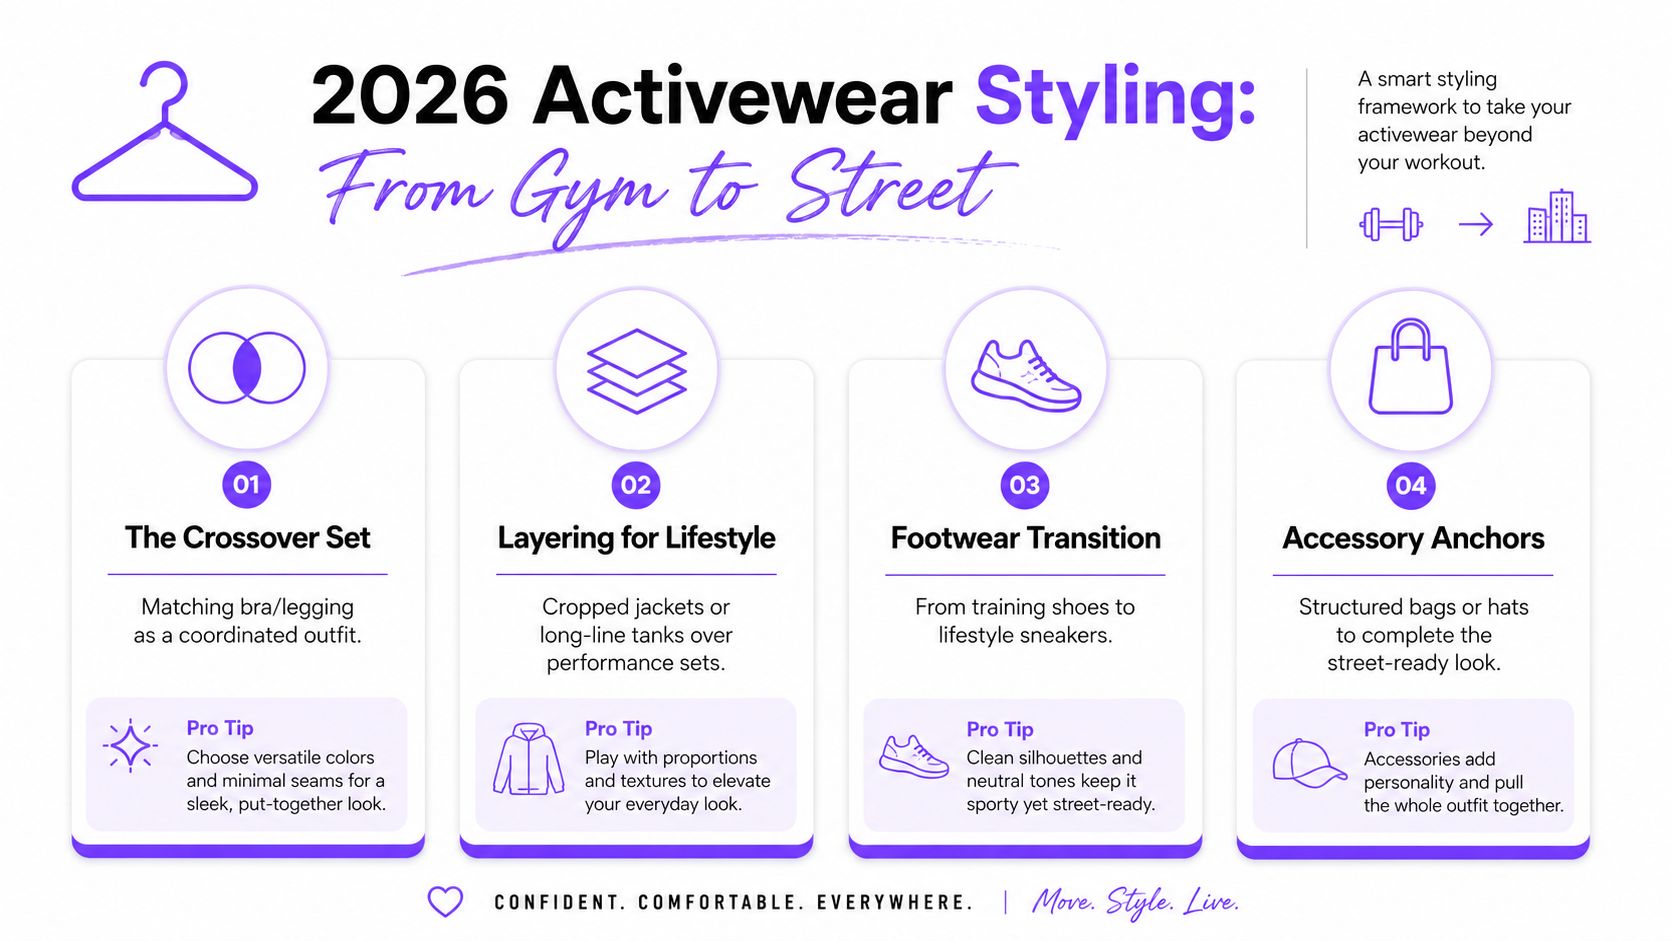
Style for use case first
Start with the intended product context.
- Yoga and pilates products should feel clean, light, and controlled.
- Training products can handle stronger posture and more technical styling.
- Running products benefit from function-first accessories and a more directional silhouette.
- Lounge-to-street activewear should look wearable outside the gym without losing product clarity.
That does not require heavy props. Usually, less works better.
Cut anything that competes with the product
Accessories should clarify the use case, not crowd the frame. If a mat, band, shoe, or layer helps explain the garment, keep it. If it pulls attention from the product, remove it.
Keep the rules simple:
- No wrinkles
- No mixed color temperatures
- No distracting logos
- No props that block waistband, hem, strap, or seam details
Creative rule: if the extra styling does not help the customer understand the product, cut it.
Post-Production for Accuracy and Consistency
Post-production should make activewear cleaner, not less believable. The job is to remove distractions while keeping the fabric honest.
Retouch for trust
Preserve texture. Preserve seam definition. Preserve realistic fabric tension. Remove lint, dust, temporary marks, and small distractions, but do not smooth the garment so aggressively that customers lose the ability to inspect it.
Be especially careful with:
- Compression lines
n- Shine on technical fabrics - Color shifts in black, navy, and saturated tones
- Mesh edges and bonded seams
- Waistbands that look warped after retouching
If the edited image looks too perfect to be real, it stops doing its job.
Standardize output for every channel
Your image specs should be decided once, then reused across the catalog. Keep PDPs, collection pages, marketplaces, and paid social aligned where possible, but do not force one crop into every placement.
A simple operating system helps:
- Define one master crop for the site
- Lock image order by product type
- Use consistent naming conventions like SKU_color_angle_variant
- Export channel-specific versions only when needed
This is where a lot of brands lose time. They produce decent images, then break consistency during resizing, re-cropping, and marketplace exports.
Where AI Fits in Activewear Production
AI can help activewear teams move faster, but it works best when the brand already knows what good product proof looks like.
Use camera-based shoots when you need exact fabric behavior, sensitive material detail, or campaign-level creative control. Use AI-assisted production when the main challenge is asset volume, variation testing, or speed.
For example, brands can use Picjam's AI fashion photography tool when they need faster on-model variations for different poses, audiences, or merchandising needs. For cleaner non-model packshots, detail assets, or simpler product presentation workflows, Picjam's AI product photography tool is a more natural fit.
The practical model is usually hybrid. Get the product truth right first, then scale variations without rebuilding the whole shoot every time.
Conversion Checklist for Your Next Activewear Shoot
The best activewear imagery makes the buying decision easier. It reduces uncertainty, keeps the catalog consistent, and shows the product doing what the PDP says it does.
Use this checklist before you shoot
- Define the product claim first. Know what each SKU needs to prove.
- Build the gallery around decisions. Front, back, side, detail, and motion should each answer a question.
- Choose lighting based on fabric behavior. Do not use one setup blindly across every textile.
- Cast for fit visibility. The product should read clearly on the body you put in front of the camera.
- Keep styling restrained. Every added element should support the product story.
- Standardize framing across the catalog. Comparison is part of conversion.
- Retouch for realism. Clean images convert better than over-polished ones.
- Plan channel outputs early. PDP, marketplace, paid social, and email do not all need the same crop.
Producer note: the cheapest reshoot is the one you avoid by planning the gallery around the product claim.
When the workflow is tight, activewear photography becomes easier to scale. You spend less time fixing inconsistency, less time re-shooting basics, and more time shipping assets that help customers buy with confidence.

Picjam team
The Picjam team blends AI, product, and creative expertise to eliminate the cost and delay of traditional photography for modern eCommerce brands.