Black Velvet Background: Apparel Photography Guide 2026
Master a flawless black velvet background for apparel photography. Covers setup, lighting, & modern AI alternatives to elevate your images.
A fashion team can shoot the same garment on two black backgrounds and get completely different results. One looks premium. The other looks flat, dusty, and cheap. Usually, the difference is not the product. It is the background material, the lighting control, and how disciplined the setup is.
That is why the black velvet background still matters in apparel photography. When you need a dark backdrop that stays deep in camera and keeps attention on the product, black velvet is still one of the most reliable physical options.
By Michael Pirone, Founder of Picjam & Vidico
Why a Black Velvet Background Works for Apparel
For apparel teams, a black background is rarely about drama for its own sake. It is about control. A good black velvet background helps the garment read clearly, keeps the frame clean, and removes distractions that dilute the product.
Velvet works differently from standard black cloth because it absorbs more light and reflects less of it back toward the lens. In practical terms, that helps the background stay darker, especially when the set is lit carefully.
What it improves in product images
For ecommerce and campaign apparel imagery, the biggest benefits are straightforward:
- Cleaner silhouette: Structured jackets, coats, dresses, and tailored pieces stand out more clearly.
- Better texture visibility: Knitwear, wool, leather, satin, embroidery, and trims stay easier to read.
- More premium presentation: The product feels considered, not casually shot.
A black background works when the product stays dominant and the set disappears.
That said, velvet is not a shortcut. It shows every mistake in setup. If there is spill on the backdrop, lint on the fabric, weak garment prep, or poor separation between subject and background, the image falls apart quickly.
Why teams also consider digital workflows
Physical velvet gives you a real in-camera result, but it also takes time. You need space, proper light control, fabric maintenance, and repeatable studio discipline.
That is why many ecommerce teams split the workflow. They may use a physical setup for hero frames, launch images, or detail-led campaign shots, then use faster digital production methods for volume content. If you are building content at scale, Picjam's AI product photography workflow is one practical route for producing consistent assets without rebuilding the same dark set repeatedly.
Essential Materials for a Physical Setup
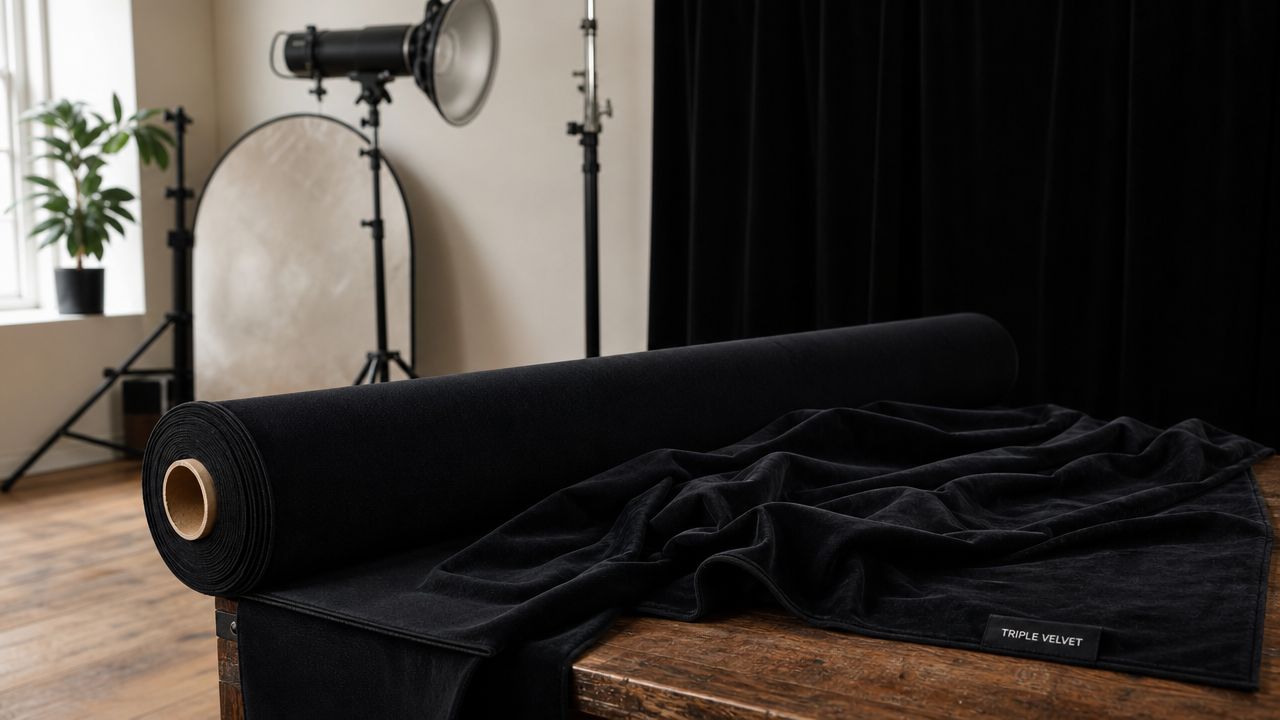
The material choice matters more than many teams expect. Cheap black fabric often photographs as charcoal, shows creases easily, and picks up uneven reflections. Velvet performs better because the pile helps absorb light rather than bounce it back.
A practical reference from Creative Island's guide to black velvet is useful for smaller product work. It suggests about 2 square yards for a typical tabletop setup, which is enough for accessories, footwear, folded garments, and close detail shots. For full apparel looks, you will usually need more.
What to buy first
A simple setup is enough if each piece does its job:
- Black velvet fabric: Choose dense, dark velvet with a consistent finish.
- Backdrop support: Use a crossbar and sturdy stands that hold the fabric without sagging.
- Clamps: Secure the sides and lower edge so the backdrop curves cleanly.
- Lint roller: Essential. Velvet attracts dust and fibers fast.
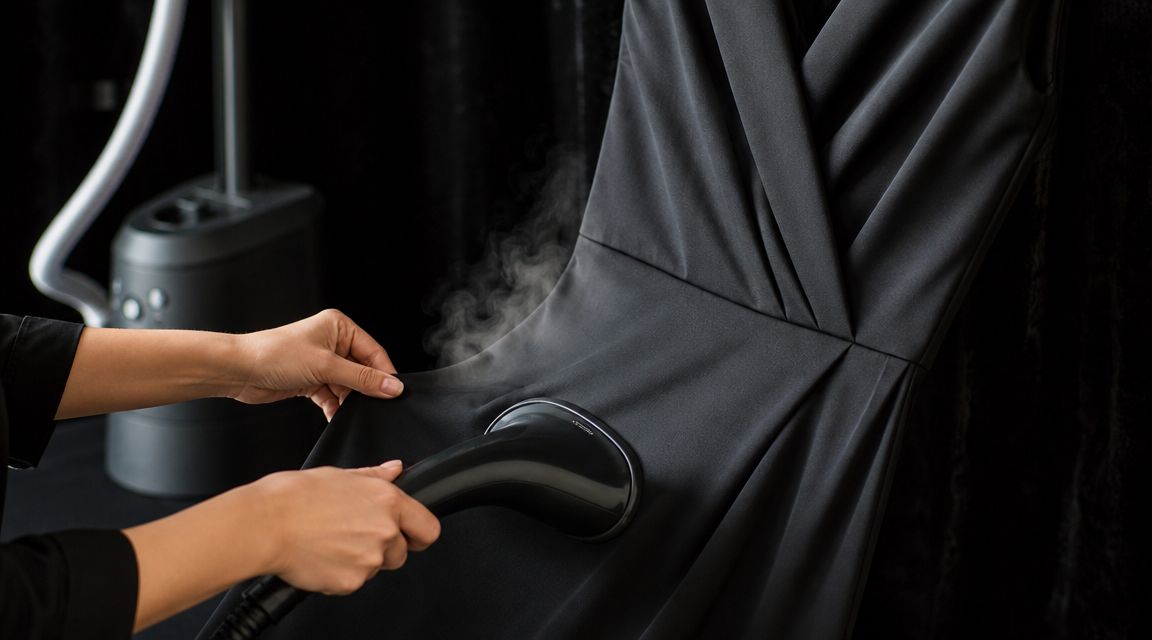
- Steamer or soft brush: Use one to remove marks and keep the surface even.
For hero apparel photography, physical velvet still makes sense because it creates real depth in camera. That matters when you are shooting garments with reflective surfaces, intricate textures, or shapes that need clean edge definition.
Choose the right size for the shot list
Buying too little fabric is the mistake that wastes the most time. Teams try to force one small piece across tabletop products, mannequins, and standing talent, then spend the shoot fighting visible edges and floor breaks.
Use the shot list to determine scale:
- Tabletop scenes: Fine for accessories, footwear, beauty pairings, and cropped details.
- Half-body apparel: Requires enough width for loose framing and enough drop to hide the lower edge.
- Full-body looks: Plan for extra length so the velvet can sweep onto the floor.
If you are building your own rig and need practical ideas for hanging and shaping a backdrop structure, elevate your event photography covers useful construction basics. The anchor says "event photography," but the support logic applies here too.
What usually works, and what usually fails
The best setups are simple and repeatable. The velvet hangs cleanly, the floor sweep is soft, and someone resets the background between looks.
What fails is usually predictable:
- Velvet pinned flat to a wall
- Fabric with visible lint or pressure marks
- Backdrop material that is too small for the framing
- Lighting that spills across the background
backdrop choices for product photography
For many teams, the answer is not choosing one method forever. It is using physical velvet where realism matters most, then using faster digital production when the goal is speed, consistency, and volume.
Mastering Lighting and Camera Settings
Most bad black velvet images are not caused by the fabric. They come from poor lighting control. If too much light hits the backdrop, the black turns grey. If the subject is placed too close to the background, separation disappears.
A practical studio approach is simple: light the garment first, keep spill off the backdrop, and expose so the product holds detail while the velvet stays deep and neutral. This studio lighting walkthrough on YouTube is a useful visual reference for that process.
Light the garment, not the backdrop
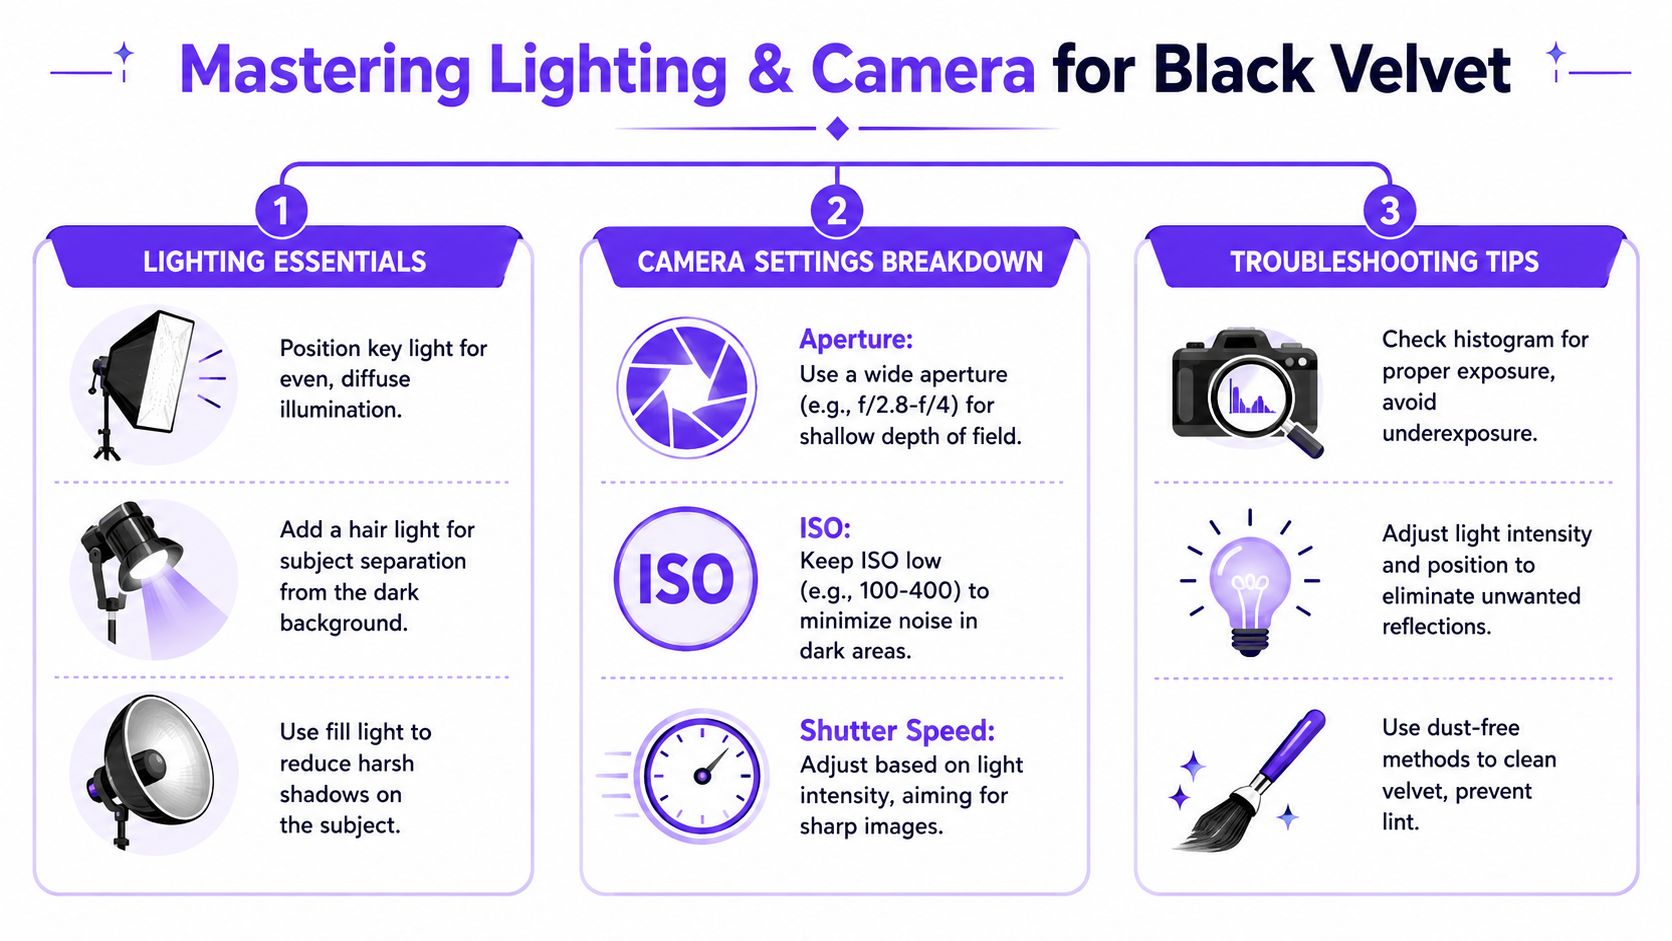
This is the core rule. Premium-looking black background images put the exposure into the apparel, not into the full set.
A dependable apparel setup usually includes:
- Key light on the subject
Use a soft source that shapes the garment without flattening it. - Controlled fill
Add only enough fill to keep detail where you need it. - Rim or separation light
Useful for dark garments, dark hair, and black-on-black styling. - Flags, cutters, or grids
Use them to stop light from washing the velvet.
Practical rule: If the velvet looks grey, check spill, distance, and exposure before blaming the fabric.
Camera settings that give you a strong starting point
There is no universal preset, but these habits are dependable:
- Keep ISO low: This helps the dark background stay clean.
- Use a stable mid-range aperture: Helpful when product sharpness matters across the garment.
- Control ambient light with shutter speed: Useful if the room is contaminating the set.
- Check the histogram and the raw file: Make sure the garment holds detail without lifting the background more than needed.
For a useful refresher on shaping light before you get into a detailed setup, this guide to photography lighting basics is a solid reference.
Where physical setups slow teams down
This is the real trade-off. Black velvet can make apparel look premium, but it also slows production down. You need more prep, more cleanup, and more lighting control than you would with a bright seamless setup.
That trade-off is often worth it for:
- Campaign selects
- Hero PDP images
- Capsule launches
- Texture-led product storytelling
It is less efficient when a team is trying to move quickly through a large SKU list with limited studio time.
Styling Guidance and Common Problem-Fixing
A black velvet setup is unforgiving in a useful way. If the styling is sloppy, the image will show it immediately. If the product is prepped well, the result looks deliberate and expensive.
Start with garment prep
Before adjusting lights or camera settings, get the product right.
These checks usually matter more than another round of exposure tweaks:
- Steam first: Wrinkles look harsher against a clean dark field.
- Clip lightly when needed: Refine the silhouette without misrepresenting the fit.
- Style for separation: If the garment is dark, make sure the outline is still readable.
- Manage reflective materials carefully: Satin, sequins, coated fabrics, and leather can look strong on velvet, but they need tighter highlight control.
In most cases, restraint wins. Clean lines and clear shape do more than over-styling.
Problem one, the velvet looks grey
Grey backgrounds are usually caused by setup errors, not bad fabric.
Work through the fixes in this order:
- Move the garment farther from the backdrop.
- Tighten the light so it stays on the subject.
- Add flags or cutters to block spill.
- Turn off stray room light before making post-production changes.
If the raw file already looks flat, solve the capture problem first. Editing should refine the image, not rescue the setup.
Problem two, lint is everywhere
This is one of the main operational drawbacks of velvet. It attracts dust, loose fibers, and debris constantly.
Keep a lint roller, gloves, and a clean brush on set. Reset the backdrop between looks, not just at the start of the day. For multi-SKU shoots, that habit saves real retouching time.
If your team is producing flat content or ghost mannequin content at volume, it can be more efficient to simplify the base capture and handle the output digitally. For example, Picjam's ghost mannequin removal workflow is useful when the priority is clean apparel presentation at scale rather than maintaining a fabric backdrop on set.
Here's a useful visual reference before you start retouching and cleanup decisions:
Problem three, edges disappear into the black
This is common with dark suiting, knitwear, outerwear, and long hair. Adding more front light usually does not solve it. It often just flattens the product and brightens the backdrop.
Use selective separation instead:
- Add a light rim on the shoulder or side seam: Enough to define shape without making the image look glossy.
- Bring out texture selectively: Ribbing, wool grain, pleats, and stitching help the eye hold the form.
- Adjust the pose: A slight gap between arm and torso can recover shape better than adding another main light.
Post-production that helps, and post-production that hurts
Good retouching on black velvet is restrained. Remove lint, smooth obvious backdrop inconsistencies, and deepen the blacks only as far as the garment edge still reads clearly.
The common mistake is forcing the whole frame to pure black. That can erase hems, crush texture, and make the product look cut out rather than photographed.
The Digital Alternative for Speed and Scale
Physical black velvet still has value. It gives you a real interaction between product, light, and surface. For the right shot, that matters.
But in ecommerce production, repeatability matters too. If a team needs multiple crops, launch variants, or consistent outputs across a large catalog, rebuilding the same physical set over and over is rarely the most efficient route.
Traditional velvet versus digital production
The practical comparison looks like this:
| Metric | Traditional Black Velvet Shoot | AI-Generated Background (Picjam) |
|---|---|---|
| Setup time | Requires fabric, support, lighting control, and cleanup | Faster once the base image is captured |
| Consistency across batches | Strong when the same crew and setup are maintained | Easier to standardize across larger volumes |
| Space requirements | Needs room for subject separation and backdrop control | Can reduce dependence on a dedicated dark set |
| Retouching workload | Often includes lint cleanup and spill correction | Shifts effort toward review and output approval |
| Best use case | Hero images, editorial frames, tactile realism | Scaled ecommerce output, testing, and variants |
This is not really a craft-versus-technology decision. It is a production decision. Use physical velvet when the in-camera result is important enough to justify the extra time. Use digital production when the team needs speed, repeatability, and lower operational drag.
Where a hybrid workflow makes sense
A lot of apparel brands use both. They define the look direction with a physical shoot, then extend that visual approach across more assets using digital production.
That hybrid model tends to work well when:
- The hero imagery needs real texture and precise lighting
- The catalog needs fast rollout across many SKUs
- Regional teams need the same visual direction in multiple output formats
- The content calendar is too fast for repeated studio rebuilds
Key Takeaways for Your Next Apparel Shoot
A black velvet background is still a useful tool when you want apparel images to feel controlled, premium, and distraction-free. It works best when silhouette, texture, and finish need to do the selling.
Use separation as the main control point
If the background looks grey, fix the setup before touching post. More distance, less spill, and tighter lighting usually solve it.
Prep and style more tightly than usual
Dark backgrounds remove excuses. Steam the garment, clean the surface, refine the silhouette, and simplify the frame.
Choose the workflow that fits the output
For hero images, physical velvet is often worth the effort. For large SKU counts, repeated content needs, and fast rollout cycles, a digital workflow is usually more efficient.
Takeaway: Use real velvet when in-camera realism matters most. Use digital production when speed, consistency, and scale matter more.
If you're comparing traditional studio production with a faster ecommerce content workflow, you can explore Picjam or book a demo to see how the process fits your team.

Picjam team
The Picjam team blends AI, product, and creative expertise to eliminate the cost and delay of traditional photography for modern eCommerce brands.