Photography Styling Guide for Apparel E‑Commerce
Photography styling guide for apparel e‑commerce: prep garments, plan shots, style models, and ship consistent PDP images that convert across every channel.
A product page fails when the image set answers some shopper questions well and misses others. One frame shows the silhouette clearly. Another shifts the color. A close-up looks editorial but hides construction. A model image feels off-brand or over-styled. The result is friction at the exact moment a customer is trying to judge fit, fabric, shape, and value.
A practical photography styling guide fixes that. It gives the team a repeatable standard for how apparel should be prepared, styled, shot, cropped, retouched, reviewed, and published across PDPs, collection pages, ads, and marketplaces.
Picjam fits into that workflow by helping apparel teams create additional model and product variations from approved source assets through tools like AI fashion photography and AI product photography. The system only works well, however, when the brand already has clear rules for garment truth, image coverage, and quality control.
Why a Styling Guide Matters More Than a Mood Board
historical context for fashion and product photography
A mood board helps define a look. A styling guide defines how that look gets executed at scale.
For ecommerce, the guide should answer a simple operational question: what does every apparel SKU need to show, and what standard must each image meet before it goes live?
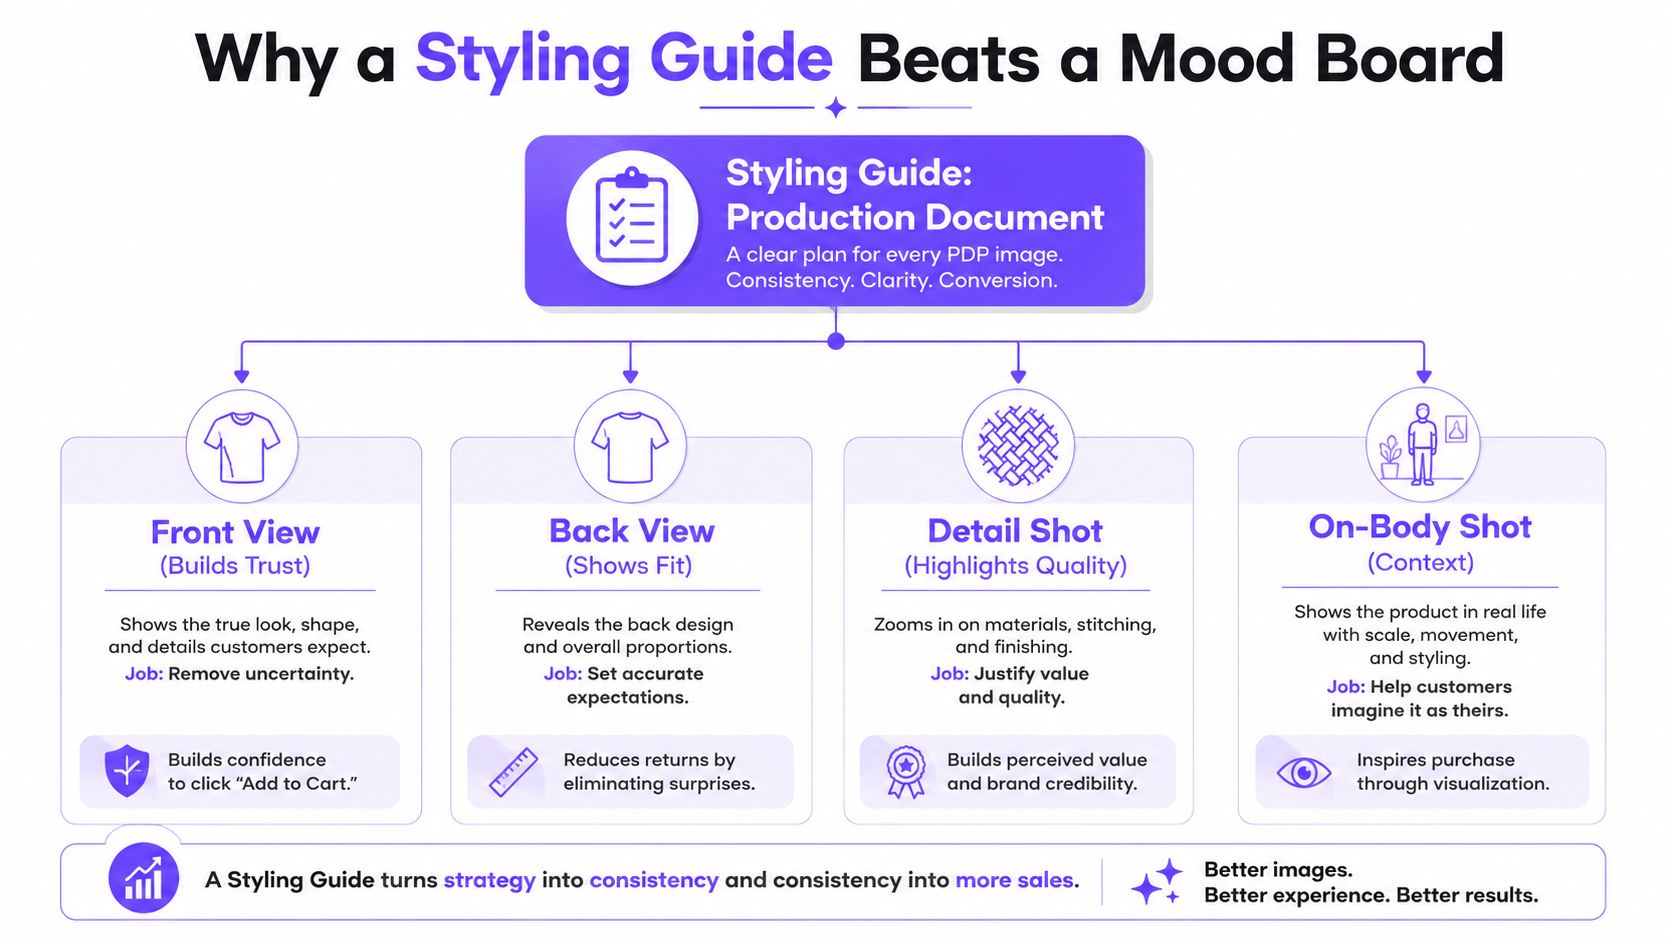
Start with the core PDP set:
- Front view: shows the silhouette, balance, and first-read shape.
- Back view: shows rear fit, seams, hems, yokes, and closures.
- On-body view: shows scale, drape, and how the garment sits in wear.
- Detail view: shows fabric, texture, stitching, trim, and construction.
Independent references on apparel image best practices support this foundation, with many apparel galleries expanding into additional close-ups, side views, and movement shots when the product needs them.
The point is not to collect more frames by default. The point is to define which frames are required by product type, what each frame must communicate, and what counts as acceptable execution.
Build the guide so a junior team member can follow it
A usable styling guide should be specific enough that a new stylist, photographer, or reviewer can follow it without improvising.
For each required shot, document:
- camera height
- focal length range
- crop rule
- model position
- garment prep steps
- background color
- lighting direction
- prop limits
- retouching limits
- pass-fail QA checks
Adobe's product photography guidance also covers common ecommerce image types such as hero, detail, lifestyle, diagonal, and group compositions. That can be useful reference when defining your own shot taxonomy.
Keep the document practical. Define exactly what your brand means by front view, how much negative space is allowed, how the hem should sit in frame, and what defects trigger a reshoot. Precision is what keeps galleries consistent when teams change, output grows, or new categories are added.
Garment Prep Before the Shoot
Most expensive retouching starts with a preparation miss.
Creased plackets, twisted side seams, collapsed collars, bent pockets, visible lint, folded labels, and blown-out knits are usually easier to fix on set than in post. If the garment is not ready before the first frame, the image set gets slower, more expensive, and less accurate.
ecommerce product photography statistics
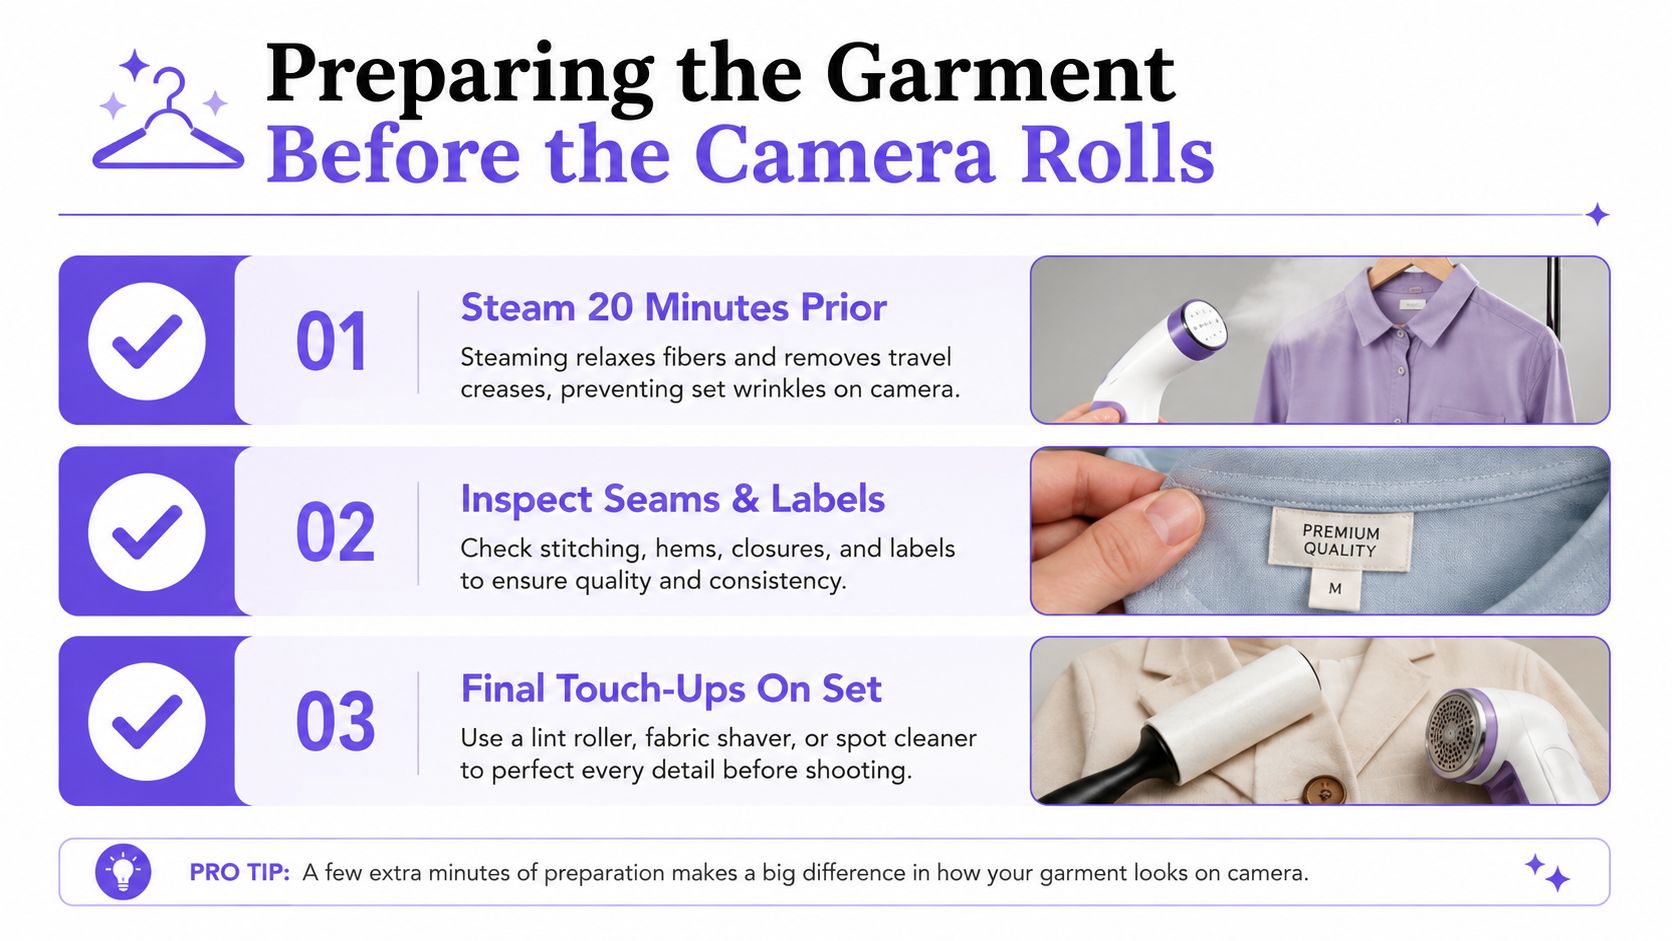
Start with steaming. Steam the sample close to shoot time, then recheck the garment after it settles. Pay special attention to:
- collar and neckline
- shoulders
- placket or zipper line
- cuffs
- waistband
- side seams
- hem
Structured pieces, ribbed knits, linen, and dark fabrics need an extra inspection pass because flaws show quickly under studio light.
Use the same prep sequence for every SKU
Run a fixed inspection sequence before a garment reaches camera:
- Remove lint and debris: lint-roll the full garment, then inspect under actual set lighting.
- Check exterior presentation: confirm plackets, collars, cuffs, pockets, and hems are straight and clean.
- Check interior construction: inspect labels, seam allowances, loose threads, and anything that may show through or distort the shape.
- Control excess volume carefully: use concealed clips or pins only when needed, and never in a way that creates a misleading fit.
- Swap weak samples early: replace faded, stretched, damaged, or misshapen units before shooting.
- Create a color checkpoint: photograph the garment against a neutral grey reference surface for review consistency.
Practical rule: if the garment would fail a buyer hand check, it should fail the camera check too.
The styling guide should also separate physical corrections from digital corrections. Steam, align, pin, and reset shape on set. Reserve retouching for small cleanup work, not structural repair.
Styling and Fit Standards
Fit communication is one of the main jobs of apparel photography. If the fit story is unclear, the shopper has to guess.
That starts with model selection. The model should help the customer understand intended fit, not simply make the garment look more flattering.
Use a casting matrix tied to your size run and silhouette intent.
| Garment Size | Model Size | Frame Notes | Key Drape Check |
|---|---|---|---|
| XS/S | True smaller frame | Keep shoulder proportion aligned to the garment block | Collar lies flat, sleeves keep shape |
| M/L | Medium frame | Show intended ease without stretching the torso | Side seams fall straight, hem stays level |
| XL and above | Proportional extended-size frame | Prioritize shoulder, bust, waist, and hip proportion | Armholes, waist, and hem do not pull visibly |
The useful question is not which model looks best. It is which model makes the product fit easiest to read.
For more depth on model presentation choices across apparel categories, see this guide to modeling for clothing brands.
Check drape before you approve the pose
A good pose can still hide a bad fit read.
Before approving a frame, check whether the garment is behaving the way the product page needs it to behave:
- T-shirts: confirm shoulder line, sleeve opening, chest ease, and body length are readable.
- Shirts: check collar roll, placket straightness, cuff position, and sleeve pitch.
- Knitwear: make sure texture reads cleanly and the body is not over-tensioned.
- Dresses: show hem position, waist placement, and how fabric falls through the skirt.
- Trousers: show rise, hip fit, leg line, and break or crop length clearly.
- Outerwear: keep zip lines, lapels, pocket placement, and bulk distribution readable.
If the product story depends on relaxed fit, oversized shape, cropped length, or stretch recovery, the guide should state exactly how that needs to be shown.
Backgrounds, Props, and Styling Restraint
Apparel ecommerce images work best when the garment stays visually dominant.
That does not mean every frame must be sterile. It means the background, props, and accessories should support product reading, not compete with it.
Use a defined background system by channel:
- PDP hero and core views: clean, consistent, distraction-free
- Collection pages: slightly more context is acceptable if treatment stays uniform
- Campaign and social assets: more expressive, but still tied to approved product truth
- Marketplace images: follow platform requirements first
The guide should specify the approved background family, tonal range, and acceptable texture level. If white, off-white, warm grey, or brand color backdrops are all allowed, define where each is used.
Keep props controlled
Props should clarify context, not create noise.
A simple operating rule works well: allow one supporting prop or one hero accessory per frame unless the shot type explicitly allows more. That keeps the eye on the garment.
Examples:
- A woven tote can support a linen shirt story.
- A chair can support a seated trouser drape shot.
- Footwear can anchor proportion in a full-body image.
What usually hurts conversion clarity is stacking props and accessories that pull attention away from cut, color, or fabric. If styling includes jewelry, bags, or shoes, set limits for:
- quantity
- scale
- color coordination
- metal consistency
- visual dominance
The shopper should still know within one second what product is being sold.
Lighting Rules for Apparel
Lighting should be chosen by product need, not by habit.
The right setup for a satin blouse is not always the right setup for black denim, brushed fleece, or a chunky knit. Your guide should define what the light needs to reveal for each category: color, surface texture, seam detail, silhouette, or structure.
A documented ratio system is more useful than vague terms like soft, clean, or premium. A brand photography lighting ratios reference can help teams define repeatable lighting behavior. For framing principles, this overview of composition and lighting fundamentals is also useful.
| Shot Type | Lighting | Background | Framing | Risk Controlled |
|---|---|---|---|---|
| Front hero | Even, controlled light | Clean and consistent | Full garment, balanced margins | Poor silhouette read and uneven exposure |
| Back view | Broad, low-shadow light | Same family as hero | Centered on garment spine | Hidden fit and construction details |
| Detail | Directional but color-safe light | Quiet, non-distracting | Feature fills frame | Texture or stitch detail going soft |
| On-body | Shaped light with restrained contrast | Brand-approved context | Full-body or three-quarter | Loss of dimension or inaccurate drape read |
Define category-specific lighting exceptions
A single house style can still allow controlled exceptions.
Examples:
- Black garments: need enough separation to preserve seam and panel detail.
- White garments: need highlight control so edges and texture do not disappear.
- Reflective trims or hardware: need angle control to avoid hot spots.
- Texture-led products: need enough directional shape to make the surface legible.
If a lighting exception is allowed, write it into the guide. Do not leave it to memory or taste.
For teams building simple repeatable setups, this guide to jewelry photo lighting on a budget is useful because it treats lighting as a system. The same logic applies to apparel. Define what must be visible, then build the setup around that requirement.
A solid photography lighting basics guide can support team onboarding, but the final standard should still be product-specific.
Shot Lists and Channel-Ready Crops
A styling guide should include a shot list, not just creative direction.
At minimum, define the required image set by product family. For example:
Core apparel PDP shot list
- front flat or front on-body hero
- back view
- close-up fabric or construction detail
- on-body fit view
- side or three-quarter view if needed
- movement or drape frame if needed
Not every SKU needs the same expansion shots. A basic tee may need fewer images than tailored trousers or a technical jacket. The guide should show where extra coverage is mandatory.
Write crop rules by channel
One of the fastest ways to lose consistency is to leave cropping decisions too late.
Define crop behavior in advance for each output:
- PDP hero: full garment visible, predictable headroom or margin
- Collection grid: uniform visual scale across SKUs
- Marketplace: platform-compliant framing and background
- Paid social: reserve safe space for overlays if needed
- Email and homepage modules: match template aspect ratios
For model photography, state whether feet must be included, how close the crop can come to the top of head, and whether hands may exit frame. For close-ups, define how much context must remain so the viewer can still understand what feature they are seeing.
Posing Rules That Help the Product
Posing should explain the garment, not perform around it.
A simple pose library is usually enough for ecommerce:
- straight front stance for core fit reading
- slight angle for dimension
- side stance when sleeve, hip, or leg line matters
- controlled movement when drape needs to be shown
- seated or leaned pose only when it supports the product story
The pose should not hide plackets, waistlines, side seams, rise, hem shape, or key construction details.
Use movement carefully
Movement can help when static frames flatten the garment, but it should stay controlled.
Good use cases:
- showing skirt sweep
- showing wide-leg trouser motion
- showing soft outerwear drape
- showing sleeve volume
Bad use cases:
- motion blur hiding product detail
- hair or props covering the garment
- extreme twists that distort fit
- poses that change perceived length or width too much
If the guide allows expressive frames, keep them secondary to the core product views.
Retouching Boundaries
Retouching should clean the file, not rewrite the product.
This is where many apparel teams create avoidable returns. When retouching removes honest fabric behavior or reshapes the garment beyond reality, the image may look better in review but perform worse after delivery.
Allowable retouching usually includes:
- lint removal
- loose thread cleanup
- minor dust or sensor spot cleanup
- small background cleanup
- color balancing to match approved reference
- temporary pin or support removal when physically used on set
Retouching that should be restricted or disallowed unless explicitly approved:
- changing garment shape
- narrowing sleeves or body width
- smoothing away real fabric texture
- reducing natural wrinkling that reflects the material
- altering drape to imply a different fit
- changing construction details
A linen shirt should still read as linen. A chunky knit should still hold visible texture. A washed tee should not be retouched into looking like compact poplin.
File Naming, Asset Control, and Review Flow
Consistency breaks when asset handling breaks.
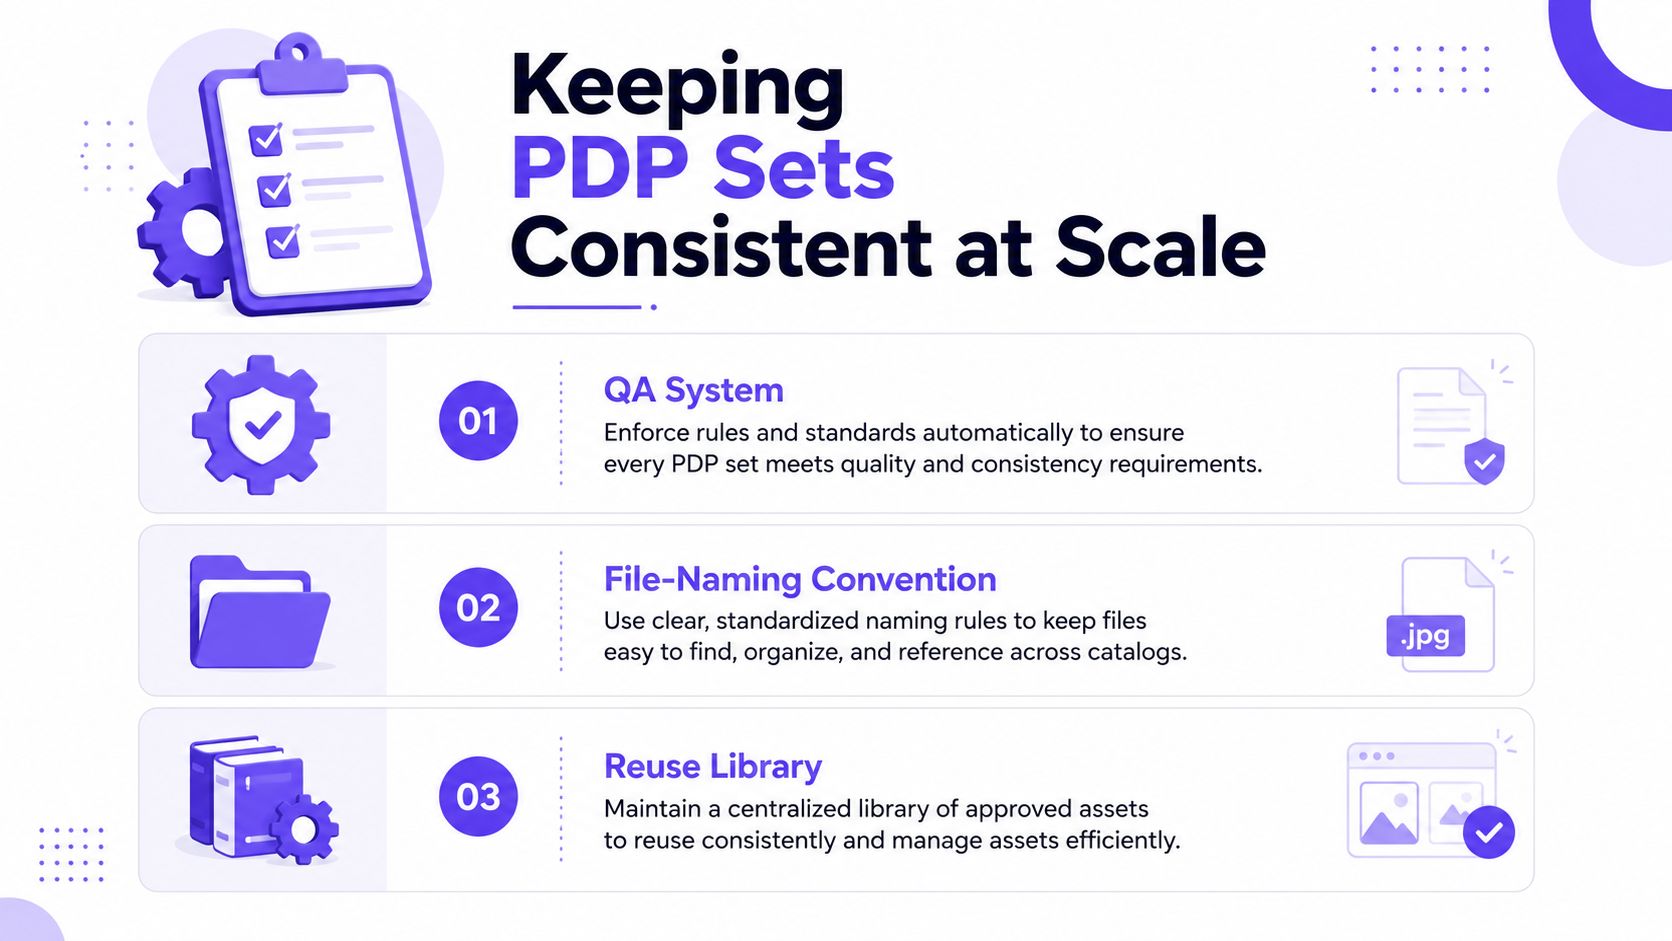
The styling guide should connect image standards with file standards. Use a naming structure such as SKU_shot_angle_version and store:
- approved shot list
- crop spec
- retouch spec
- color reference
- garment family tag
- final approval status
That makes it easier to reuse standards across categories and easier to troubleshoot where a bad asset entered the workflow.
The broader product photography workflow should connect prep, capture, post, QA, and publishing. The styling guide is one control layer inside that larger production system.
Veo3 and Grok Imagine video guide
Final QA Checklist Before Publish
Every image set should pass a short review before it goes live.
Garment accuracy
- color is consistent across the full gallery
- silhouette matches the actual product
- no hidden clips, pins, or supports are visible
- no misleading reshaping has been introduced
Styling control
- garment is steamed and aligned
- accessories stay within allowed limits
- props do not overpower the product
- model styling matches brand and category rules
Framing and crop
- required shot list is complete
- crop matches the channel spec
- garment sits at the correct scale in frame
- background treatment is consistent with the guide
Technical quality
- focus is correct on key product areas
- exposure is even and controlled
- highlights and shadows preserve product detail
- texture remains readable
Retouching review
- cleanup is complete
- no over-smoothing or shape editing is visible
- texture and construction remain true
- color matches approved reference
Asset control
- filename is correct
- version is current
- output dimensions are correct for destination
- final approved files are stored in the right location
A short checklist used every time is more useful than a long document nobody follows.
Operating Takeaway
A strong apparel photography styling guide is not a creative extra. It is production control.
Define the required shot list. Set garment prep standards. Document fit and styling rules. Limit props. Match lighting to product behavior. Write crop specs by channel. Set hard retouching boundaries. Then run the same QA process every time.
That is how apparel teams keep PDP image sets clear, consistent, scalable, and trustworthy across a growing catalog.

Picjam team
The Picjam team blends AI, product, and creative expertise to eliminate the cost and delay of traditional photography for modern eCommerce brands.