Ecommerce Image Optimization: A Guide for Apparel Brands
Master ecommerce image optimization for apparel. Our guide covers formats, compression, srcset, SEO, and automation to boost speed and conversions in 2026.
When shoppers land on an apparel product page, images do most of the selling. They answer the questions copy cannot answer fast enough: What does the fabric look like? How does it hang? Is the color accurate? What does the back look like? Can I trust this brand enough to buy without touching the product first?
That is why ecommerce image optimization matters. It is not just a speed task, and it is not just a creative task. For apparel brands, it sits in the middle of performance, merchandising, and conversion.
Author: Michael Pirone, Founder of Picjam & Vidico
Most teams still split the work in the wrong way. Creative teams focus on how the product looks. Ecommerce teams focus on page speed. Growth teams focus on conversion rate. In reality, image optimization affects all three at once.
If your files are too heavy, pages slow down. If your compression is too aggressive, fabric detail disappears. If your galleries are poorly structured, shoppers cannot evaluate fit, texture, or quality with confidence. The result is usually lower engagement, weaker conversion, and more wasted paid traffic.
For apparel brands, the goal is simple: serve the fastest image that still sells the product properly.
Why Apparel Image Optimization Has a Direct Revenue Impact
On most fashion ecommerce pages, images are the heaviest assets and the most important buying inputs.
A shopper can tolerate a short delay in reading product copy. They are less tolerant when the main product image loads slowly, when gallery images shift around the page, or when zoomed details look soft. In apparel, those details are not decoration. They are evidence.
A close-up of knit texture, denim wash, seam quality, lining, or hardware can either reduce hesitation or create it. If the image loads late or looks compromised, the page loses selling power.
This is why the technical side and the merchandising side cannot be managed separately.
The common mistakes
Most apparel teams lose performance in one of three ways:
- They upload oversized originals and rely on the platform to sort it out later.
- They compress too hard and flatten the details shoppers care about.
- They serve the same large image to every device, including mobile.
None of those problems are hard to fix individually. The issue is that they usually compound across product pages, collection pages, editorial landing pages, and marketplace feeds.
A collection grid with bloated thumbnails slows category browsing. A PDP with weak close-ups hurts conversion. A marketplace image set with poor cropping hurts click-through. The image stack affects the full funnel.
What good looks like
Strong teams treat image optimization as part of product presentation, not just technical cleanup.
They usually do four things well:
- They assign each image a job.
- They choose format and dimensions based on placement.
- They deliver responsive sizes by device.
- They review image quality at real display sizes, not at full resolution in a design tool.
If your team is still exporting manually, upstream discipline matters too. This guide to Lightroom export settings for social and ecommerce images is useful if oversized source files are still making their way into Shopify or another storefront.
Choose Formats and Compression Based on the Placement
Format choice has a bigger impact than most teams expect. If you get the format wrong, you start with unnecessary file weight before compression even begins.
Use the right format for the job
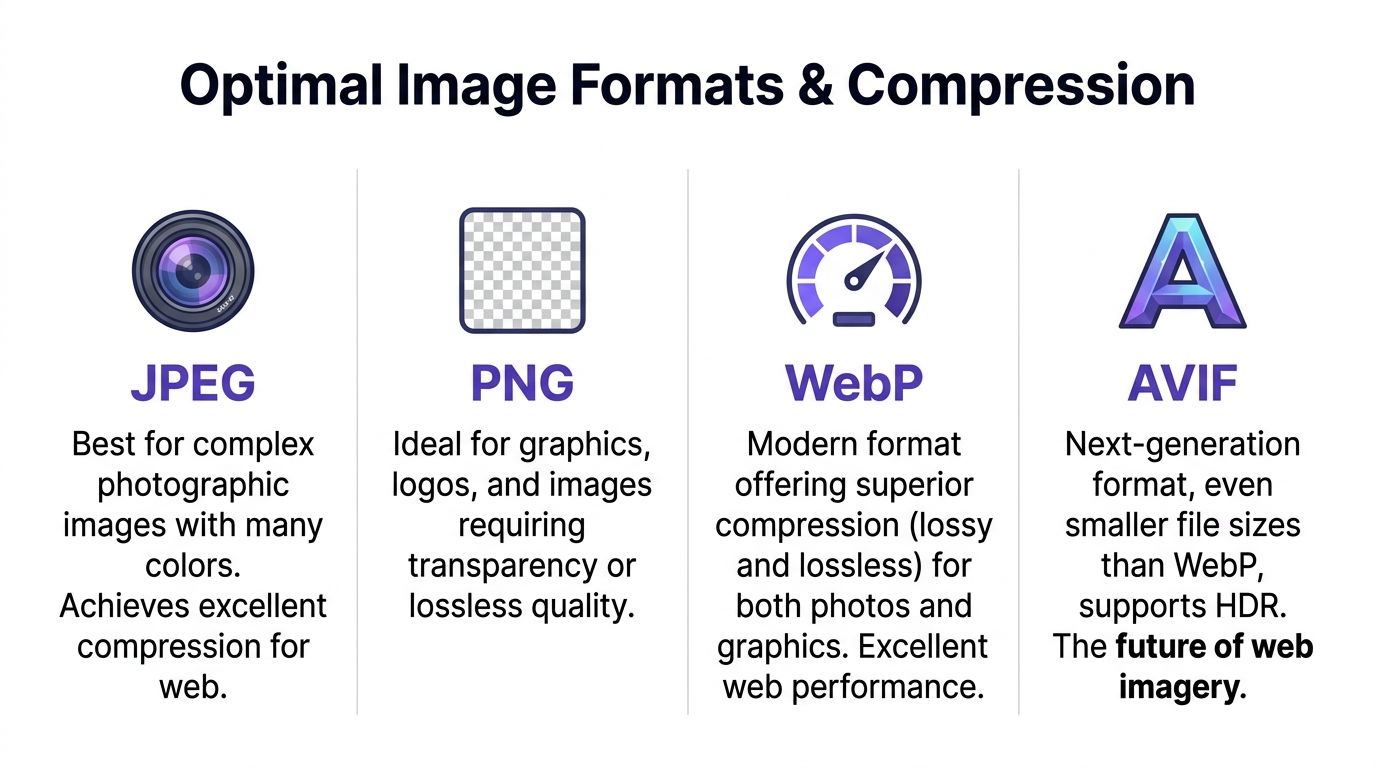
For most apparel product photography, WebP is the practical default. It usually gives you a better balance of file size and visible quality than JPEG. That matters when you need to preserve texture in cotton, wool, silk, rib knit, denim, or embroidery.
JPEG still makes sense in older workflows and fallback scenarios. PNG is still useful for transparency, graphics, and certain design assets. AVIF can be more efficient again, but many teams still find it less convenient across tooling, review workflows, and merchandising operations.
For most stores, the working rule is straightforward:
- Use WebP for core product imagery.
- Use PNG for transparency and graphic assets.
- Keep JPEG only where compatibility requires it.
The point is not to chase the newest format. The point is to remove unnecessary weight without compromising how the garment looks.
Set file targets by placement
Not every image deserves the same size budget.
A thumbnail in a collection grid does not need the same weight as a zoom-capable PDP image. A homepage banner should not inherit the same export logic as a plain-background front shot. Teams that use one generic export rule across the whole storefront usually over-serve some placements and under-serve others.
A better approach:
- Keep collection thumbnails very light.
- Keep standard PDP images crisp at their actual display size.
- Allow zoom or hero images slightly more weight, but only if the added detail is visible and useful.
- Strip excess weight from any image where the shopper will never see the difference.
Consistency matters too. If one gallery image is sharp and the next is visibly softer or noisier, the page feels less trustworthy even if the load time is acceptable.
Find the real compression limit
The right compression point is not where the file is smallest. It is where the shopper still trusts what they are seeing.
That is especially important in apparel, where quality signals live in small details. Over-compression often shows up first in:
- knit texture
- lace and embroidery
- edge contrast around garments
- gradients and darker tones
- skin tones and hair in model photography
Review images where they actually matter:
- Check them at live PDP and collection sizes.
- Test them on mobile Safari and Chrome.
- Inspect dark garments for blocking or color shift.
- Inspect edges for halos and ringing.
- Review zoom states separately from standard gallery view.
If your merchandising team needs a simple way to reduce image size before upload, lightweight tools can help. Just do not confuse file compression with a complete image strategy.
Fix the source workflow, not just the upload step
A lot of ecommerce image debt starts before the files ever reach the storefront.
Creative teams often export one large master and reuse it everywhere: paid social, email, lookbooks, wholesale decks, PDPs, marketplaces. That saves time in the short term and creates image bloat everywhere else.
If your team is building product content at scale, create export presets by placement and channel. If you are also producing new catalog imagery, tools like Picjam's AI product photography hub can help teams create more placement-ready product visuals without restarting a full production cycle.
Use Responsive Delivery So Every Device Gets the Right File
Compression only solves part of the problem. Delivery solves the rest.
If the same large image is sent to every screen, a phone ends up downloading an asset built for desktop. That is one of the most common and avoidable sources of waste on apparel storefronts.
Responsive delivery with srcset lets the browser choose the right file for the screen and display density.

What srcset is doing
In simple terms, srcset gives the browser a menu of image sizes. The browser picks the most appropriate one.
That means:
- mobile devices load smaller files
- larger screens load larger files
- higher-density displays can still get sharp images
For apparel, that matters because the same product image may appear in multiple contexts: collection grids, quick views, PDP galleries, related product carousels, and zoom states.
A simple implementation example
<imgsrc="jacket-800.webp"srcset="jacket-400.webp 400w,jacket-800.webp 800w,jacket-1200.webp 1200w"sizes="(max-width: 600px) 50vw, (max-width: 1200px) 33vw, 800px"alt="Women's black wool jacket front view"/>| Element | What it does |
|---|---|
| src | Supplies a default image |
| srcset | Lists available image widths |
| sizes | Tells the browser how much space the image will occupy |
| alt | Adds accessibility and product context |
Where teams usually miss it
The main problem is not that teams have never heard of responsive images. It is that they assume the platform has handled every edge case already.
In practice, image bloat often appears in:
- custom homepage sections
- app blocks
- collection templates
- third-party carousels
- editorial landing pages
- bundle builders and quiz flows
A theme might handle core PDP images well while a review widget or custom section still loads oversized assets.
The best internal question to ask is simple:
Are all customer-facing product and collection images using responsive
srcset, or only the theme defaults?
That question usually reveals where the wasted weight is hiding.
What Shopify teams should review
If you run Shopify, check more than the main theme templates. Review custom sections, app output, and collection grid behavior too. This guide to Shopify product image size is useful if you need to align source dimensions with how images actually render across the storefront.
For operators, the takeaway is straightforward: optimize both the file and the delivery path.
Structure Images for Search Visibility and Shopping Click-Through
Image SEO for apparel is often explained too narrowly. File names and alt text matter, but they are only part of the picture.
What actually matters is whether the image is clear, relevant, well-labeled, and useful in the context where it appears.
Get the basics right
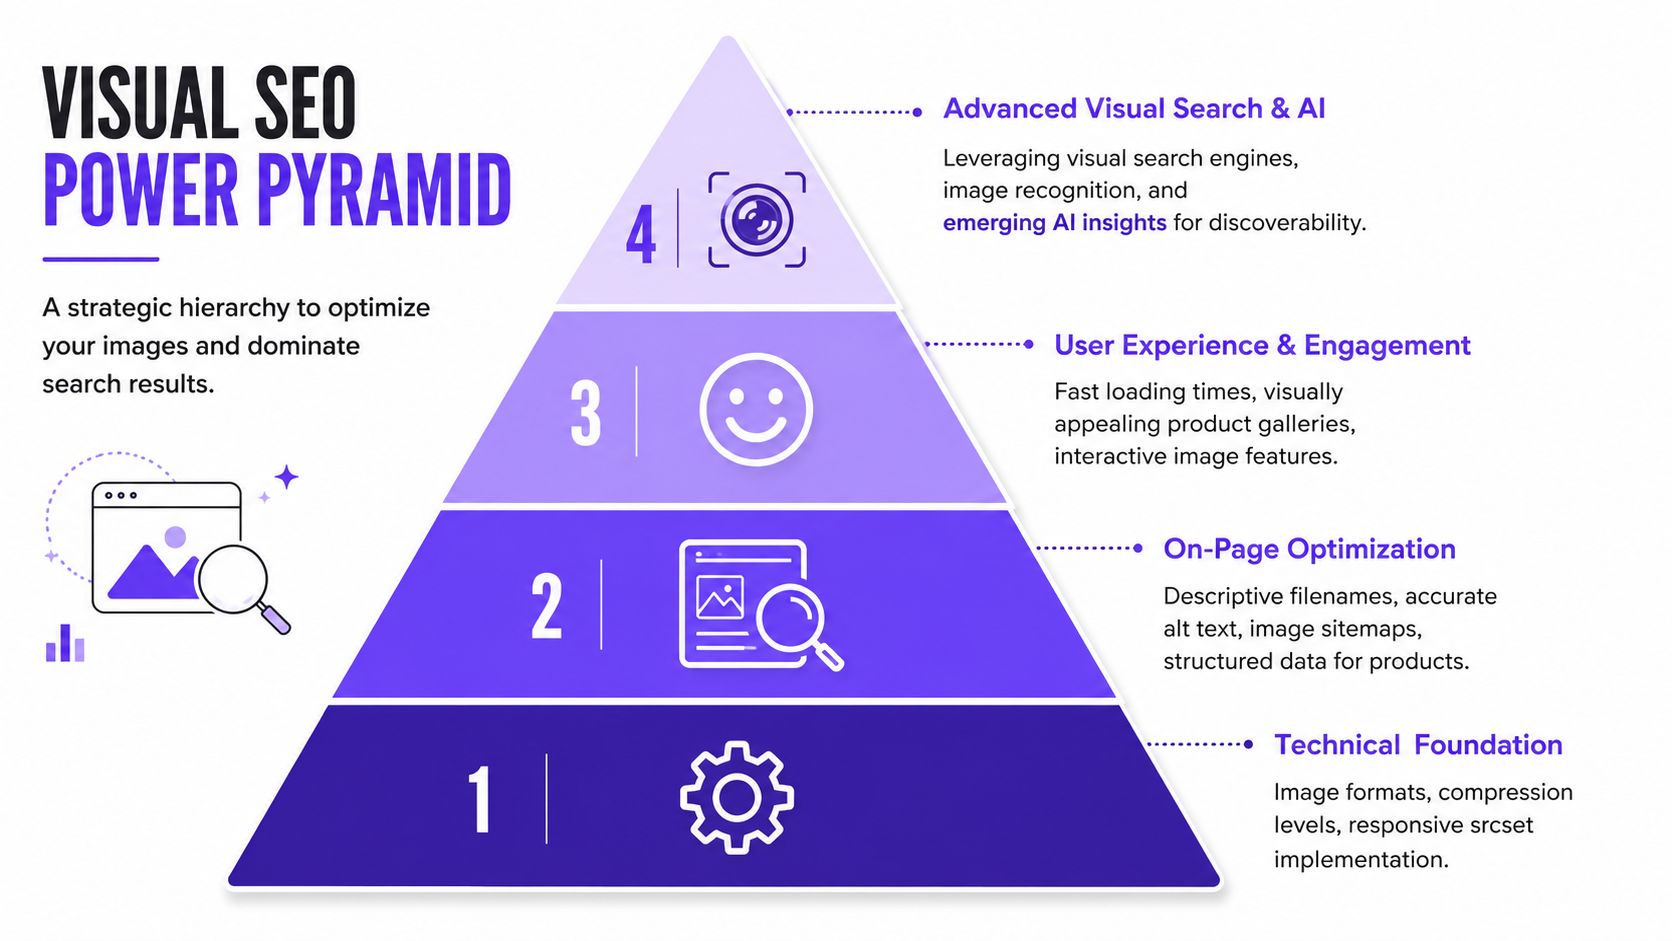
Search and shopping systems need clean context around the asset. That means:
- descriptive filenames
- accurate alt text
- relevant surrounding copy
- product schema
- image sitemaps where appropriate
IMG_4817.jpg says nothing useful.
womens-black-merino-cardigan-front.webp gives category, color, material, and angle immediately.
For teams that need a shared vocabulary, this glossary of image SEO concepts is a useful reference.
Make the image match the intent
Metadata cannot rescue a weak product image.
If someone is evaluating a linen shirt, they want to understand color, cut, and texture quickly. If the primary image is overly styled, cropped badly, or unclear, the product becomes harder to evaluate whether it is on a search result, a collection page, or a marketplace listing.
For apparel brands, the better rule is this: keep the image style aligned with the buying question.
- Use plain-background clarity where precision matters most.
- Use model imagery to show fit and proportion.
- Use close-ups to prove material quality.
- Use contextual shots when they help click-through without hiding the product.
That is as relevant for Google Images as it is for marketplaces and shopping feeds.
Keep the product story consistent
Your image, filename, alt text, and surrounding copy should all describe the same product story.
If the page is selling a summer linen shirt, the image should support that use case clearly, and the supporting metadata should reinforce it. Mixed signals create weaker relevance and weaker shopper confidence.
This matters even more on collection pages and marketplace feeds, where the image often does more of the work before a click happens.
Build Galleries That Reduce Buying Friction
For apparel, gallery structure matters almost as much as image quality.
A product page does not need more images by default. It needs the right images in the right order.
Assign each image a job
The first image should identify the product quickly. The next few should remove the most likely objections.
For apparel, that usually means some combination of:
- front view
- back view
- on-body fit view
- close-up of fabric or texture
- detail shot of hardware, cuff, seam, or trim
- side view or drape view
- contextual or styled shot
A shopper looking at tailoring wants to judge structure and fit. A shopper looking at knitwear wants to judge texture and weight. A shopper looking at denim wants to judge wash, leg shape, and rise. Gallery planning should reflect that.
Think across page types
Different placements need different image behavior:
| Placement | What the images need to do |
|---|---|
| Collection page | Load fast, read clearly at small size, earn the click |
| Product page | Reduce uncertainty and support purchase confidence |
| Marketplace listing | Compete for attention while following marketplace rules |
| Paid landing page | Reinforce the promise of the ad and shorten time to evaluation |
Teams often over-invest in the PDP hero image and under-invest in collection thumbnails and marketplace crops. That is a mistake. The earlier placements decide whether the shopper even reaches the product page.
Flat lay can still be useful
For some categories, flat lays still perform well when they are used intentionally. They can be especially useful for basics, accessories, folded product, and clean collection merchandising where shape reads clearly. If your team is testing alternate presentation styles, Picjam's flat lay photography hub is a relevant reference point.
Test Images Like a Merchandising Lever, Not a Design Preference
Small image changes can produce meaningful commercial differences, especially in apparel categories where uncertainty is high.
The issue is not which image looks nicest in isolation. The issue is which image helps the shopper understand the product and buy it with confidence.
What to test first
Start with variables that answer product questions directly:
- Hero image choice: plain product-first shot vs model-first shot
- Gallery order: fit image first vs detail image first
- Detail coverage: texture, hardware, lining, stitching, waistband, cuff, back view
- On-body presentation: ghost mannequin, cropped torso, full-body model, flat lay
- Image count: lean gallery vs fuller gallery for higher-consideration products
These tests usually matter more than superficial visual tweaks because they change how much doubt a shopper feels.
Measure business outcomes, not just image engagement
Gallery clicks are useful diagnostic data. They are not the main KPI.
Track outcomes like:
- add-to-cart rate
- conversion rate
- revenue per session
- return rate
- time on PDP
- size chart opens
If a more editorial image set gets more attention but creates lower conversion or more returns, it is not a better image set.
Use a simple testing framework
| Test area | What you are actually learning |
|---|---|
| First image | How quickly the shopper understands the product |
| Fit imagery | Whether the silhouette and proportion are clear enough |
| Detail shots | Whether quality concerns are being resolved |
| Background and crop | Whether context is helping or distracting |
| Model choice | Whether relatability improves trust and purchase intent |
Keep tests controlled:
- Pick one category with enough traffic.
- Change one image variable at a time.
- Run long enough to capture actual purchase behavior.
- Apply the winning pattern to similar products.
- Document what changed and what moved.
This is where image optimization becomes repeatable merchandising instead of subjective debate.
For teams rolling changes out across a larger catalog, this guide to product photography automation workflows is a useful operational reference.
Scale the Workflow Without Lowering the Standard
Picjam fashion ecommerce solutions
Manual optimization works for a small catalog. It usually breaks once product volume, channel count, and launch frequency increase.
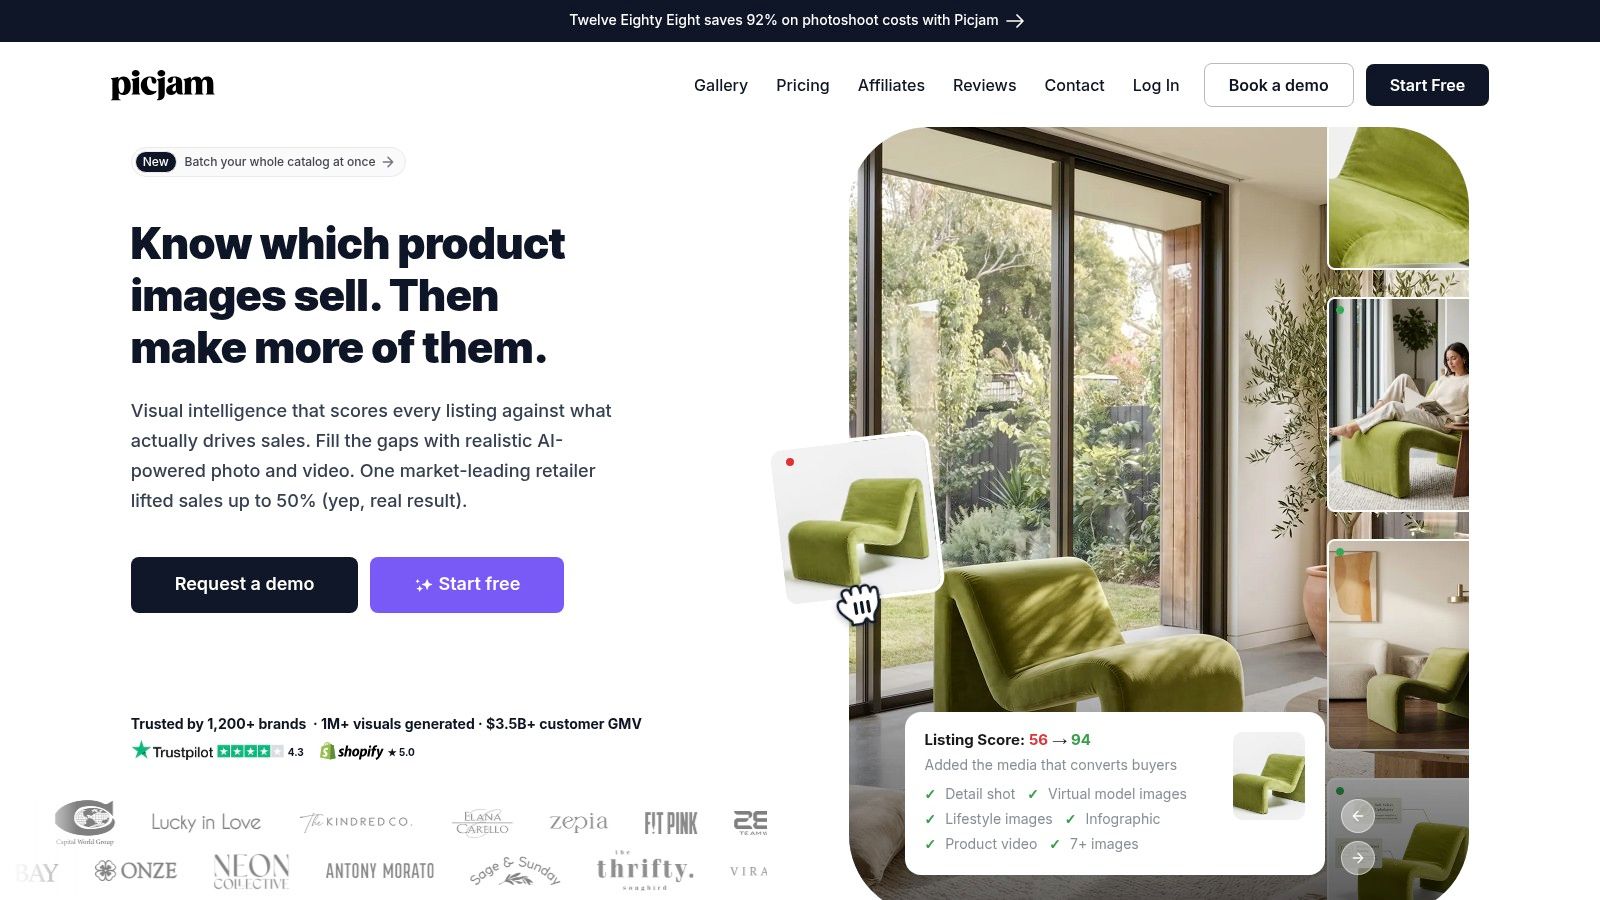
The challenge is not knowing what a good product image looks like. The challenge is producing and adapting it consistently across:
- product pages
- collection pages
- paid creative
- marketplaces
- seasonal launches
- international storefronts
What automation should actually handle
The best automation workflows remove repetitive production work without reducing control over the final presentation.
That usually includes:
- resizing by placement
- format conversion
- compression
- channel-specific variants
- cropping rules
- rollout of tested gallery patterns
The point is not to create more images for the sake of it. The point is to ship better-adapted images faster.
One option in that stack is Picjam, which helps fashion teams create and adapt product visuals and videos from existing assets while preserving garment detail.
A practical scaled workflow
A workable system usually looks like this:
- ingest the base asset
- generate placement-specific variants
- compress and convert for web delivery
- publish according to merchandising rules
- retest underperforming PDPs with fresh creative
That process matters because the brands that move fastest are rarely the ones with the biggest production budget. They are the ones with the cleanest content operations.
A short demo makes that workflow more concrete:
Key Takeaways for Apparel Operators
If you want image optimization to improve ecommerce performance, keep the priorities practical.
scale content creation framework
- Choose formats and compression levels by placement.
- Serve responsive image sizes instead of forcing one large file to every device.
- Build galleries that answer buying questions, not just brand presentation goals.
- Label images clearly for search and shopping context.
- Test image structure against conversion and return outcomes.
- Scale the workflow so good image decisions can be repeated quickly.
The core idea is simple. In apparel ecommerce, the best image is not the largest file or the most art-directed frame. It is the image that loads quickly, represents the product accurately, and helps the shopper decide.
That is what good ecommerce image optimization actually does.
If you want to see how much budget your brand could save by replacing parts of your current production workflow, compare your setup with Picjam and run the savings calculator.

Picjam team
The Picjam team blends AI, product, and creative expertise to eliminate the cost and delay of traditional photography for modern eCommerce brands.